Is a small but powerful data recovery software, which restores deleted or lost files fast on your computer with Windows OS.
Downloads: 380
BitGenius is the powerful data recovery software for Windows users to recover deleted, lost, or formatted data in minutes. It can help users to recover all types of files, including images, videos, audios, emails, archives and so on. Besides, BitGenius can help you recover data from external hard drive, USB flash drive, SSD and etc.
Leare More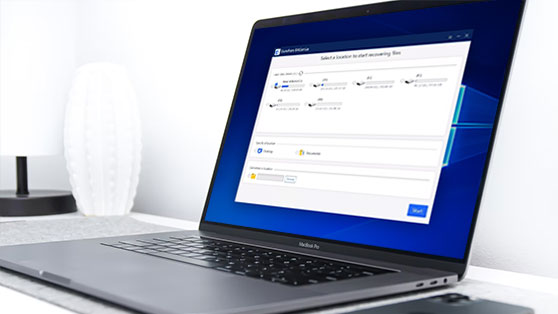


| Name | Version | Modified | Size |
|---|---|---|---|
| BitGenius | 3.0.0 | Jan. 07, 2020 | 7.7MB |
4.3
BitGenius is a useful utility that only takes up very little memory and storage space. You can get a Quick Guide here in 3 parts.
Note: Please do not access or use the partition where you want to recover files or the data recovery process will be tougher as this may overwrite the data in it.
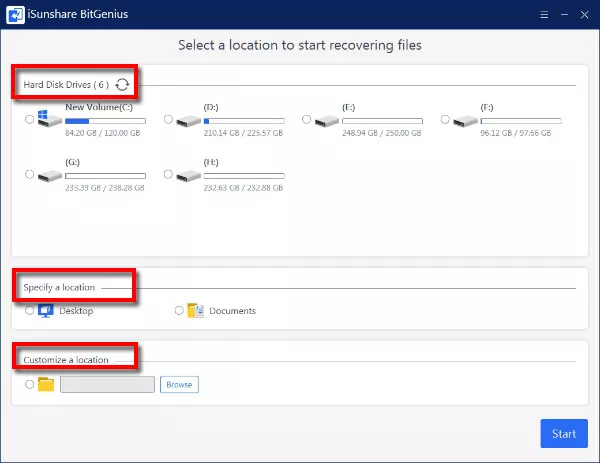
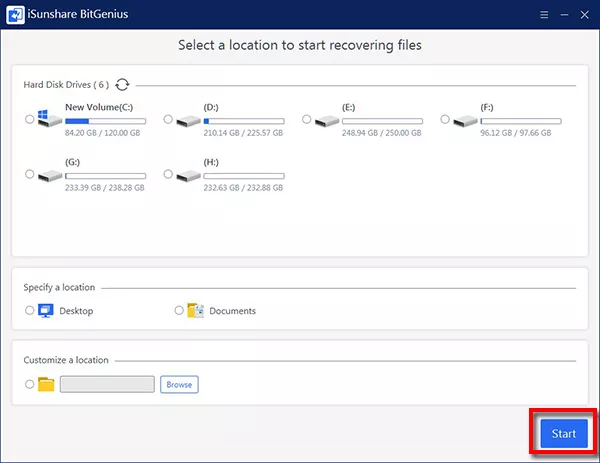
Step 1: Select a location where you want to recover deleted data.
On the main screen, you can see three sections followed by several locations you can choose: Hard Disk Drives, Specify a location, and Customize a location.
Step 2: Start with a single click and the scanning process will begin.
Step 1: Scan files in Quick Scanning mode first.
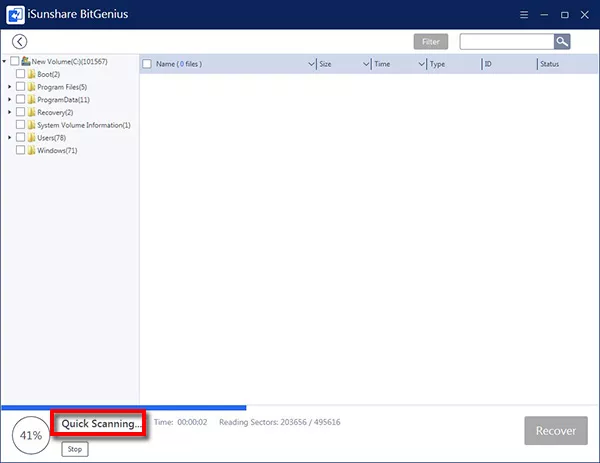
Step 2: Deep Scanning follows.

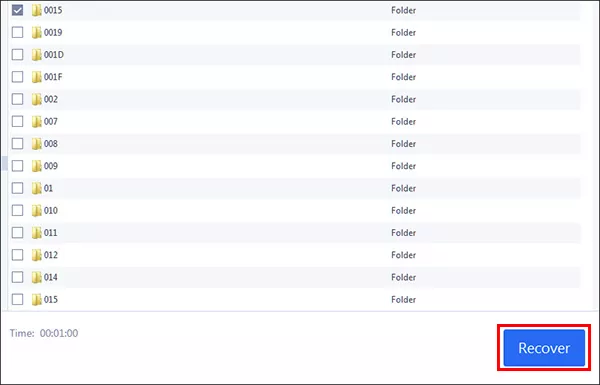
Step 3: A folders list is shown on the left.
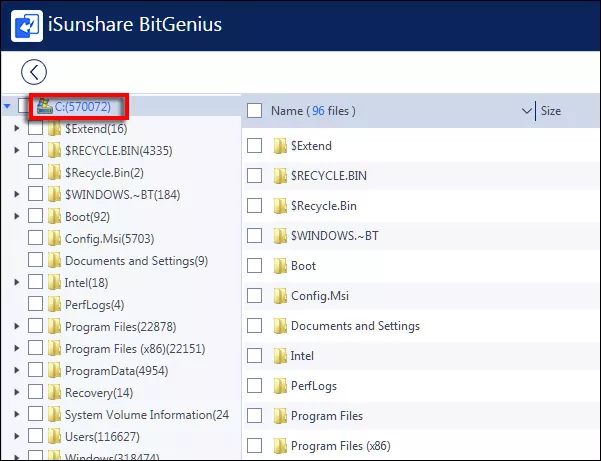
After the Scanning is finished, you can see a full folders list on the left.
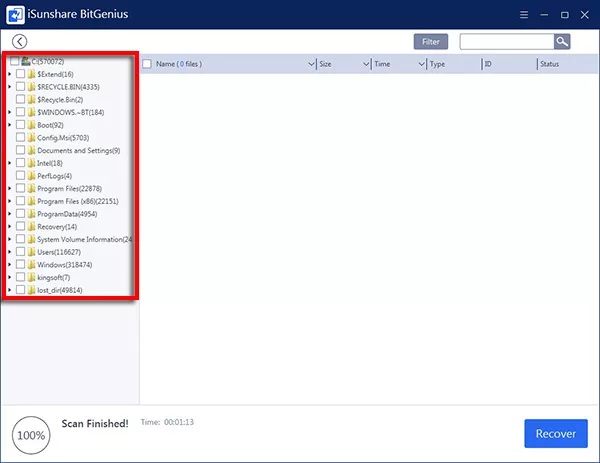
Step 1: Select the folder on the left.
If your files are moved to the Recycle Bin just with the Delete key, click the folder named $RECYCLE.BIN.

If your files are permanently deleted with Shift + Delete keys or by formatting, click the folder where your deleted files were once located.
If the previously deleted files were in the root directory, please click the first one of the folders list on the left and the deleted files will be shown on the right.
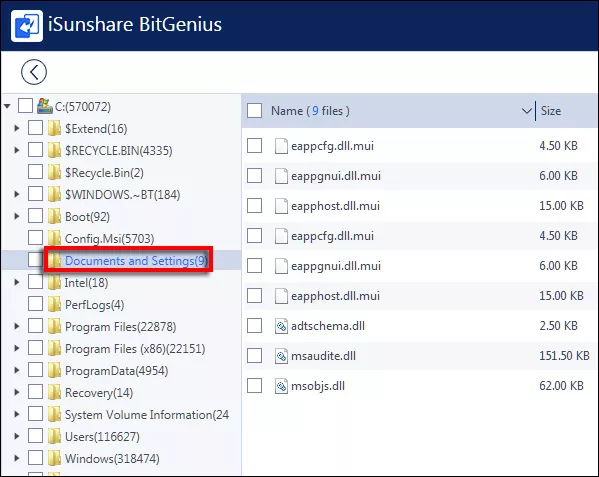
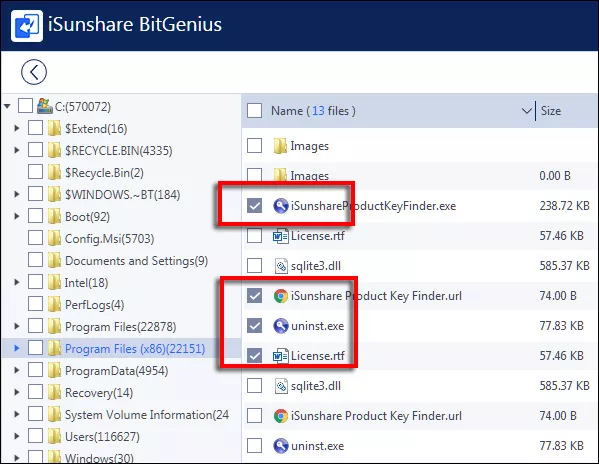
Step 2: Select the folders or files on the right.
After you click the folder on the left, you can find and select the folders or files you want to recover on the right.
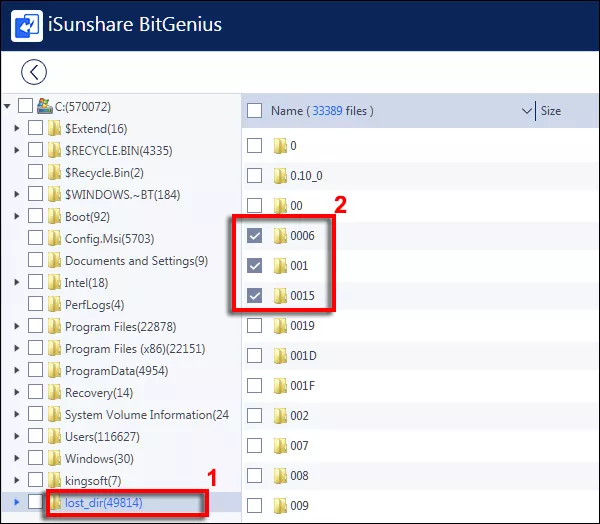
If the deleted files are not in the folder where they were located, please go find the folder named lost_dir on the left.
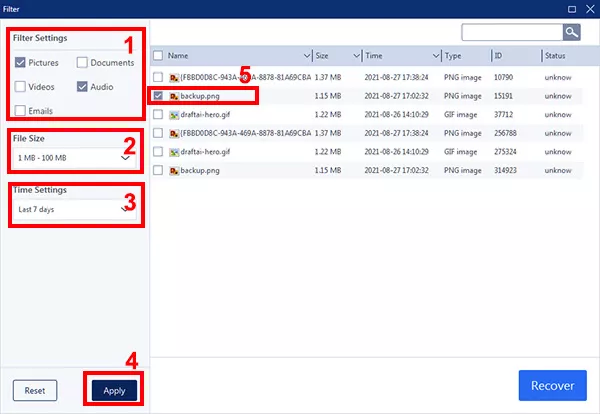
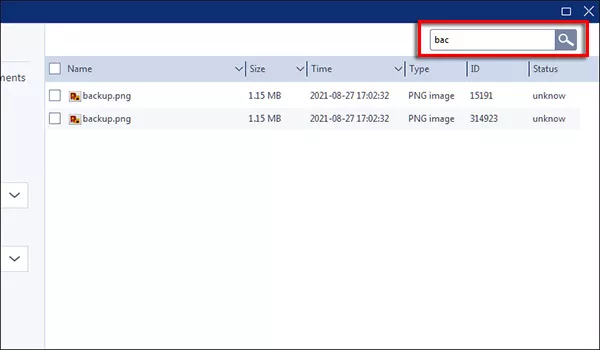
1. You can also use the Filter on the top.

When the files type, files size, as well as time are set and then applied, the filtered result will be displayed on the right. You can click the files you want to restore.
2. After selecting a folder on the left or filtering, you can search for the deleted files by their names in the search box on the top.
Step 3: Click the Recover button.
Step 4: Select a folder to store the recovery files.
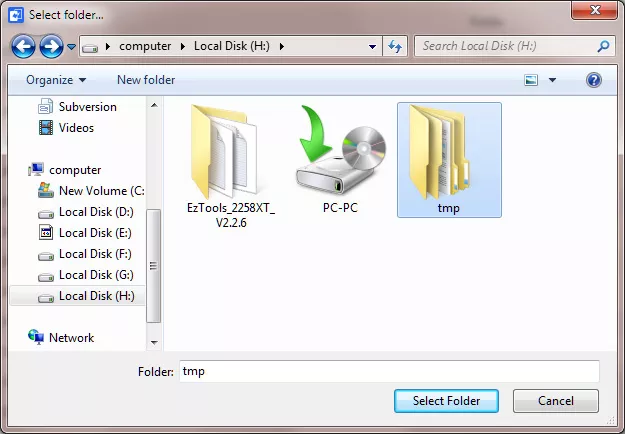
Note: Please don't store your files in the place where they were lost.
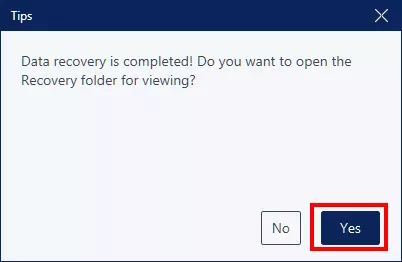
Step 5: If you want to open the Recovery folder for viewing, click Yes on the pop-up.
When you click the left arrow to exit, a box will pop up that says "Do you want to save the current scanning process?".
If you Save it, you can go back to this scanning process next time, which can save your time and energy.
