5 Methods to Protect Files on USB with Password on Windows10
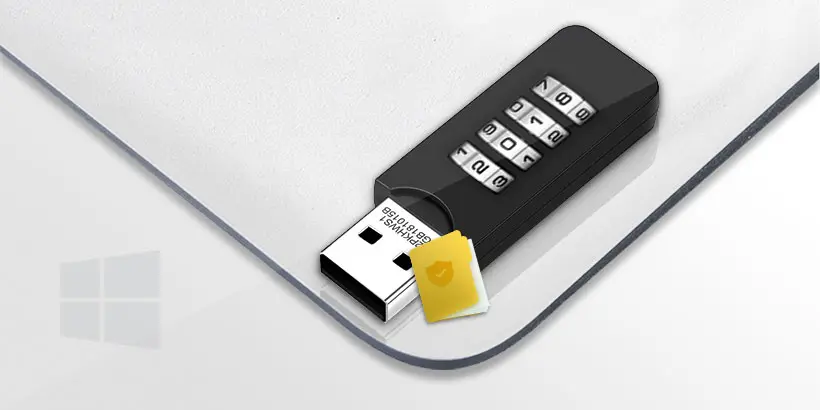
USB is well known due to its compatibility and portability. However, it's also been criticized for its easiness of getting stolen and infectious by malware. You might have seen a lot of actual cases that USB drive got stolen and the files were permanently gone. So, it's extremely critical to set password to protect files and folders in USB. In this article, we represent you 5 methods to protect files and folder in USB with password on Windows 10.
Tips: If you want to only encrypt photo, take this post as a reference: 3 Ways to Protect Photos on USB Drive
- Method 1: Set MSOffice password to files on USB drive
- Method 2: Take advantage of WinZip to protect files and folders
- Method 3: Web app to generate encrypted version of files on USB
- Method 4: Utilize BitLocker to launch protection to flash drive
- Method 5: Rohos Mini Drive to set an encrypted partition on USB drive
Method 1: Set MSOffice password to files on USB drive
If you're using MSOffice, for text files like word file and excel file, we can directly set password to them.
Step 1: Choose Encrypt with Password in Word 2016.
Click File, go to Info tab, select Encrypt with Password from the down list of Protect Document.
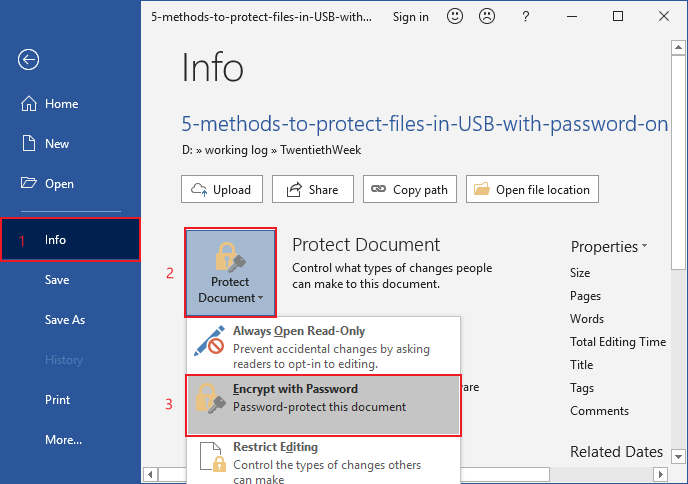
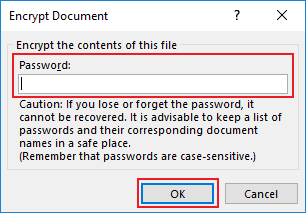
Step 2: Input Password in the Encrypt Document dialog.
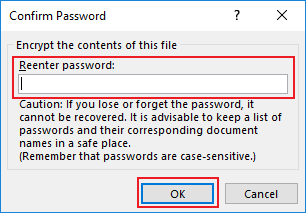
Reenter password to confirm.
Note: Don't leave this password behind. Microsoft couldn't help you get back the password if you lose it. But don't panic if you forget the password. Try some password recovery tools like Office Password Recovery.
Method 2: Take advantage of WinZip to protect files and folders
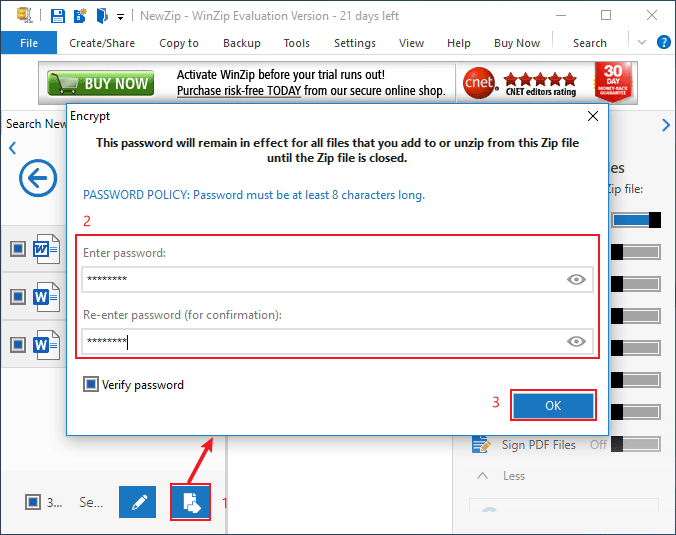
Select files on USB drive and add to zip. And then set password to the zip to protect files and folders in the zip with WinZip.
Step 1: Select files needing protection.
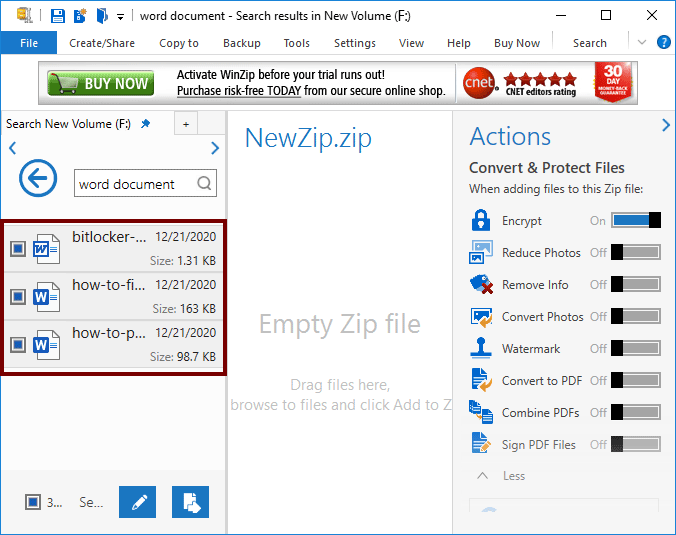
Step 2: Click Add to Zip and set password.
Method 3: Web app to generate encrypted version of files on USB
Upload files on the home page of the web encryption app - File Lock. Enter password to encrypt files. Keep the password in mind. Every time you want to read files, you'll need it for decryption.
Step 1: Upload the files needs encryption.
Click Choose Files to upload the files you want to protect from drives and devices. If there's need to multiple-select, hold SHIFT or CTRL to click on files.

Step 2: Set password for every file to encrypt.
Enter password for protection. If different files require different passwords, then enter password one by one into the box in the Password column. Otherwise, you can just enter password once for multiple files into last box and click All.
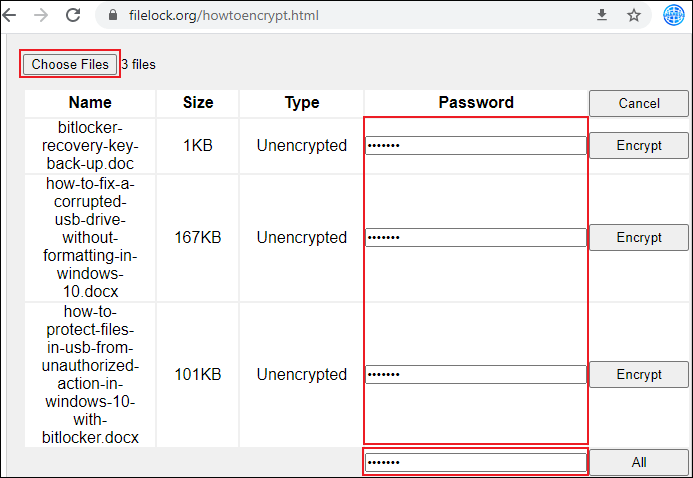
After encryption, it generates encrypted enc files. Save these files to local position.

Step 3: Delete the original files.
Don't forget to delete the original files, or the encryption is in vain.
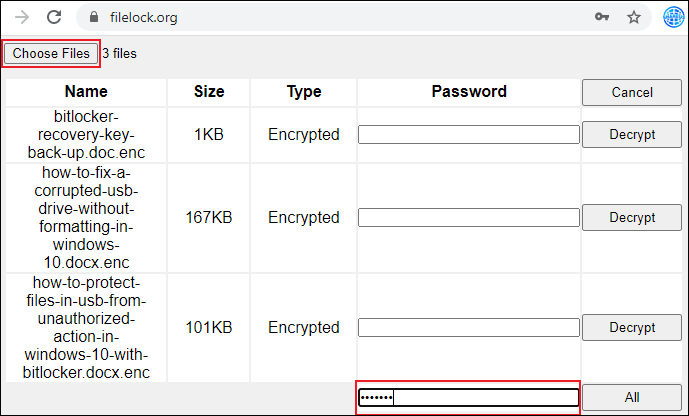
When you need to read these files, you need to go back to home page of File Lock. Choose files, enter passwords to decrypt them, finally, click "Decrypt". Since I set one password to these three files, I just need to enter password in the last box and click "All".

Method 4: Utilize BitLocker to launch protection to flash drive
BitLocker is used to encrypt the USB flash drive. After turning it on, everyone needs the specific password to open this drive to read files in it.
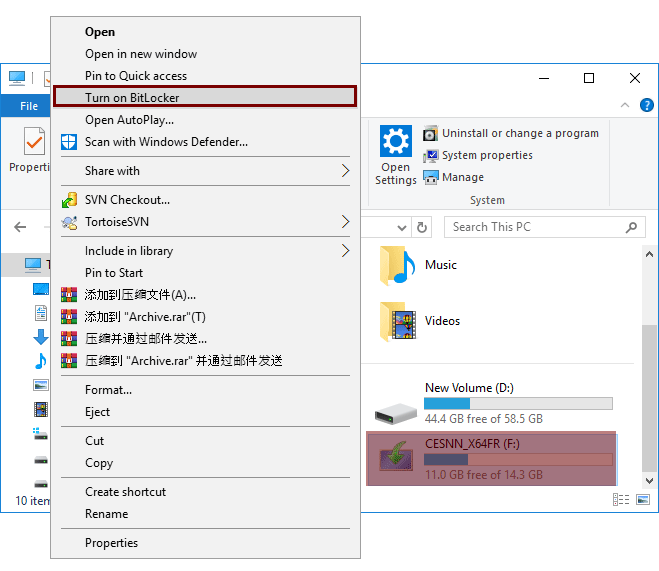
Step 1: Right-click the drive and select Turn on BitLocker.
Step 2: Ensure encryption options.
Now to decide how much of your drive to encrypt and which encryption mode to choose.
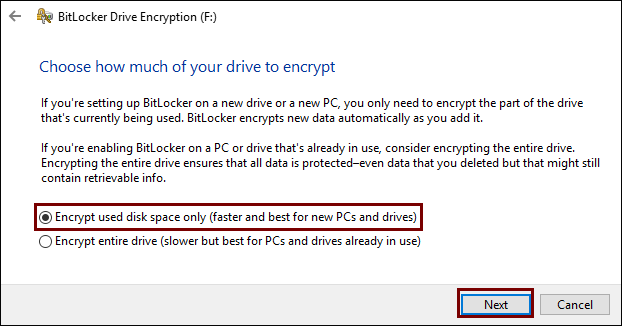
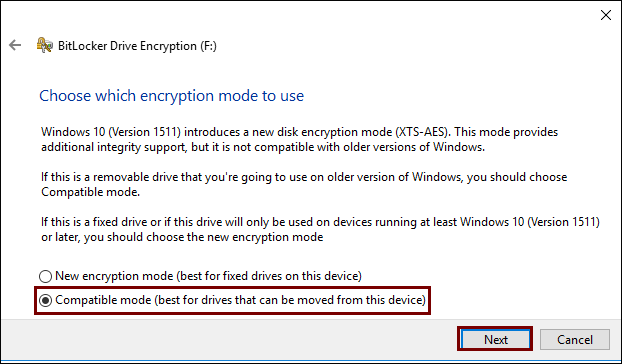
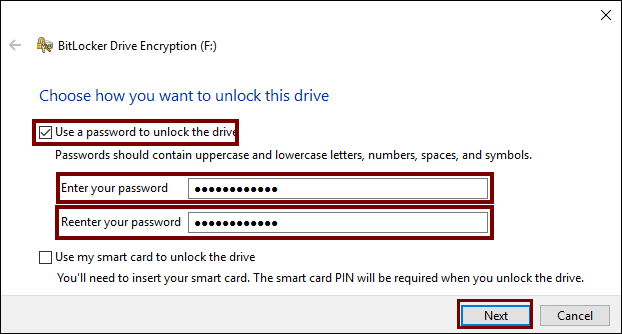
Step 3: Enter password for encryption.
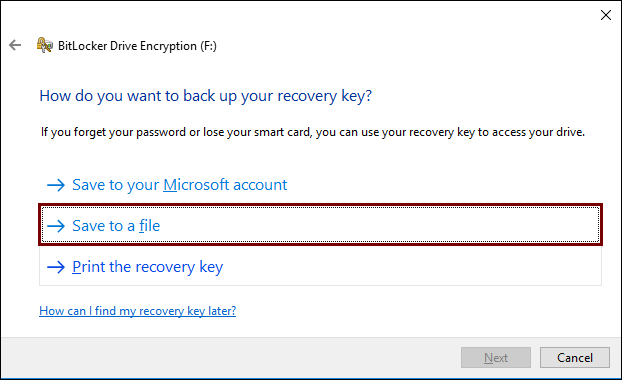
Step 4: Back up recovery key.
Unlike password for a specific account, there is no "forget password" for BitLocker Drive Encryption. So, don't forget to back up recovery key and restore it carefully.
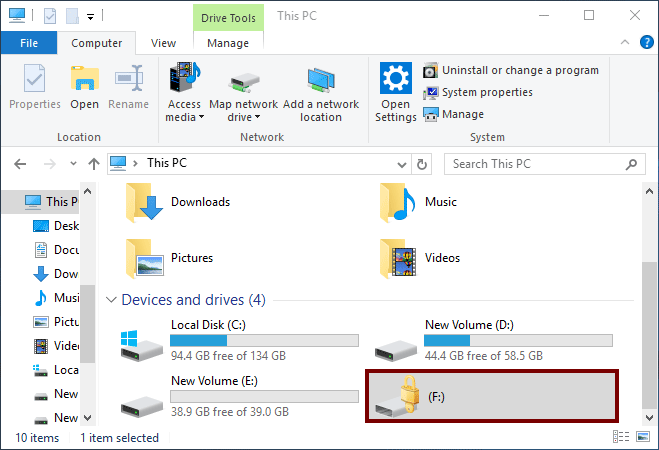
When USB drive is successfully encrypted, it shows with a big golden lock on it to indicate that it's locked.
Note: If you unfortunately lost the recovery key file, but luckily happens to be a MacOS user, try BitLocker Genius for Mac.
Method 5: Rohos Mini Drive to set an encrypted partition on USB drive
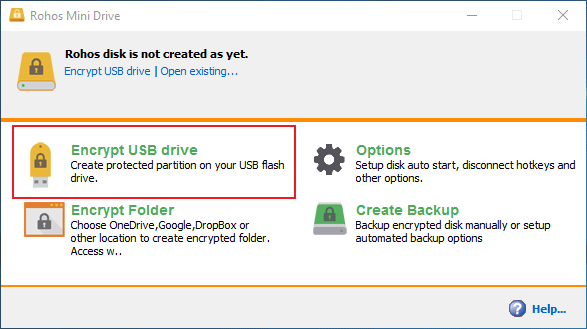
Rohos Mini Drive is a disk encryption software. It creates an encrypted partition of USB drive.
Step 1: Choose Encrypt USB drive.
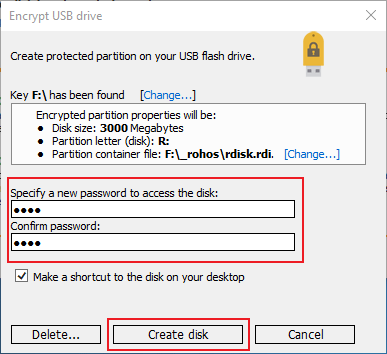
Step 2: Set password to the partition.
To encrypt the partition, input your password once to specify and twice to confirm. And then, select Create disk.
Bottom Line
Above are 5 safe and easy way to protect files and folders with password on USB flash drive:
Method 1: Set MSOffice password to files on USB drive
Method 2: Take advantage of WinZip to protect files and folders
Method 3: Web app to generate encrypted version of files on USB
Method 4: Utilize BitLocker to launch protection to flash drive
Method 5: Rohos Mini Drive to set an encrypted partition on USB drive
If you forget the password of MSOffice file, try Office Password Genius;
If you lose password for BitLocker and are a MacOS user, utilize BitLocker Genius for Mac.


