USB Flash Drive Keeps Disconnecting in Windows10? Solved!

December 31, 2020
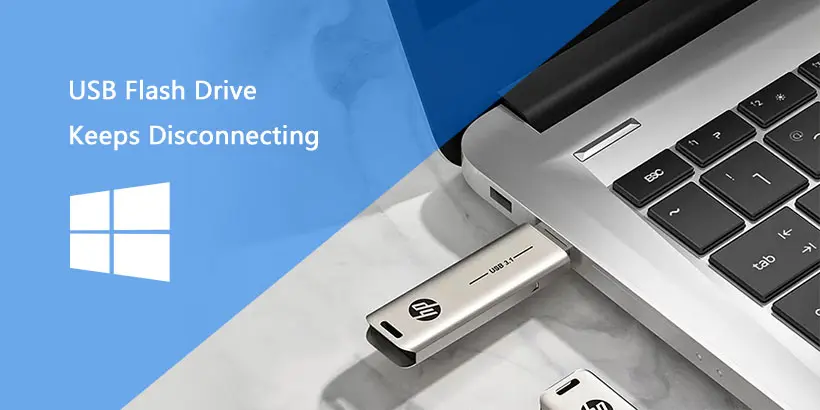
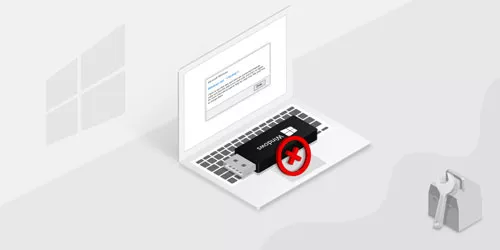
It's annoying that a USB flash drive keeps disconnecting to Windows 10 pc which blocks reading and writing files on the drive process. Users are so desperate to get over this problem that we feel like necessary to give a favor via this article.
Why does USB drive keeps disconnecting in Windows10?
Reason 1. Something wrong with USB port.
The USB port in which the USB flash drive is plugged might be corrupted or malfunctioning.
Reason 2. Failed USB or other drivers.
This happens when the computer or PC system is infected by some horrible viruses and lead the USB or other drivers to corruption.
Reason 3. Insufficient power supply.
Without enough power, the USB flash drive may be powered off to save energy.
Reason 4. USB flash drive errors.
Maybe some partitions or files of the drive have errors. Maybe the drive is attacked by some viruses.
Reason 5. Computer file system issues.
It's possible that the computer is facing some file system issues, for instance, some critical system files are corrupt.
What to do when confronting USB flash drive connecting problem?
Solution 1. Switch to another USB port.
If the problem is caused by corrupted USB port, unplug the drive and reconnect it to another USB port or directly to other computers.
Solution 2. Reinstall the USB drivers.
Uninstall USB device driver first.
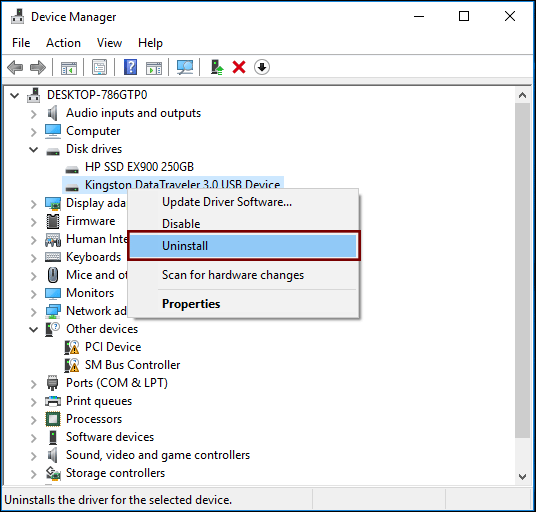
After uninstallation completes, disconnect the drive and reconnect it after a few seconds.
Solution 3. Change power saving strategies.
We have two ways to prevent USB flash drive from being turned off by computer for power saving.
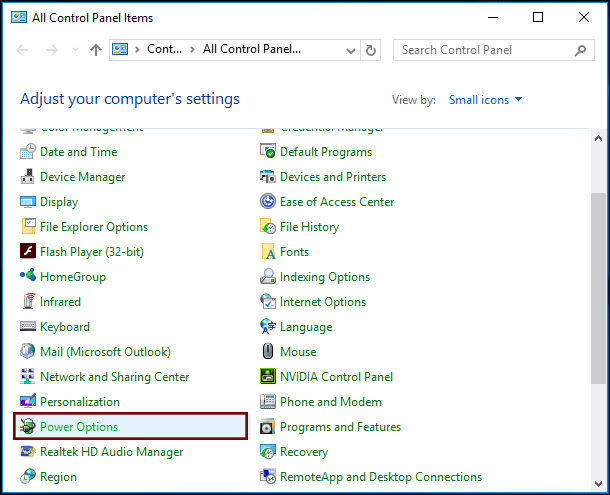
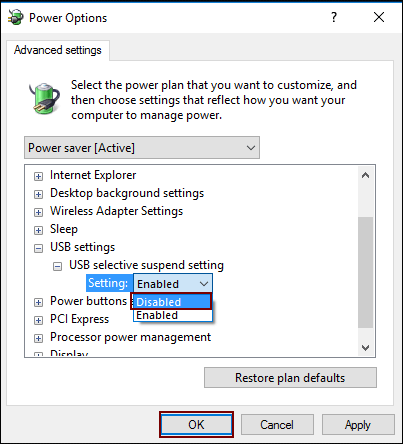
1. Disable USB selective suspend.
Step 1: Select "Power Options" in Control Panel.
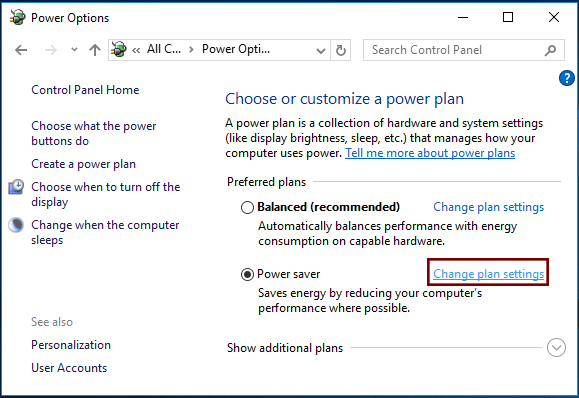
Step 2: Click "Change plan settings".
Step 3: Click "Change advanced power settings".
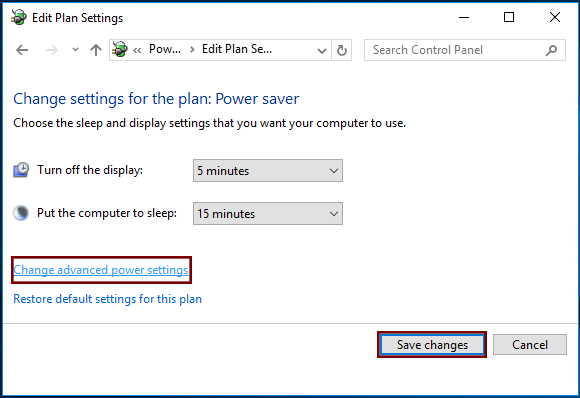
Step 4: Find "USB setting" and Disable USB selective suspend setting.
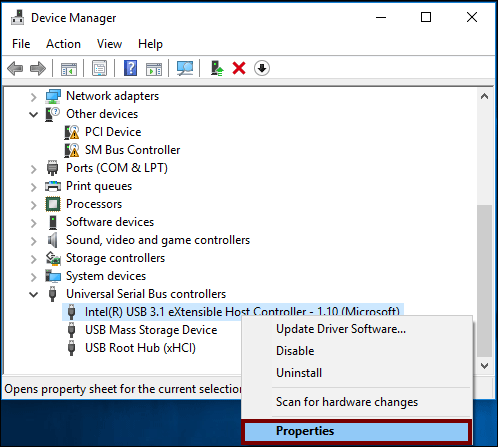
2. Turn off the Power Saving Option.
Take my own USB flash drive as example and steps are shown below.
Step 1: Select Device Manager in Control Panel.

Step 2: Right-click Intel(R) USB 3.1 eXtensible Host Controller - 1.10 (Microsoft) and choose Properties in the list.
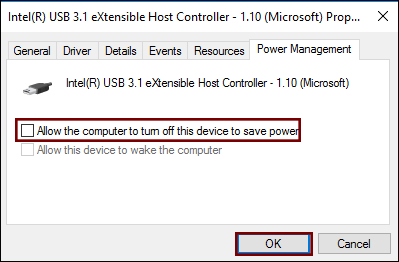
Step 3: Go to Power Management tab, uncheck "Allow the computer to turn off this device to save power". And click OK to save the setting.
Solution 4. Take advantage of the inbuilt tools on Windows10.
In fact, Windows10 has its own tools to find out the problems and fix them.
1. CHKDSK console.
Press Win + R simultaneously. Input "cmd" in the box and launch it as admin.
Input "chkdsk f: /F /R" in the Command Prompt and press Enter.
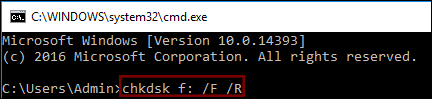
"f:" is the drive letter. Remember to replace it with the letter of your drive on computer.
"chkdsk f: /F" can fix disk f: errors.
"chkdsk f: /R" not only fits errors of f: but also checks for bad partitions on the disk and try to recover the readable information from the bad partitions.
After repairing, reconnect the USB flash drive.
2. System File Checker.
Launch "cmd" as admin. Input "sfc /SCANNOW" in the Command Prompt and press Enter.
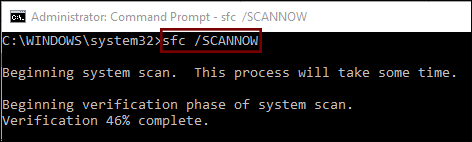
After scan finishes, restart your PC and retry again.
3. Hardware and Devices Troubleshooter.
Step 1: Type "Troubleshooting" into the Search bar on the desktop and then press Enter. From the search result, choose Troubleshooting.
Step 2: Choose Configure a device under Hardware and Sound from the Troubleshoot computer problems interface.

Step 3: Apply repairs automatically.
From the outset, this interface may represent "Advanced" in the spot of "Apply repairs automatically" in the picture below. Click "Advanced" and you will see the it.
Click Next, and Troubleshooter will begin to scan and fix the problems.
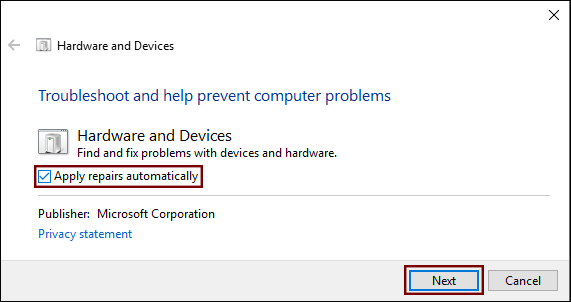
Step 4: Select Apply this fix to solve the problem Troubleshooter found.