How to Extract Data from Corrupt Excel File

January 14, 2021

It's unexpecting that Excel files are corrupted when we need to use them. When encountering this problem, you are very likely to wonder how to extract data from corrupt Excel files. Read this post to find out solutions to extract data from corrupt Excel files effectively.
When you find an Excel file is damaged, the first thing is to copy and move the original file to another disk. And then to make sure whether the file is broken according to the following steps.
a. Close other programs that are running and open the documents you need to use.
b. Restart the Office application and the computer.
c. Check for viruses and malware.
If you complete the above steps, but the file is still corrupted, move to the methods below.
Solution 1: Use Open and Repair function
When opening a corrupted Excel file, Excel can automatically fix the document by File Recovery mode. If not, try Microsoft Excel's built-in "Open and Repair" feature to repair the file.
Steps:
a. Open Microsoft Excel, click File > Open, and then choose the file location of the corrupted file in this PC.
b. In the pop-up window named "Open", click the broken file once.
c. Then click on the drop-down icon on the "Open" button and choose Open and Repair.
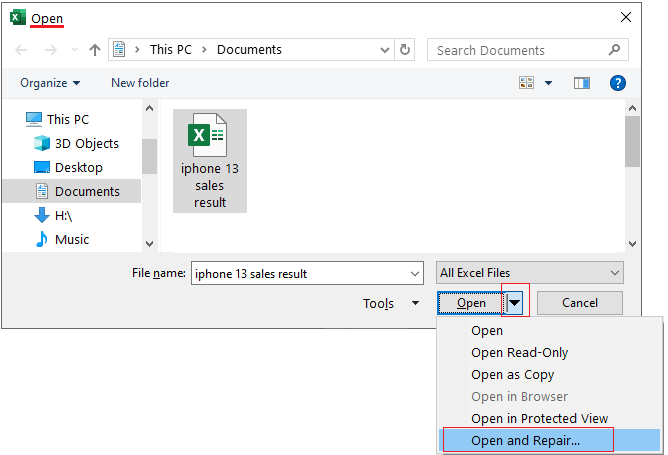
d. Select "Repair" in the prompt box that pops up. If the repair doesn't work, choose "Extract Data".

If the problem is not resolved yet, move to the next one.
Solution 2: Set calculation options from automatic to manual
Microsoft Excel recalculates the workbook automatically each time a value affecting a formula changes by default. But when facing a corrupted file, you can change the calculation setting from Automatic to Manual. When the workbook isn't recalculated, it may open.
Steps:
a. Open Microsoft Excel, and then create a new blank workbook.
b. In the new workbook, click on the "File" tab and choose "Options".
c. In the "Word Options" window, click the "Formulas" option.
d. Under the Calculation Options, choose "Manual".

e. Choose "OK" to confirm. Then open the corrupted file in this new blank workbook.
Still can't recover the corrupted workbook using this method? Follow the next method.
Solution 3: Make use of Previous Versions
Another tip that helps you to extract data from corrupt Excel files is Previous Versions. Although you would lose some data, you can still find some of the data and even formats. Computers with Windows 7 and higher will enable System Restore feature by default. If you don't turn it off, you can see your previous file by following steps: right-click the damaged file, choose Properties, and hit the Previous Versions tab.

If there are no files available, you can reopen the System Restore by these steps.
a. In the search box on the taskbar, type "Control Panel" and open it.
b. Search for "Recovery" in the input box on the right and click "Recovery".
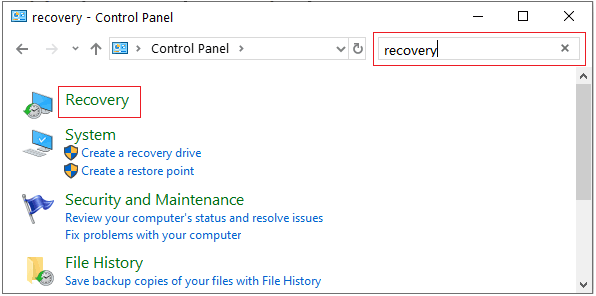
c. In the Recovery window, click "Open System Restore" and then choose "Next" to open it.
If you don't find any file in Previous Versions, proceed to the next one.
Solution 4: Restore documents from AutoRecover file location
Temporary Excel files can be saved by Microsoft Office by default. AutoRecover is a useful function to extract Excel data if you forget to save the file. You can check and change the settings of these functions by following these steps.
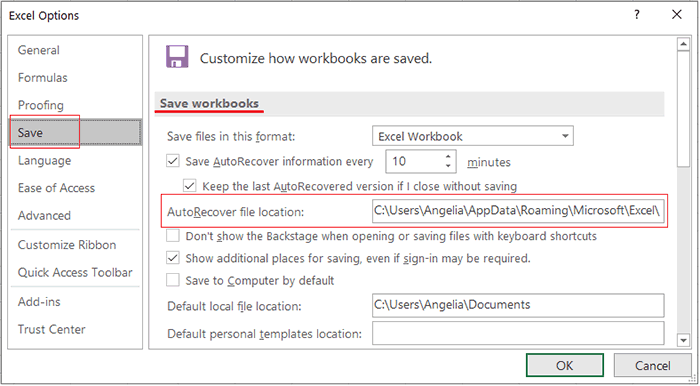
a. Open Microsoft Excel, click on the "File" tab and choose "Options". Then click on "Save" in the left navigation pane.
b. Under the Save workbooks, you can see the settings. The default time to save the file is 10 minutes. It's not recommended to set the time below 10 minutes. Besides, you can see and copy the location of the temp files.
After ensuring that the Auto Recovery feature is enabled, you can see the temporary files in your computer.
Steps:
a. Copy the AutoRecover file location under the "Save workbooks". Or copy the path below, and modify the username.
C:\Users\USERNAME\AppData\Roaming\Microsoft\Excel\b. In the search box on the taskbar, type "This PC", and open it.
c. In the display box on This PC, paste the AutoRecover file location you just copied. Then press "Enter".
d. Here you can see all the temporary files saved on the computer.

e. Copy the file you want and save it to another safe place by changing the extension from .TMP to .XLS/.XLSX.
If the above methods don't work for you, then you should consider using a trustworthy Excel recovery tool recommended here.
Solution 5: Use Excel Repair Genius to repair files effortlessly
Using a reliable third-party recovery tool is an effortless and guaranteed solution. Besides, it is almost the easiest way to repair corrupted, damaged Excel files. Excel Repair Genius is the kind of software that can fix XLSX file corruptions and remove Excel error messages within 3 easy steps.
Why choose Excel repair genius?
● You can repair broken .xlsx files without affecting the original content and format.
● The software works efficiently with large Excel files.
● Support MS Excel 2019/2016/2013/2010/2007.
● Compatible with Windows 2000/2003/2008/2012/2016/XP/Vista and Windows 10/8/8.1/7(32 bit & 64 bit).
Steps to utilize Excel Repair Genius:
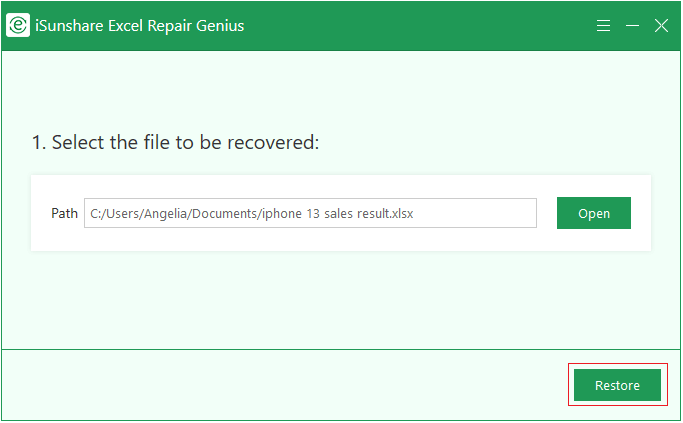
a. Click the Open button to choose the corrupted file you want to repair.
b. Click on the Restore option. Then the file will be recovered automatically.
c. After completing the repair, hit the Save button to select a location for the file.
d. A window will pop up to inform you that the file has been saved successfully. Click "Yes" to see the restored file.

There's nothing frustrated than losing important Excel data. That's why we're here to help you extract Excel data. Instead of giving up on broken Excel workbooks, try repairing them with the above manual methods we've mentioned. If they don't fix the issue, keep calm and use Excel Repair Genius.
Download: Excel Repair Genius