6 Fixes | File Explorer Search Not Working in Windows 11/10

May 16, 2022
The search box of file explorer is a practical tool. When you want to find the specific files quickly or when you forget the specific location of the files accidentally, you just need to input the keyword and press Enter, then the file explorer search box will retrieve the items that match the keyword.
If the file explorer search doesn't work on your computer, it is advisable for you to read this post. Here, we list six ways to solve the file explorer's search utility not working issue. You can just try only one or two of them until you fix your issue.
Of course, if you are unwilling for your search items to be seen by others after the search box return to normal usage, it is easy. Read how to clear file explorer search history in Windows 11 to remove your search history easily.
1. Restart file explorer
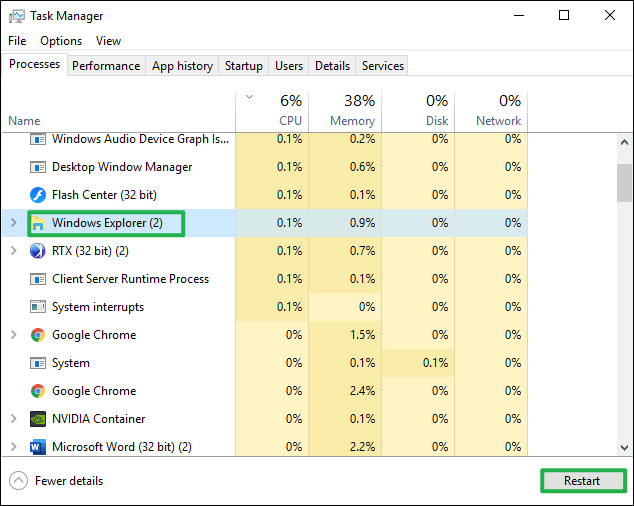
Step 1: Right-click any blank space in the taskbar of the desktop, and click Task Manager.
Step 2: Find and click Windows Explorer process, and click Restart.
2. Make sure Windows search service is enabled
Step 1: Press Windows + R to open Run dialog, type services.msc and click OK.
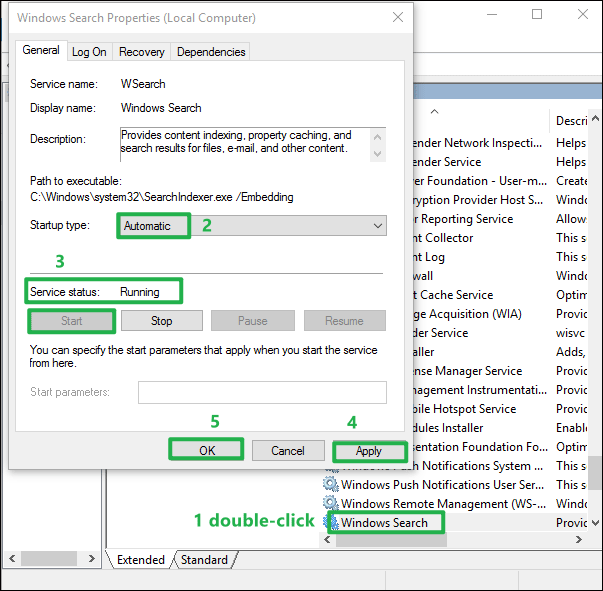
Step 2: Double-click the Windows Search service to open its Properties.
Step 3: From the drop-down menu of the Startup type, click Automatic.
Step 4: The service status should be started, if not, click Start.
Step 5: Click Apply and OK.
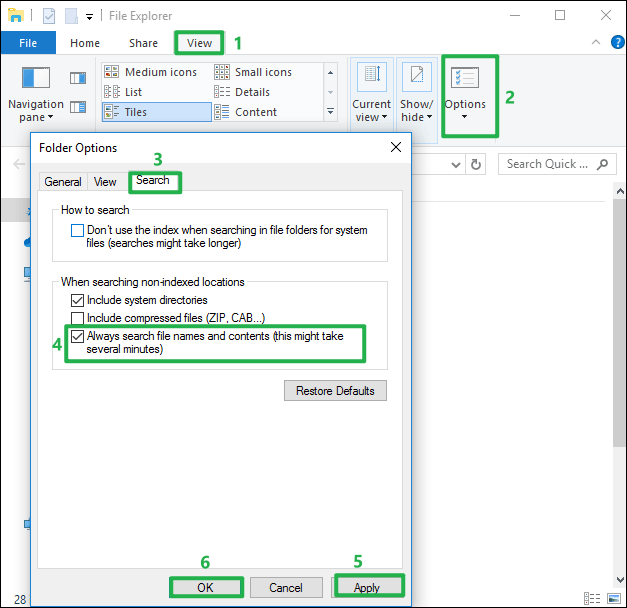
3. Change the search options
Step 1: Press Windows + E to open your File Explorer.
Step 2: Click View tab in the upper tool bar.
Step 3: Click Options to open folder options.
Step 4: hit Search tab, and check Always search file names and contents option.
Note: You can also check Include compresses files if you need.
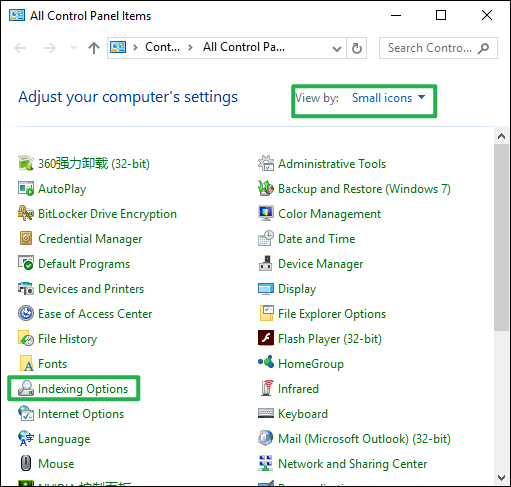
4. Rebuild search box
Step 1: Right-click the Start menu and click Control Panel.
Step 2: Choose to view by Small icons.
Step 3: Find and click Indexing Options.
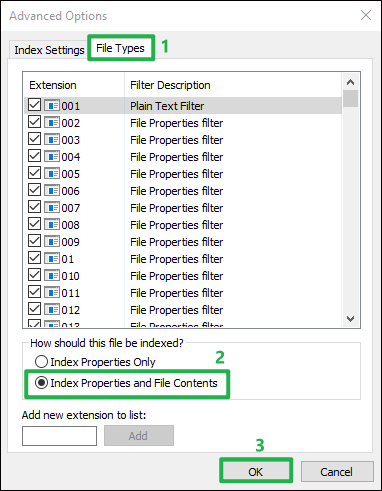
Step 4: In the pop-up window, click Advanced button.
Step 5: In the File Types tab, click Index Properties and File Contents, and click OK.
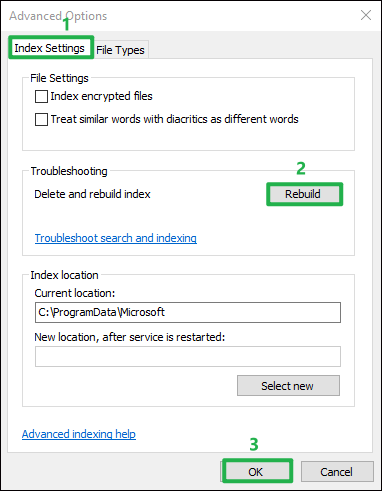
Step 6: In the Index Settings, click Rebuild in Troubleshooting section, and click OK.
5. Add system permission to a file/folder
Step 1: Right-click the problematic file or folder and choose Properties.
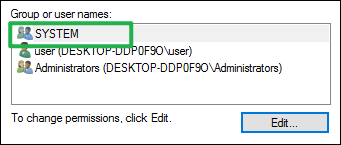
Step 2: Go to security tab, there should be SYSTEM in the box of Group or user names. If so, go to the next fix. If not, click Edit.
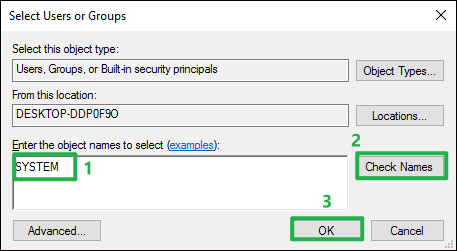
Step 3: Click Add. Then type SYSTEM in the box of Enter the object names to select (examples) and click Check Names and OK.
6. Modify file explorer options
Step 1: Press Windows + R to launch run dialog, type control.exe folders and hit Enter.
Step 2: Go to View tab.
Step 3: Check the option Launch folder windows in a separate process.
Step 4: Click Apply and OK.