Ways to Fix Windows 10 Start Menu Not Working

May 19, 2023

The Windows start menu provides access to the various functions and applications installed on your computer. You can access it by clicking on the Windows icon located in the bottom left corner of the screen or by pressing the Windows key on your keyboard. Many users have reported that the Windows 10 start menu not working. This article will show you some solution to fix Window 10 start menu not working.
Part 1: Why the Windows 10 Start Menu Not Working
The current Windows 10 start menu is more functional than previous versions. However, the disadvantage of the upgrade is that they offer more opportunities for errors.
Some of the most common causes include:
1. Corrupted system files or outdated drivers: If the system files or drivers responsible for the start menu are corrupted, this can cause the Windows start menu not working.
2. Windows update: Sometimes Windows not being updated to the latest version can cause the Windows start menu not working. An unspecified Windows update error can also cause the start menu to freeze.
3. User account problems: A specific Windows account causes the start menu to crash, or a corrupt configuration file can also cause the start menu not working.
4. Malware or virus infection: If you have a malware or virus infection in Windows, it may cause problems with the start menu.
Part 2: How to Fix the Windows 10 Start Menu Not Working
Here are some ways you can take to fix the Windows 10 start menu not working issue:
Way 1: Restart Windows Explorer
To restart Windows Explorer, follow these steps:
Press Ctrl + Shift + Esc to open the Task Manager. Click on the " Processes " tab. Find and right-click " Windows Explorer " in the list of processes. Then select " Restart ".
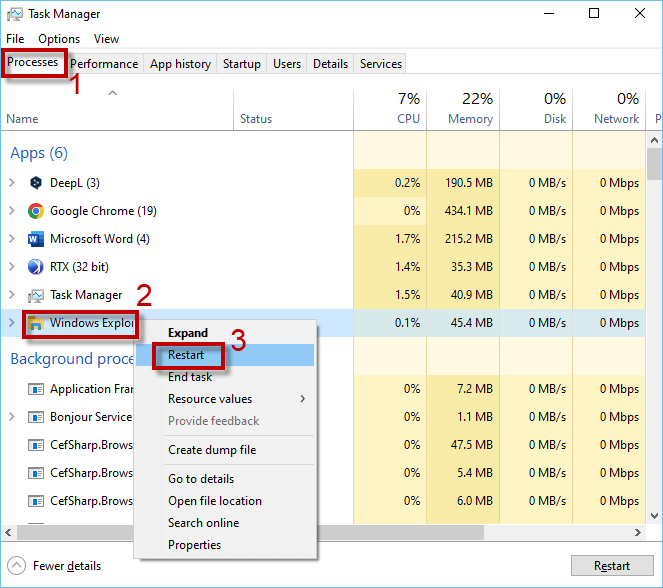
Wait a few seconds for Windows Explorer to restart. Check whether the Windows start menu is working properly, if not, try the next method.
Way 2: Check for updates
Make sure your Windows 10 is updated to the latest version. To check for updates, follow these steps:
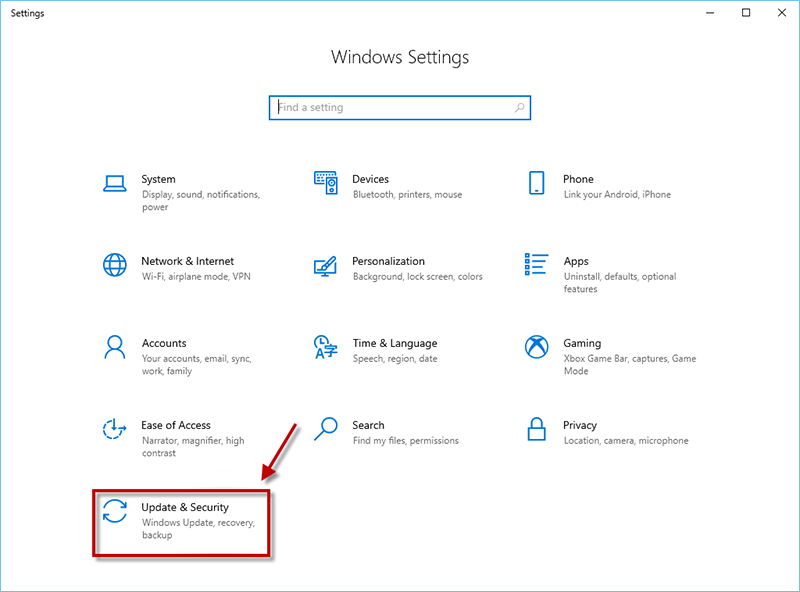
Step 1: Go to Settings and click on Update & Security.
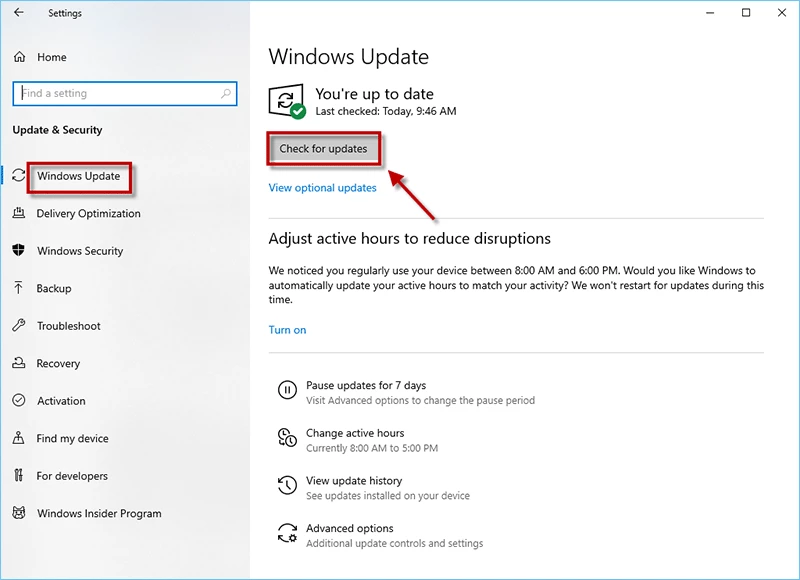
Step 2: On the Windows Update page, click on Check for updates. If there are any updates available, click on Download and Install.
Once the updates are installed, restart your computer and check if the start menu is working properly. If not, try the other methods mentioned in this article.
Way 3: Sign out of your account
When you sign out of your account, many things are cleared and refreshed. So, a great quick fix for Windows 10 start menu issues is simply logging out and back in.
Step 1: There are three methods to do the sign-out option.
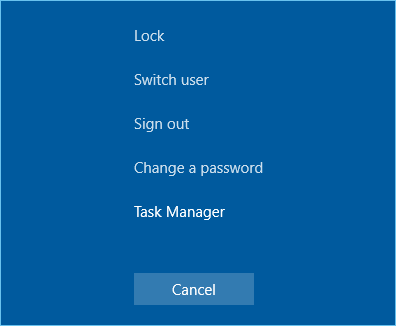
Method 1: Press Ctrl + Alt + Delete keys at the same time then click the "Sign out" option.
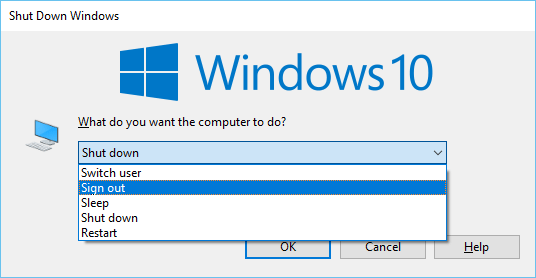
Method 2: Click on your Desktop (not on any app) and press the keyboard shortcut Alt+F4. Then click Sign out.
Method 3: Alternatively, you can press the Windows key + L to quickly lock your computer and sign out of your account.
Step 2: Then, you will be on the login screen again. Sign back into your account. Check if the start menu works properly.
Conclusion
The Windows 10 start menu not working can be very annoying because you can't access the apps and settings there. There are multiple ways to fix this problem. For example, you can restart Windows Explorer, sign out your account, or update Windows 10 to the latest version. Hopefully, one of the methods in this article can help you successfully solve the problem of Windows 10 start menu not working.