How to Bypass Microsoft Account & Network Connection in Windows 11 22H2 Setup?

November 2, 2023
If you activate the system with a Microsoft account on a new laptop, there is no return or exchange after activation. Also, if you log in to your Microsoft account at the first startup, the user folder is forcibly set to the first five digits of the email address. These two issues may drive you crazy. So, how to bypass Microsoft account and network connection in Windows 11 22H2 setup? Here are the methods!
Method 1: Log in with a Nonexistent Account
There is an easy trick to bypass the Microsoft account login and network connection using a fake account.
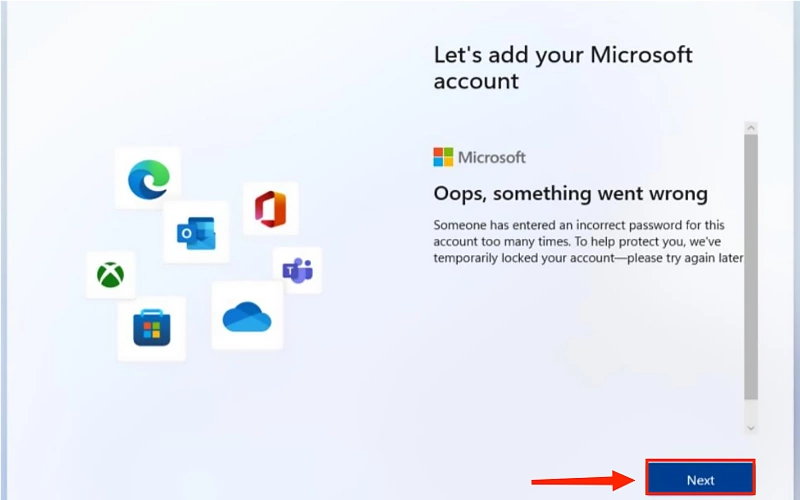
Step 1: When the setup process shows the “Unlock your Microsoft experience” window, click Sign in > Type “a@a.com” in the sign-in box, then click Next.


Step 2: You will receive a wrong message about “Oops, something went wrong”, click next.
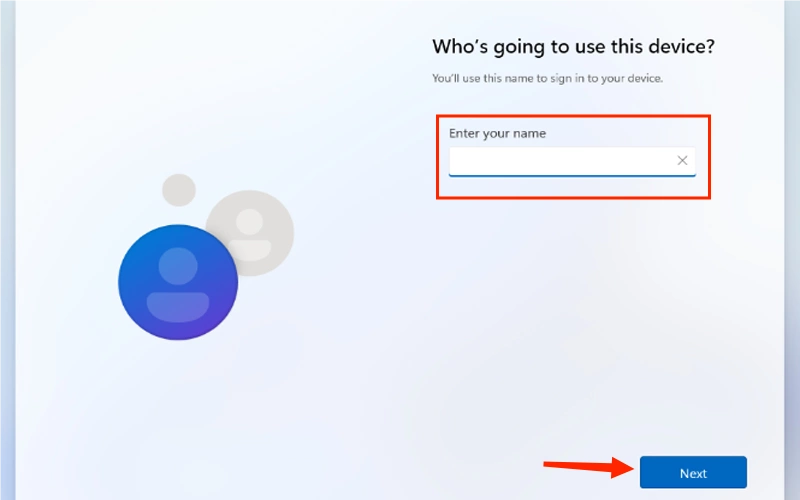
Step 3: Enter the local default account > click Next.
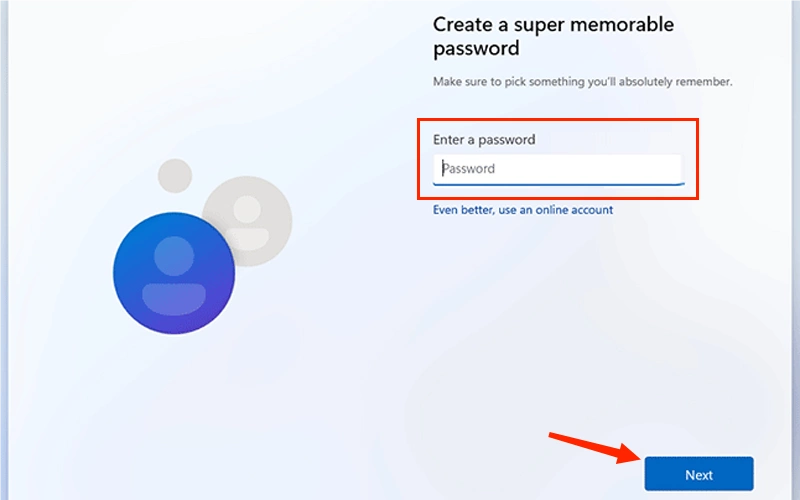
Step 4: Type in an easy password you can remember > click Next.
Step 5: Confirm your account password > Add three security questions to recover your local account > Choose the privacy settings for your device. Then you can skip the networking Microsoft account and easily create a local account.
Method 2: Perform the “OOBE\BypassNRO” Command
Note: Before trying this method, make sure your computer is offline.
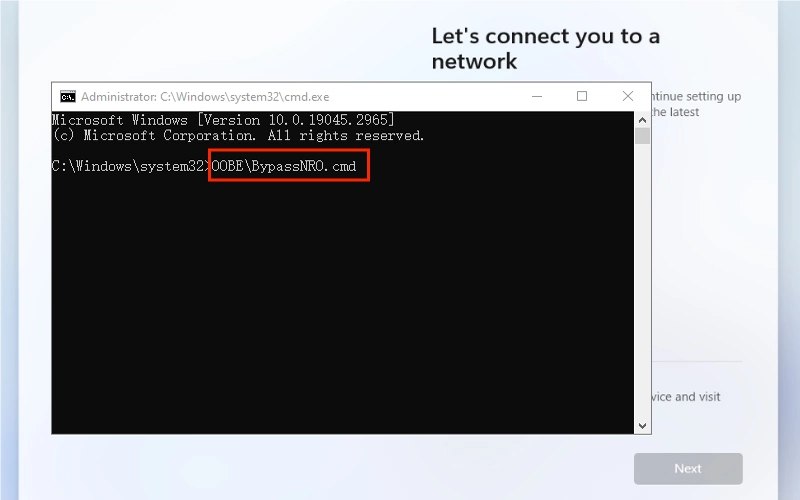
Step 1: When you are on the “Let’s connect you to a network” page, press “Shift + F10” (or Fn + Shift + F10) to open the command prompt window.
Step 2: Type "OOBE\BypassNRO.cmd" and hit the Enter button. Then the computer will reboot automatically.
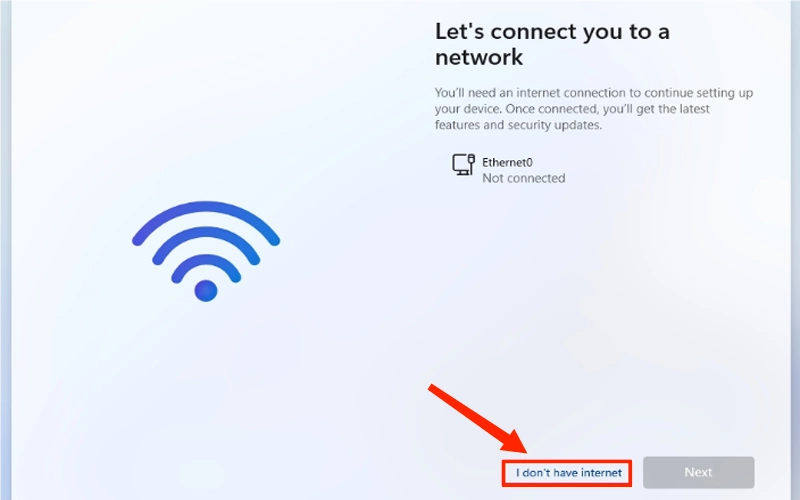
Step 3: Keep following the instructions till you are on the “Let’s connect you to a network” page. You will be surprised to find that there is an additional option “I don’t have internet”, just click it.
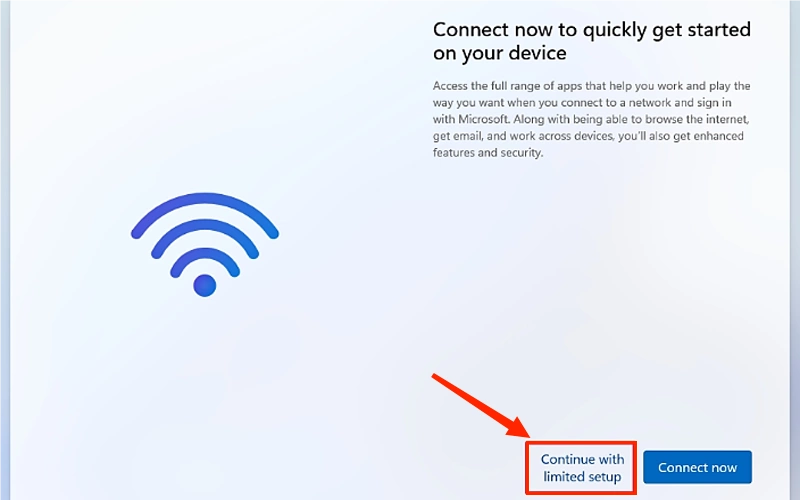
Step 4: Click “Continue with limited setup” then click Accept.
Step 5: After finishing the above steps, you will find the “Who’s going to use this device?” page. You can use a local account to continue the Windows 11 (version 22H2) installation. (The steps of local account you can refer to Method 1 Steps 3 to 5.)
Method 3: Modify the Registry to Bypass
This method still requires your computer to be disconnected network.
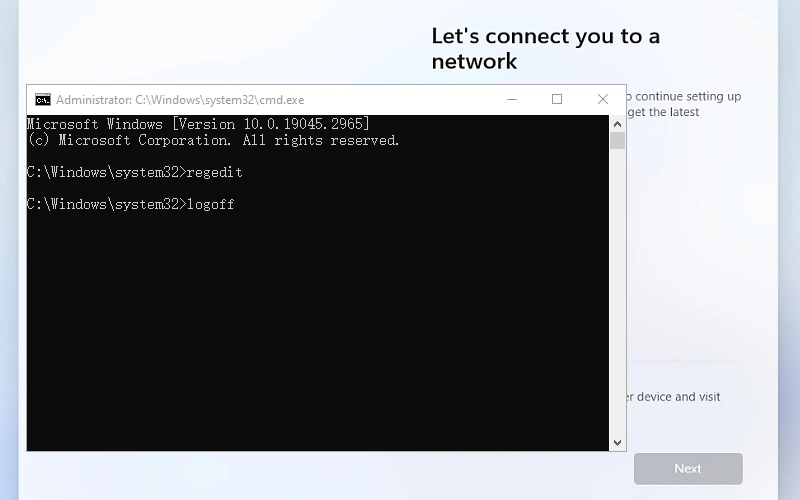
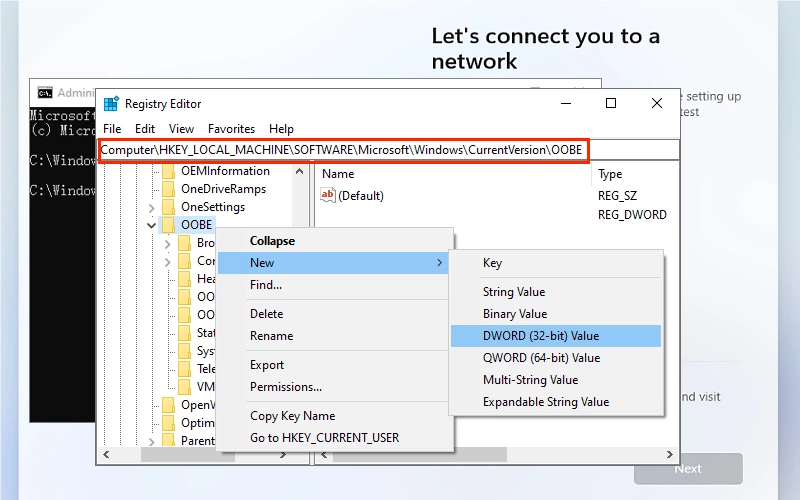
Step 1: Stay on the “Let’s connect you to a network” page > press “Shift + F10” (or Fn + Shift + F10) to open the cmd window > Type "regedit" and hit the Enter button to enter Registry Editor.
Step 2: Find the path:
HKEY_LOCAL_MACHINE\SOFTWARE\Microsoft\Windows\CurrentVersion\OOBEStep 3: Right-click the OOBE folder > New > DWORD (32-bit) Value.
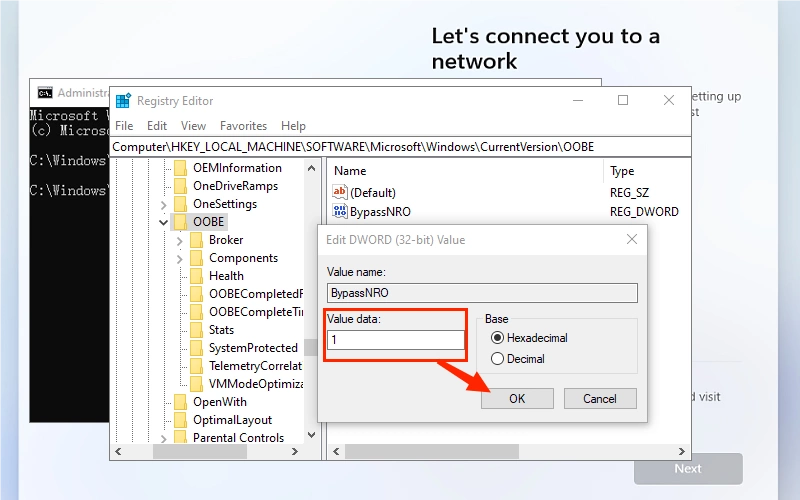
Step 4: Rename it to “BypassNRO” > Change the Value data to “1” and click OK.
Step 5: Type “logoff” in the cmd window, then hit the Enter button. After that, you can bypass the Microsoft account login and internet connection.