How to Enable or Disable Password Reveal Button in Windows 10 & 11?

June 24, 2022
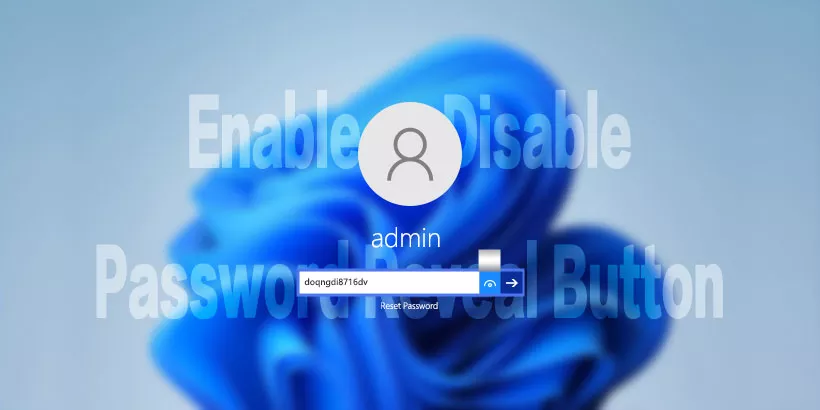
When you turn on your Windows 10 & 11, the device displays a password reveal button next to the password box. This feature makes it easy to ensure that you have entered the correct password. However, if you are surrounded by prying eyes, this can put your security at risk. This is because the password display button allows anyone to easily check your password. Therefore, in this post, I will share you how to enable or disable password reveal button in Windows 10 & 11.
Way 1: Use the Local Group Policy Editor
Local Group Policy (LGPE) is a reliable tool for Windows that can be used to configure various system settings. However, this tool is only available for Windows Pro, Enterprise and Education versions.
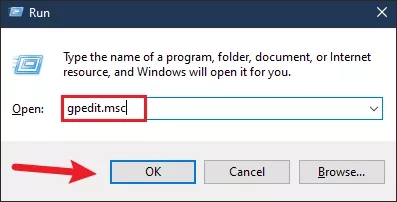
Step 1: Press WIN+R at the same time to open the Run dialog box, type gpedit.msc, and click OK to open the Local Group Policy Editor.
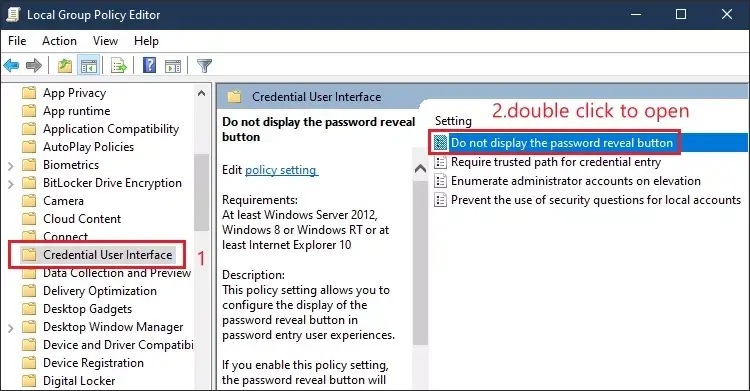
Step 2: Navigate to the following path in the local group policy editor.
Computer Configuration > Administrative Templates > Windows Components > Credential User InterfaceStep 3: Click on the "Credential User Interface folder" on the left, and double-click the "Do not display the password reveal button" option in the right window.
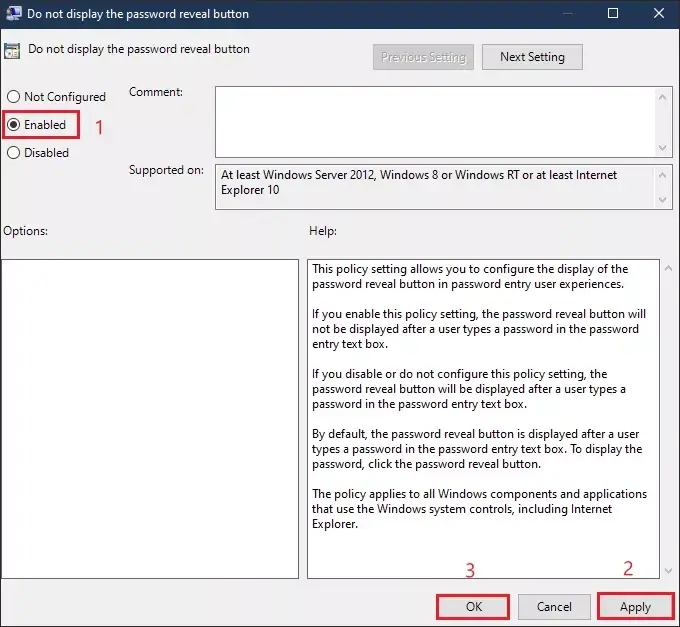
Step 4: Click the "Enabled" option and then click the "Apply" and "OK" button to save the change. The password reveal button will not be displayed after a user types a password in the password entry text box. If you change your mind, and would like to enable the password reveal button again, just switch the toggle back to "Not Configured" or "Disabled".
Way 2: Use the Registry Editor
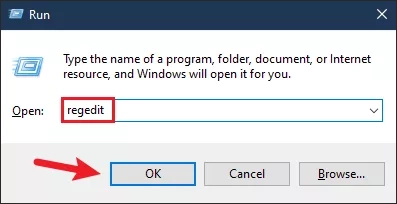
Step 1: Use the shortcut key WIN+R to open the Run dialog box, type regedit and click OK to open the Registry Editor.
Step 2: Navigate to the following directory in the Registry Editor. If you don't have CredUI key in the registry, then right click on the windows folder and click on create a New > Key. And then name the key as "CredUI".
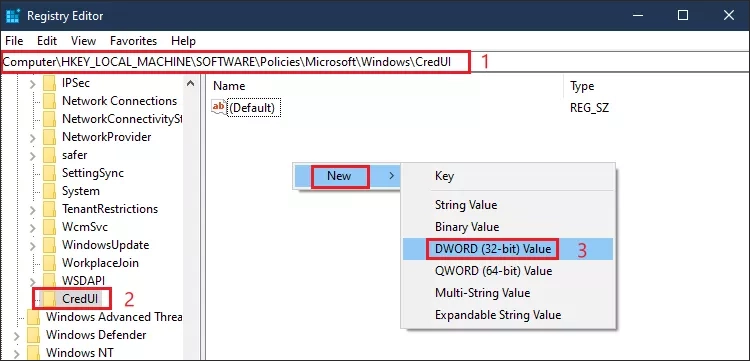
HKEY_LOCAL_MACHINE\Software\Policies\Microsoft\Windows\CredUI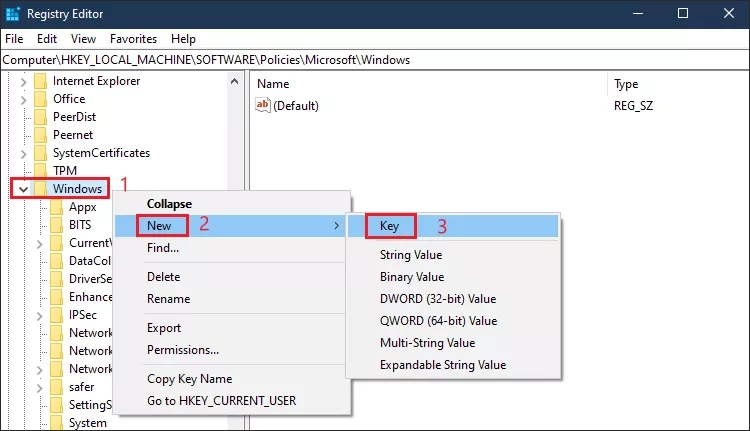
Step 3: Make sure you locate the correct path and click on "CredUI" key in the left window. Right-click in the right window and select New > DWORD (32-bit) Value.
Step 4: Name this value as "DisablePasswordReveal" and double click to open it. Set the value data to 1. Press OK to complete the change. This will disable the password reveal button. If you want to enable the password reveal button again, just change the value data back to 0 or simply delete the value of "DisablePasswordReveal".

Step 5: Reboot your PC to make sure the changes take effect.
Watch the Video Tutorial
Enable or disable password reveal button - Watch the video now!