How to Record Laptop Screen with Audio in Windows 11 and 10?

May 11, 2022
In our daily life, when we need to instruct others remotely on the steps of computer operation, or need to give customers answers on how to use software products, screenshots may be confusing. If there is a clearer and more intuitive video file, it will make the receiver more understandable, which requires the use of screen recording. Screen recording is common in life, it can help us a lot. For example, it can be used to record a movie or TV series, record an online class, record a live game and record a video call with a friend, etc. Here I will introduce four methods for recording screens on laptops in windows 11 and 10 with audio.
Way 1: Use the screen recording software that comes with your laptop in windows 11/10
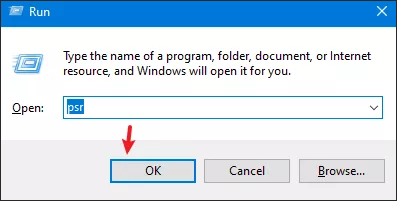
Step 1: Use the shortcut key win+R to open Run. Then type psr and enter to confirm.
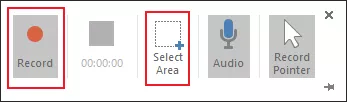
Step 2: Click the Start Record button in the upper left corner to start recording the screen.

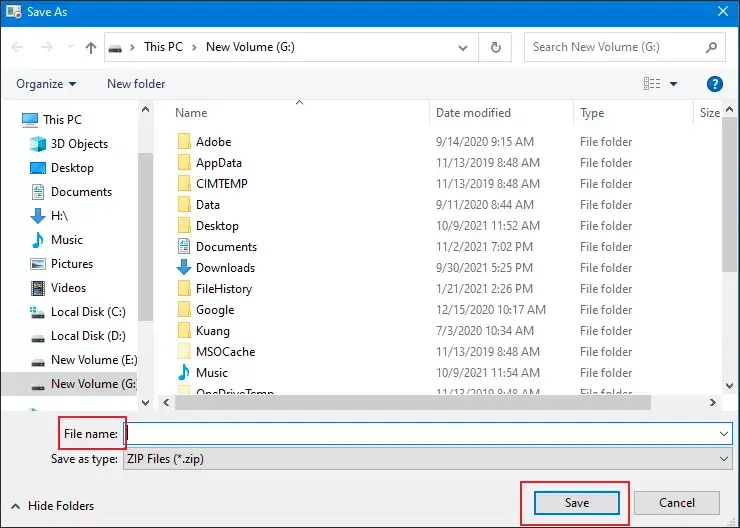
Step 3: Select Stop Record. In the Save As dialog box, type a name for the file, and then select Save. The file will be saved as a .zip file using the file extension.
Step 4: If you want to view the recording, open the zip file you just saved and then double-click on the file. The file will open in the browser.
Way 2: Use the PPT recording tool
Step 1: Create a new PPT→ Double click to open→Click Insert→Screen Recording.

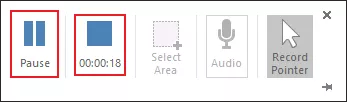
Step 2: Select Area and click record.
Step 3: You can click pause halfway, if you want to end the recording, you can tap Stop and the recorded screen will automatically appear in the PPT file.
Step 4: You can right-click to save Media as on your computer. The file will be saved as a .mp4 file.

Way 3: Use the Xbox screen recording tool that comes with windows 11/10
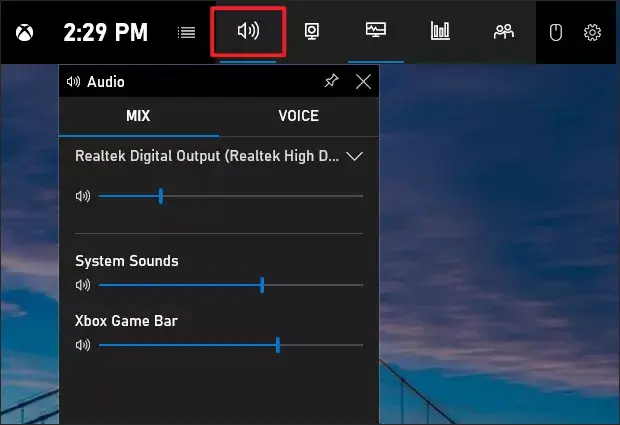
Step 1: Use the laptop shortcut WIN+G to open the Xbox.
Step 2: Set the audio recording parameters.
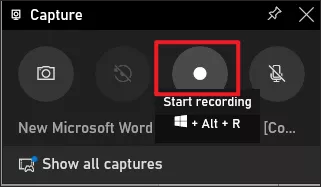
Step 3: Click start recording to record your screen. You can also use WIN+ALT+R to start recording the screen.
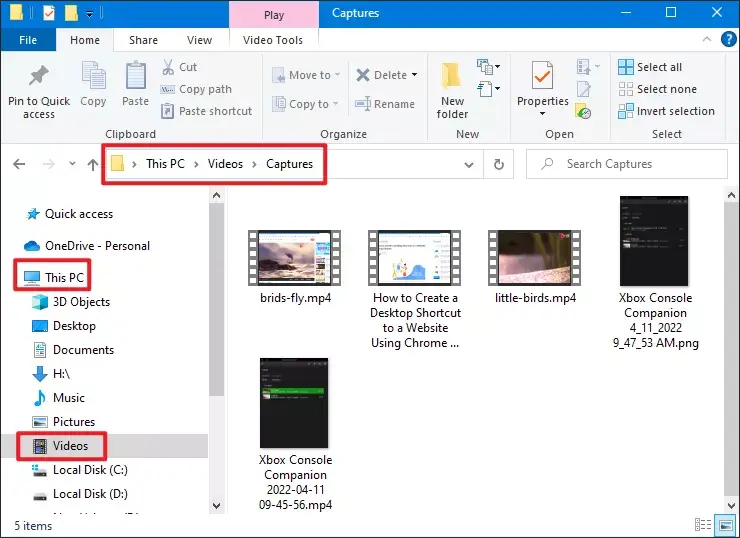
Step 4: After you finish recording the screen, open This PC and click on Videos, there is a capture folder in which the videos you just recorded is located.
Way 4: Use professional screen recording software
Currently, there is a variety of screen recording software on the market, personally, the current great and free screen recording software are ScreenToGif, Captura, and obs-studi.
ScreenToGif: This software has the disadvantage of recording video without sound, mainly for recording Gif. But it's a free screen recorder for laptop, don't worry about viruses.
Captura: This records video with audio, mainly for computer video recording, and webcam recording, the code is completely open and completely free, and you also do not worry about viruses.
obs-studio: It is a very powerful free, open-source, ad-free software developed abroad (screen recording is only one of its functions, and for some high-end players who want to record both the screen and the camera, choose this). This feature is so advanced If it is difficult to get started, it is recommended to search for relevant guides before use.
Summary
Laptop screen recording plays a vital role in our daily life. Learning to use screen recording can save time, improve work efficiency, and also record the best part of a movie or TV series to share with friends. There are many functions of screen recording in Windows 10, and we can slowly explore the charm of it.