Sleep Option Missing in Windows 10/11: How to Fix It?

June 17, 2022

Normally, we can see three options involving Sleep, Shut down and Restart when clicking Power option in the the Start Menu. Putting the system to sleep is a good option when users don't want to completely shut down their PC and retain the ongoing programs. For laptop users, this option can also help save the battery. But what to do if you find the sleep option invisible? In this post, we will discuss how to restore a missing sleep option in Windows.
1. Run power troubleshooter
Step 1: Press Windows+I to open Settings and select Update & Security > Troubleshoot > Additional troubleshooters.
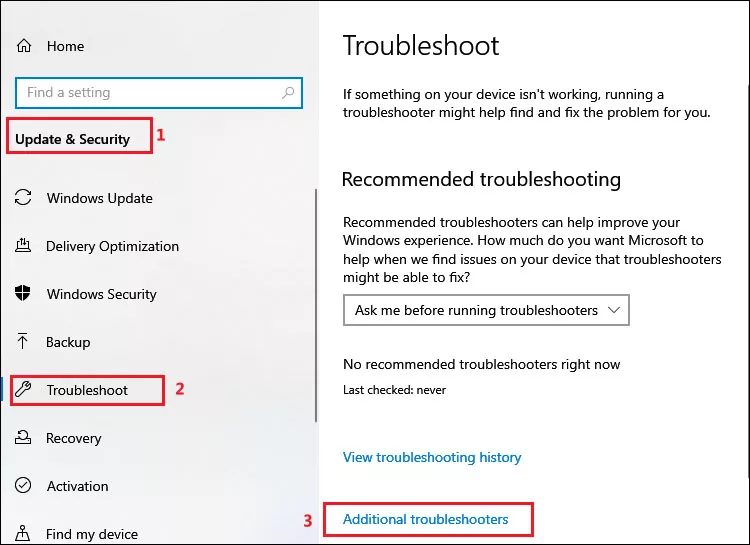
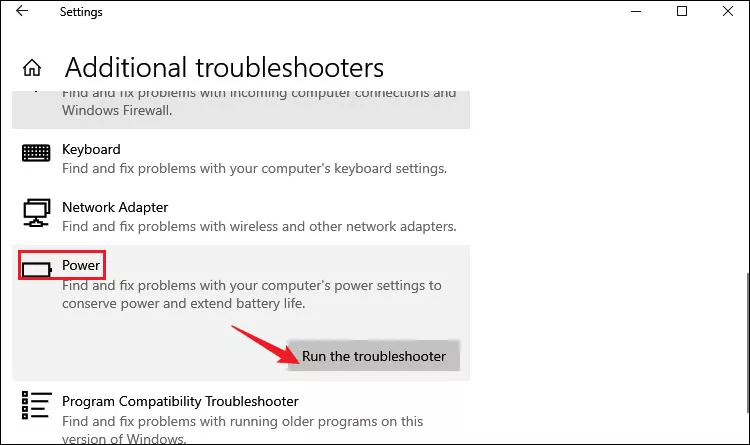
Step 2: In the next window, expand Power option under Find and fix other problems and click on Run the troubleshooter.
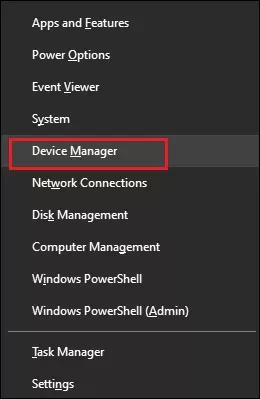
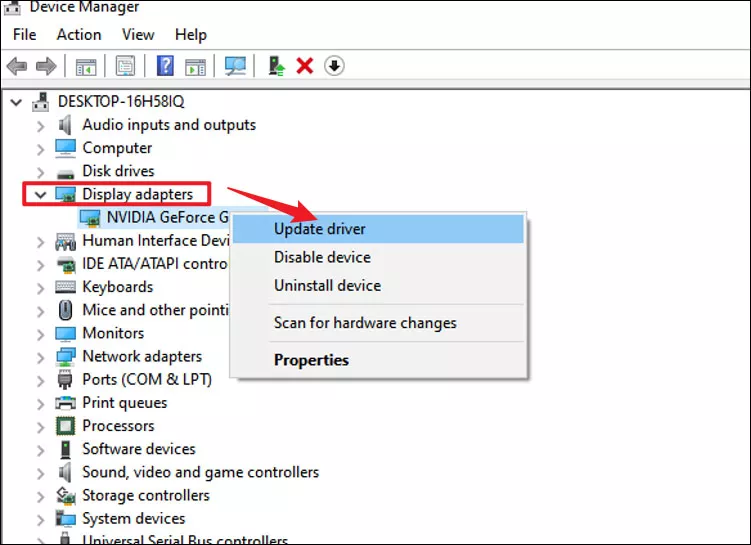
2. Update graphics drivers
Step 1: Press Windows+X and select Device Manager from the menu.
Step 2: Expand Display adapters and right-click on your graphics card. Then click Update driver.
Step 3: In the next window, choose Browse my computer for drivers.
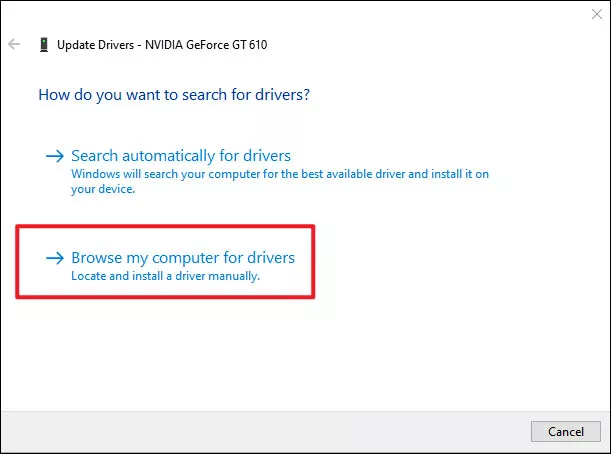
Step 4: Select Let me pick from a list of available drivers on my computer and click Next.

Step 5: Choose your graphics driver and click Next.

If you find that you have already installed the latest driver, then outdated drivers are not the root cause of the missing sleep option. Try Windows Update:
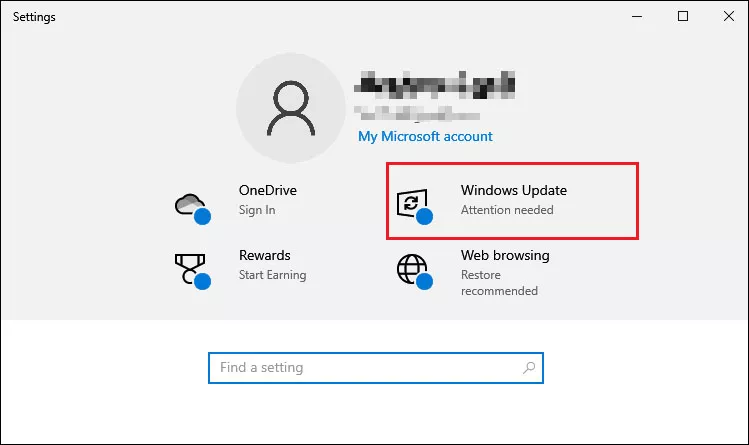
Step 1: Press Windows+I to open Settings and select Windows Update.
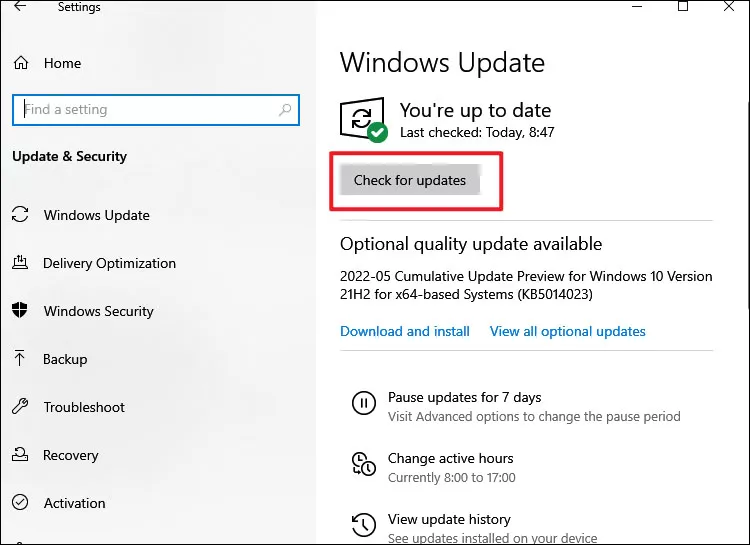
Step 2: Then click Check for updates and the latest version will be installed.
3. Restore default power options
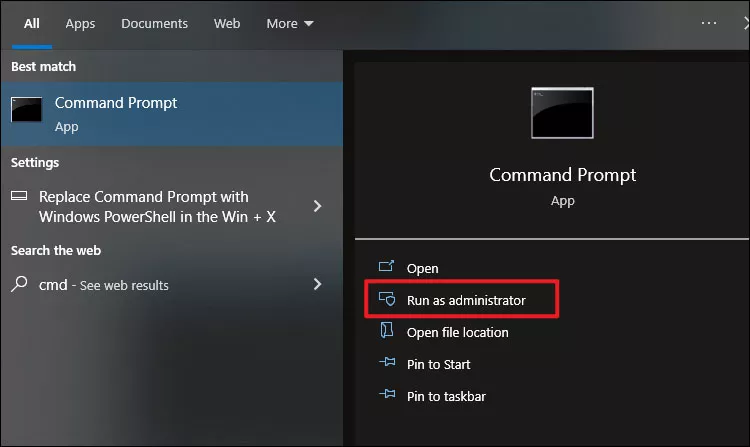
Step 1: Type and search cmd in the search bar and select Run as administrator.
Step 2: Copy and paste the command line given below and hit Enter to launch it.
powercfg -restoredefaultschemesStep 3: Restart your PC after the command is completely finished.
4. Enable sleep option from Control Panel
Step 1: Type and search control panel in the search bar and open it.

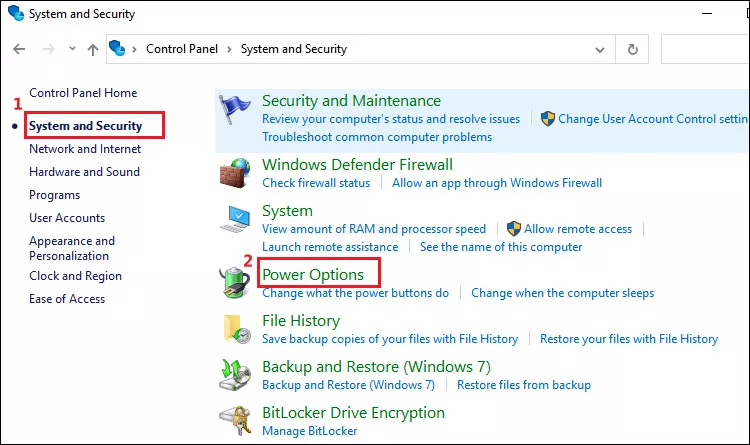
Step 2: In Control Panel, select System and Security>Power Options.
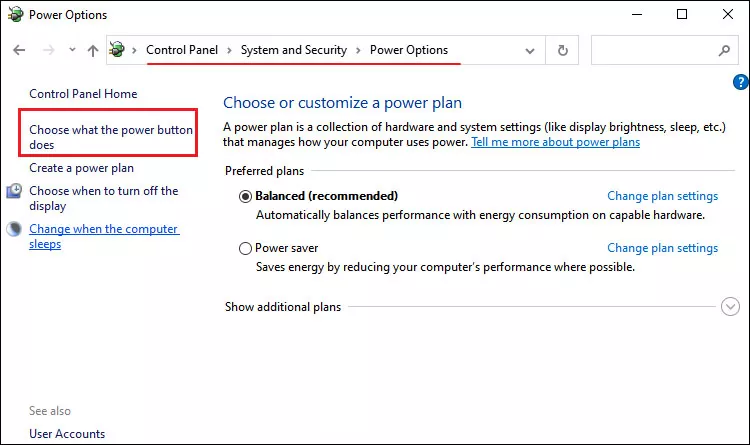
Step 3: Then click on Choose what the power button does.
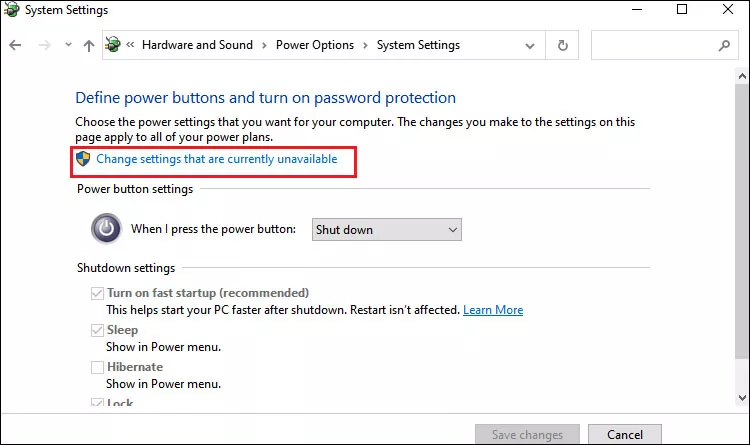
Step 4: Next, click on Change settings that are currently unavailable.
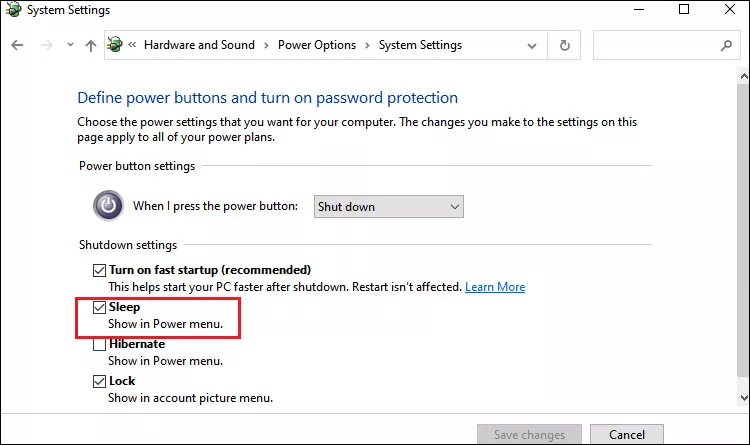
Step 5: Mark the checkbox next to Sleep in Shutdown settings and then click Save changes.
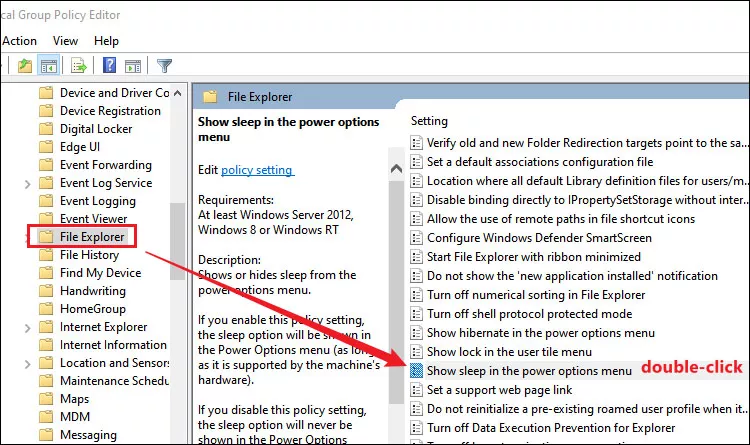
5. Enable sleep option from Group Policy Editor
Step 1: Press Windows+R to open run dialog, type gpedit.msc in the open box and press Enter to open Group Policy Editor.

Step 2: Navigate to the following path:
Computer Configuration > Administrative Templates > Windows Components > File ExplorerStep 3: Double-click on Show sleep in the power options menu.
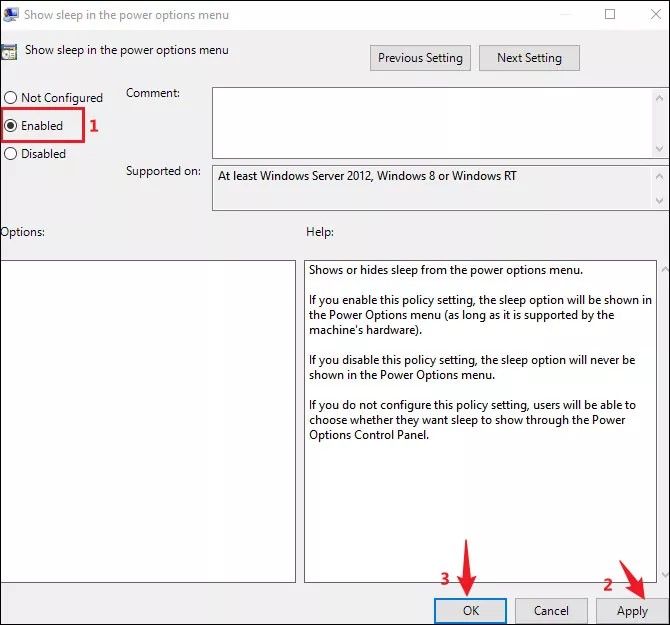
Step 4: In the pop-up window, choose Enabled option and click Apply then OK.
Step 5: Open Command Prompt as administrator and enter the below script to make the changes work.
gpupdate /forceYou will see “Computer Policy update has completed successfully.” and “ User Policy update has completed successfully.” after this command execution.