Solved: Microsoft Login Error 0x80190001 on Windows 11/10

October 8, 2023
When you try to log in to your Microsoft account, it suddenly pops up a prompt saying, “Something went wrong. Please try again later: 0x80190001.” Generally, this error will cause user accounts to fail to log in, the Windows Store will not display content, and personal accounts will not be synchronized or verified. In this article, you will learn how to solve Microsoft login error 0x80190001 on Windows 11/10.
Way 1: Run the Windows Internet Troubleshoot
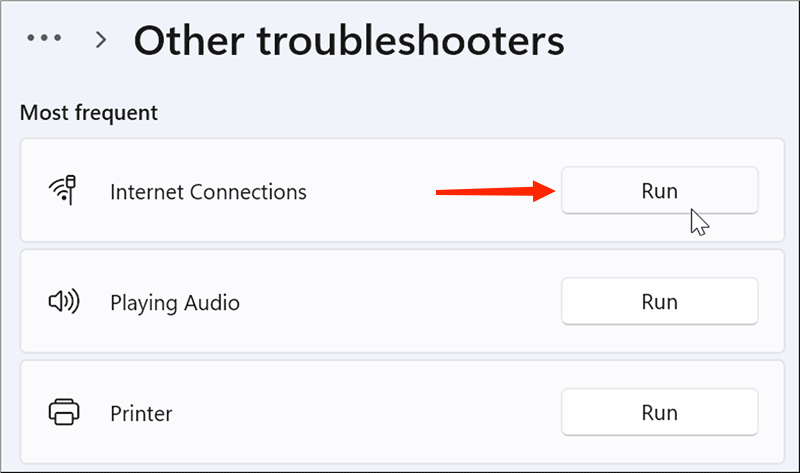
For Windows 11:
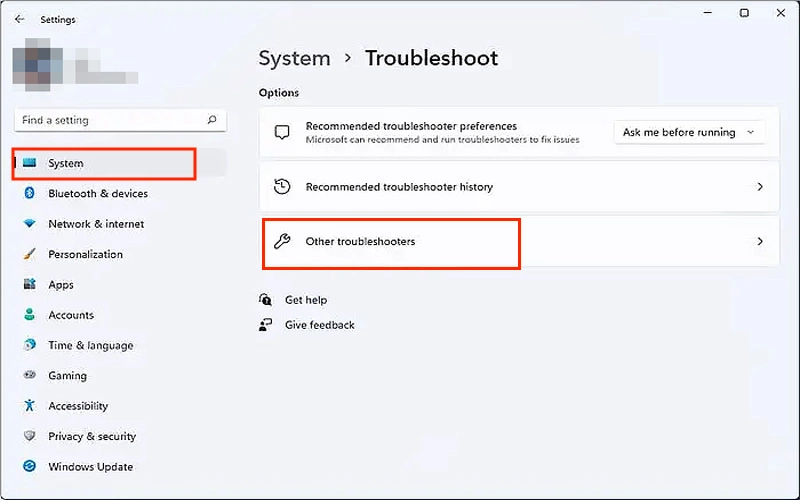
Steps: Press “Win + I” to open the settings window → System → Troubleshoot → Other trouble-shooters → Internet Connections → Run.
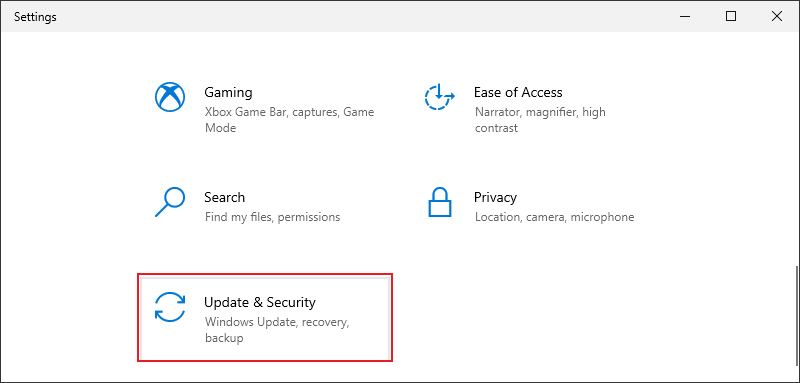
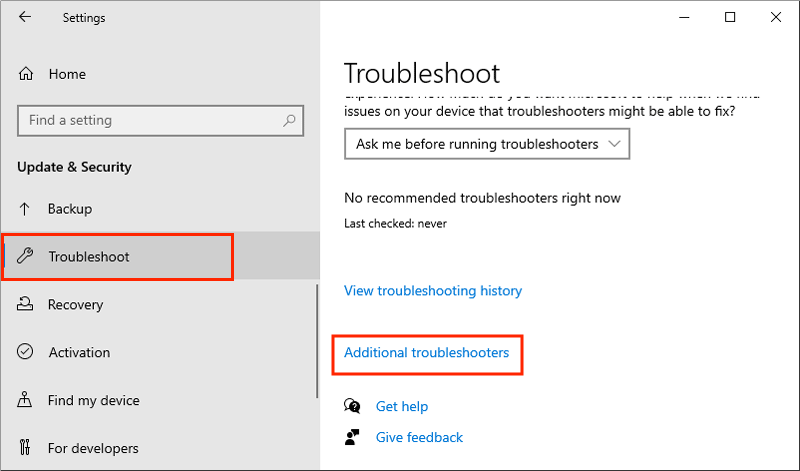
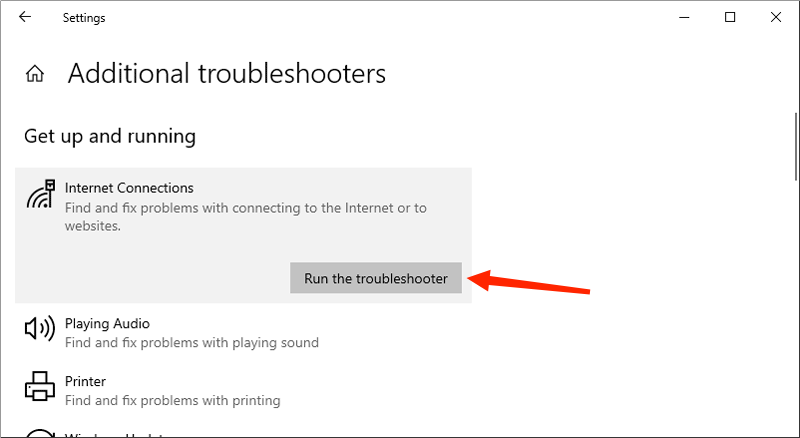
For Windows 10:
Steps: Press “Win + I” to open the settings window → Update & Security → Troubleshoot → Additional troubleshooters → Internet Connects → Run the troubleshooter.
Way 2: Reset Internet Configuration
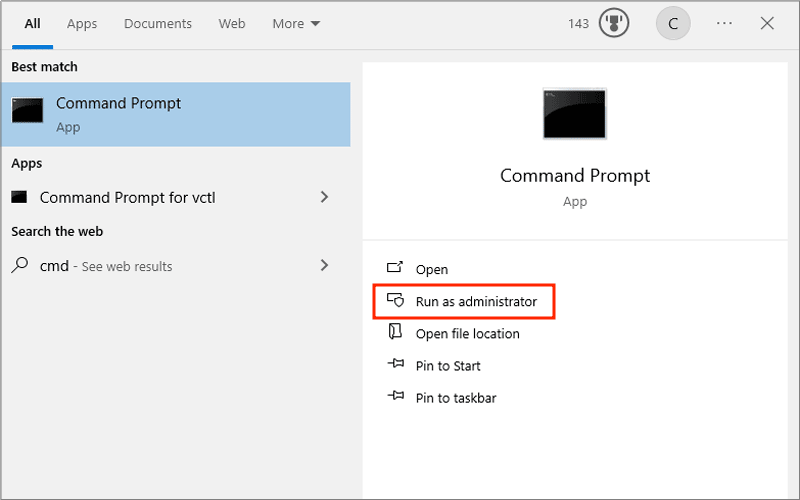
Steps: Type “cmd” in the search bar → Click “Run as administrator” → Copy “netsh winsock reset” then hit the Enter button → Copy “netsh int ip reset” then hit the Enter button.
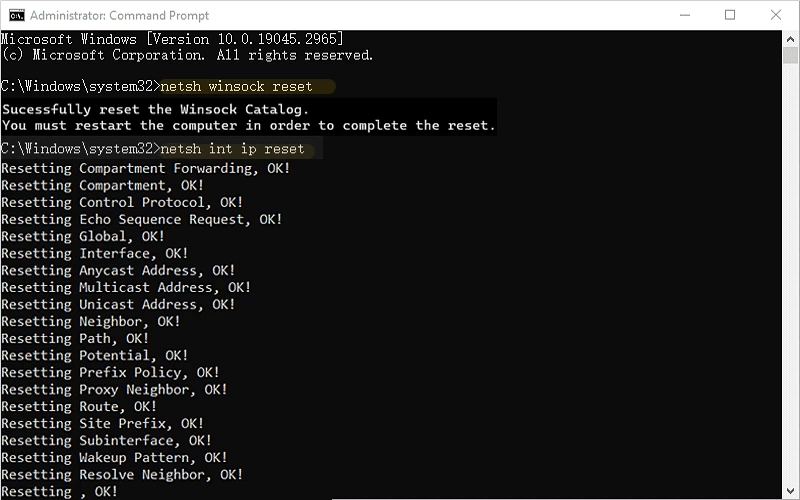
Restart your computer after successfully resetting the internet setup to see if the error 0x80190001 has been fixed.
Way 3: Manually Change DNS Server Addresses
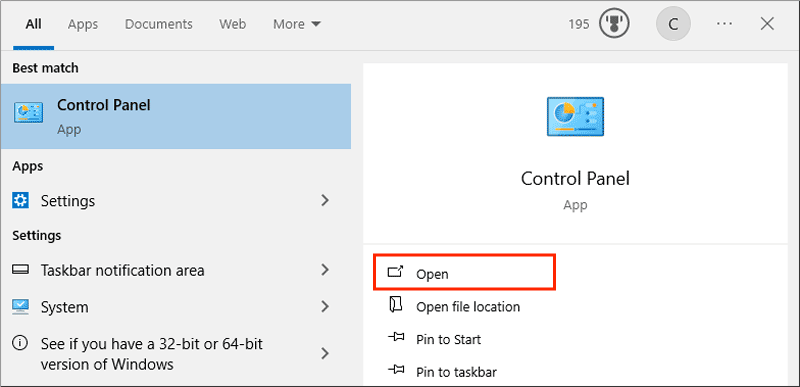
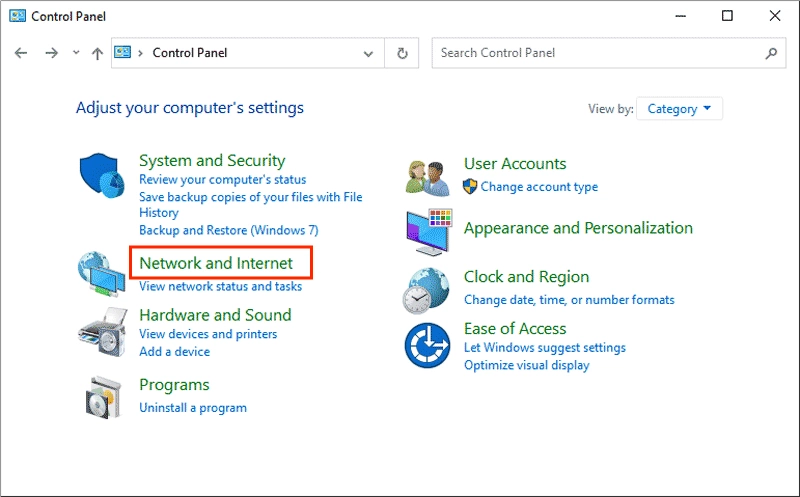
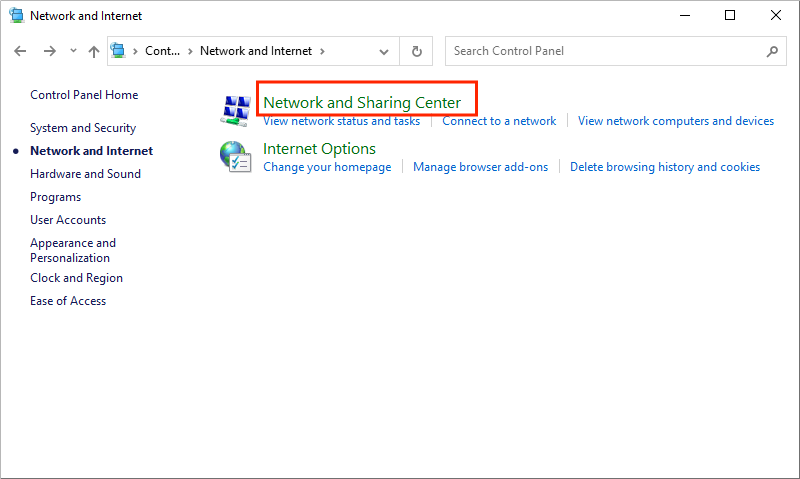
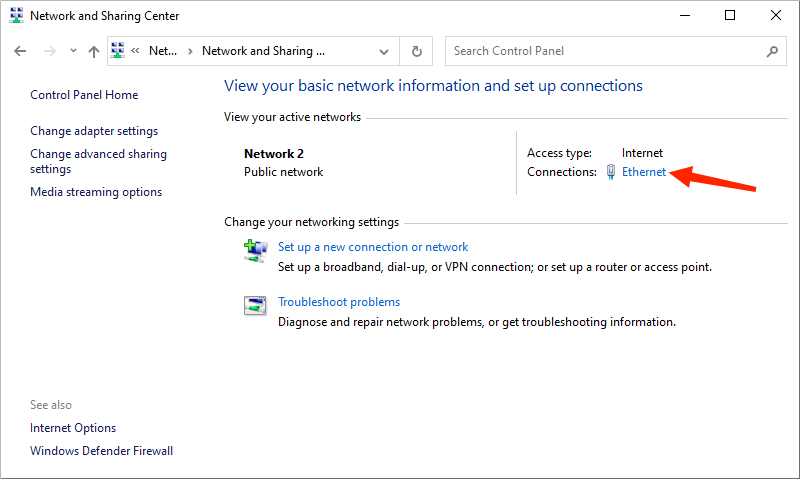
Step 1: Type “control panel” in the search bar → Click to open it → Network and Internet → Network and Sharing Center → Ethernet.
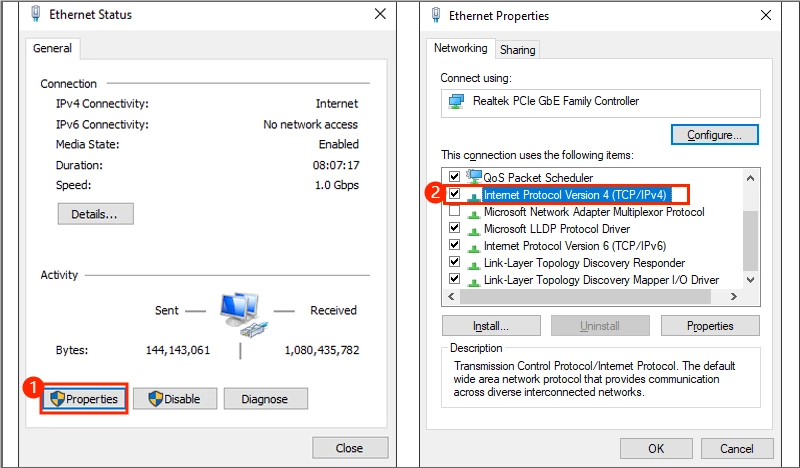
Step 2: Properties → Double-click “Internet Protocol Version 4 (TCP/IPv4)”.
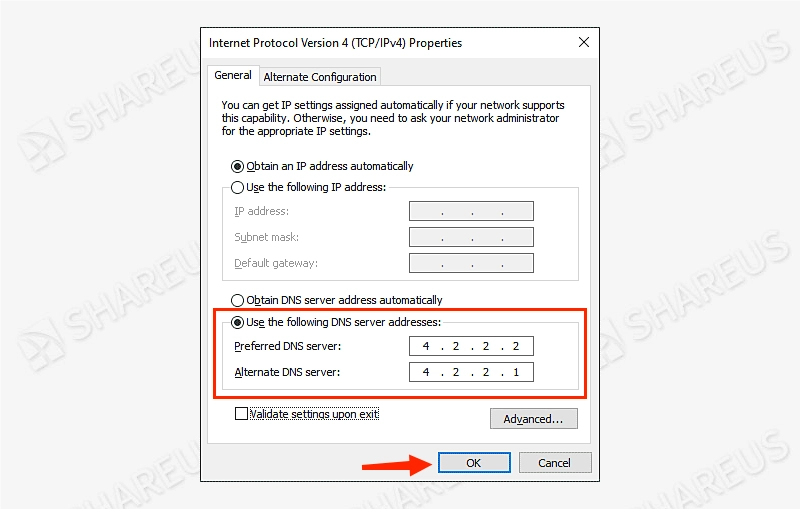
Step 3: Choose “Use the following DNS server addresses” and fill in the number as the below screenshot, then click OK.
Step 4: Back to the Network and Sharing Center → Click Internet Options in the lower left corner → Advanced → Click Reset → Check the “Delete personal settings” → Reset.
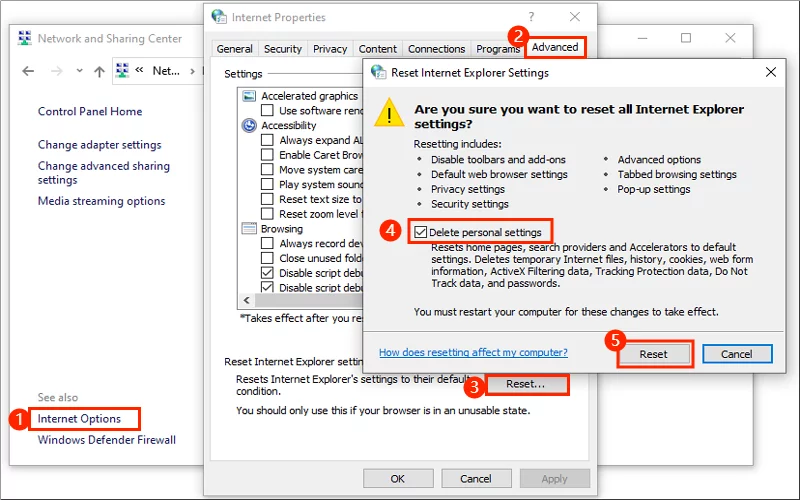
After finishing the above steps, reboot your computer then log in to your Microsoft account to check if the error 0x80190001 has been resolved. If it is work, then change the DNS to “Obtain DNS server address automatically” in case it affects the internet speed.
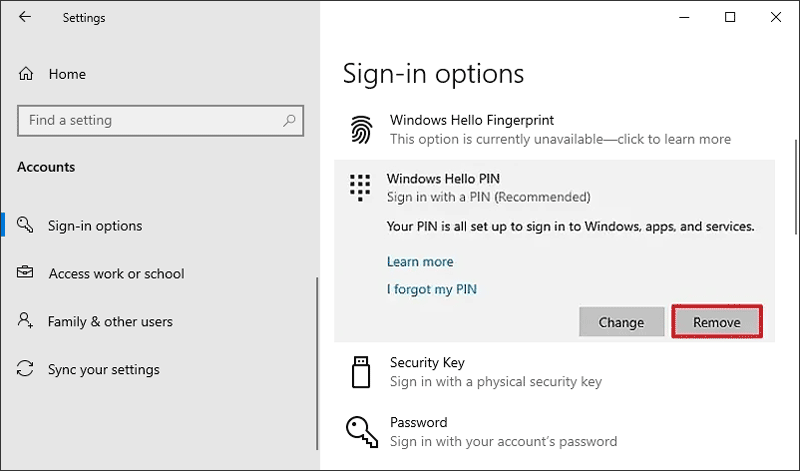
However, this method may come to a situation where you can enter your account and passcode, but it is a blank screen without any hint. It may be due to the PIN code problem, here are the steps to fix it:
Steps: Press “Win + I” to open the settings window → Accounts → Sign-in options → Windows Hello PIN → Remove.
Way 4: Disable Internet Protocol Version 6(IPv6)
If changing DNS does not work, you can try the following method:
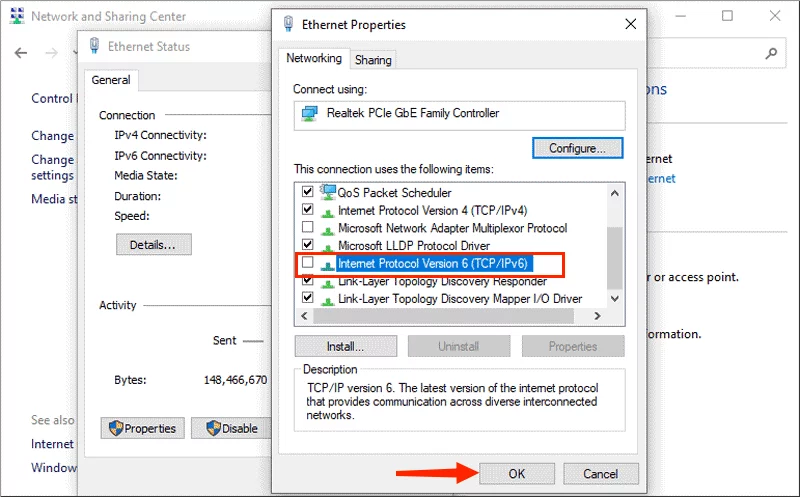
Step 1: Type “control panel” in the search bar → Click to open it → Network and Internet → Network and Sharing Center → Ethernet.
Step 2: Properties → Uncheck “Internet Protocol Version 6 (TCP/IPv6)” then reconnect the internet. After that, log in to the account to check whether the Microsoft login error 0x80190001 is repaired.
Way 5: Flush Your DNS Records via CMD
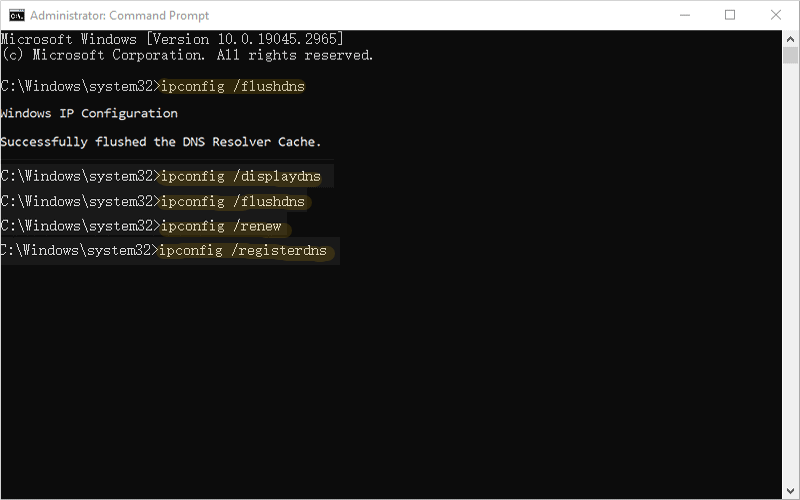
Step 1: Type “cmd” in the search bar → Click “Run as administrator” → Type the command “ipconfig /flushdns”, then hit the Enter button.
Step 2: After flushing the DNS Resolver Cache, type the following commands in order to check:
ipconfig /displaydns (Display the DNS Resolver Cache)
ipconfig /flushdns (Clear the DNS Resolver Cache)
ipconfig /renew (Update the IPv4 address of a specified adapter)
ipconfig /registerdns (Refresh all DHCP leases and Re-registers DNS names)
Once you've completed the steps listed above, check to see if you can log into your Microsoft account.