What to do If IME is Disabled in Windows 10 and 11

May 17, 2022

IME, the short form of Input Method Editor, allows users to enter characters in different languages and switch between these languages at will. However, some users found that there's a cross icon with the message that IME is disabled instead of the abbreviation of their selected language, making it impossible to switch to another language. This error often occurs after a startup or a system update. Then, in this post, we will discuss how to troubleshoot disabled IME in your Windows 10/11.
1. Enable Input Indicator
If the Input Indicator is turned off, then you cannot change the input language. So you need to check its status and make sure it's turned on.
Step 1: Right-click on taskbar and select Taskbar settings.

Step 2: Scroll to find Notification area and click on Turn system icons on or off.
Step 3: Make sure the Input Indicator icon is turned on.

2. Switch input methods
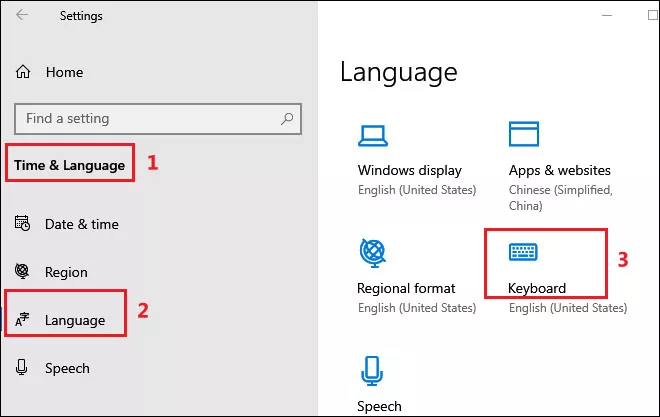
Step 1: Press Windows+I to open settings. Select Time & Language>Language>Keyboard.
Step 2: In the keyboard window, scroll to find Switching input methods and check Let me use a different input method for each app window.
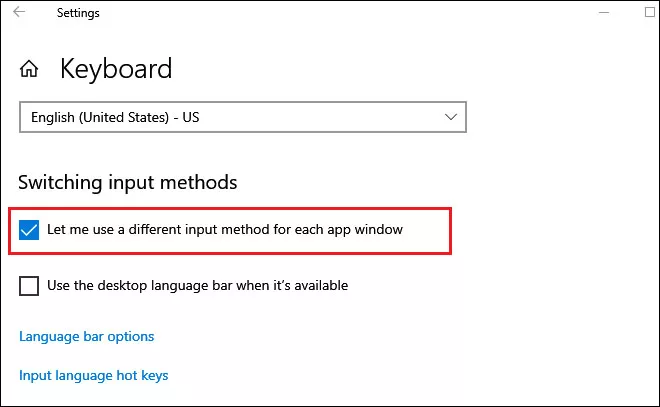
After that, reboot your PC to check if the IME is enabled.
3. Remove and add the language again
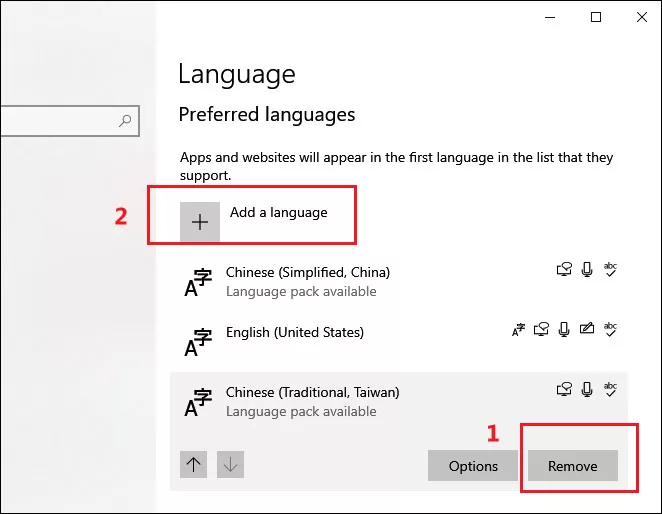
Step 1: Press Windows+I to open settings. Select Time & Language> Language>Windows display.

Step 2: Locate to Preferred languages, select the installed language and choose Remove. Then you can click Add a language to add your needed language again.
4. Bypass WSUS for Domain-joined PC
This method applies to whose system is Domain joined.
First, you need to create a system restore point.
Step 1: Type create a restore point in the search box on the taskbar and select it from the list.

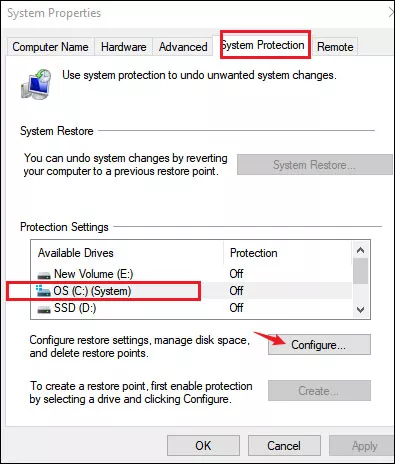
Step 2: Choose System Protection tab in System Properties window, select C: drive and click Configure.
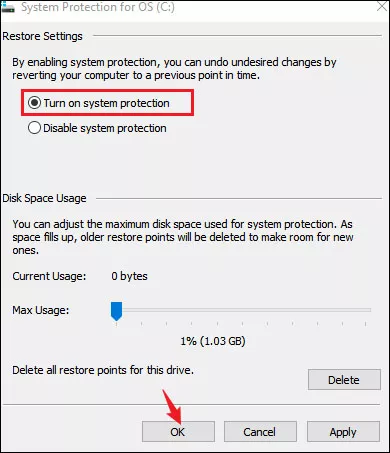
Step 3: You need to check Turn on system protection and click OK to enable system restore.
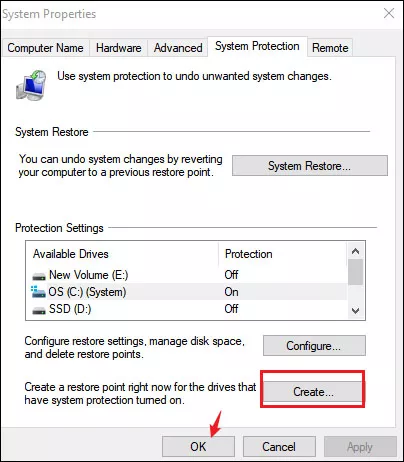
Step 4: Back to System Properties window, click Create and follow the instructions on screen. You will see a message that the restore point was created successfully after the process completes.
Then you can continue with the following steps.
Step 5: Press Windows+R to open run command, copy and paste the below path in the box and hit Enter to run it. Then close the run dialog.
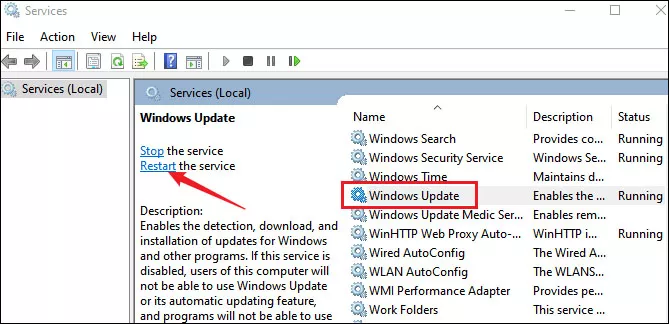
REG ADD "HKEY_LOCAL_MACHINE\SOFTWARE\Policies\Microsoft\Windows\WindowsUpdate\AU" /v UseWUServer /t REG_DWORD /d 0 /fStep 6: Again press Windows+R to open run command and type services.msc in the run box to open Windows Services Manager. Scroll to find Windows update in Services window and click on it, then select Restart the service.
Step 7: After these steps, you need to open settings and add the language again as what you do in method 3.
Step 8: Press Windows+R to open run command, type regedit in the run box and hit Enter to open Registry Editor.
Naviagte to the following path:
HKEY_LOCAL_MACHINE\SOFTWARE\Policies\Microsoft\Windows\WindowsUpdate\AUStep 9: Delete the UseWUServer key.
5. Reset your Windows
Factory reset can help fix Windows issues of user settings. Before resetting your computer, it's better to backup your important files.
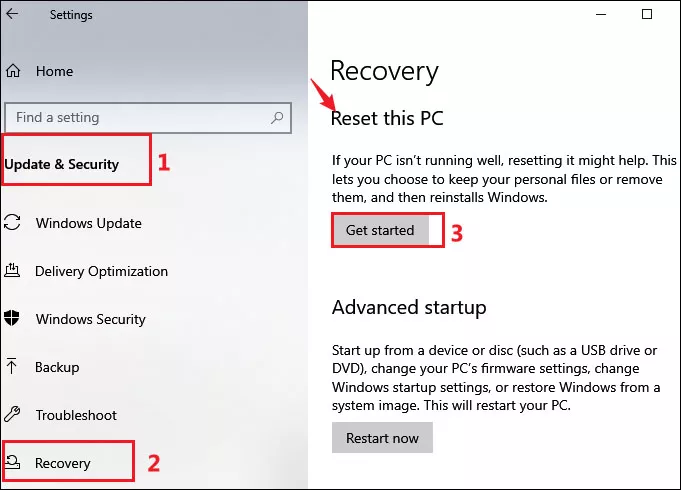
Step1: Press Windows key to open Start menu and select Settings > Update & Security.
Step 2: Choose Recovery, find Reset this PC and click on Get started. You can choose to keep your files or remove files before resetting and follow the instructions until the process complete.