Full Guide: How to Stress Test Your PSU

August 22, 2022
PSU, short for Power Supply Unit, is a hardware component that converts high-voltage AC (Alternating Current) into a steady low-voltage DC (Direct Current) that can be used by computers. It also modulates the DC output voltage to the required wattage of the computer components. All of the components in your PC case are powered by PSU, thus a healthy PSU is significant. If you want to know how well it functions and whether it can handle overclocks, performing a stress test is the best choice. In this post, we will discuss how to conduct a stress test on your PSU.
What would happen if the PSU is too weak?
Inadequate power supply can lead to a lower quality of graphics, display issues and system glitches. Here lists some warning signs that your power supply cannot provide enough power:
- Your computer randomly restarts or shuts down.
- Random program crashes.
- Your system freezes randomly.
- Blue screen of death error increases.
- Monitors occasionally flash due to downgraded graphics card.
How can I stress test the PSU?
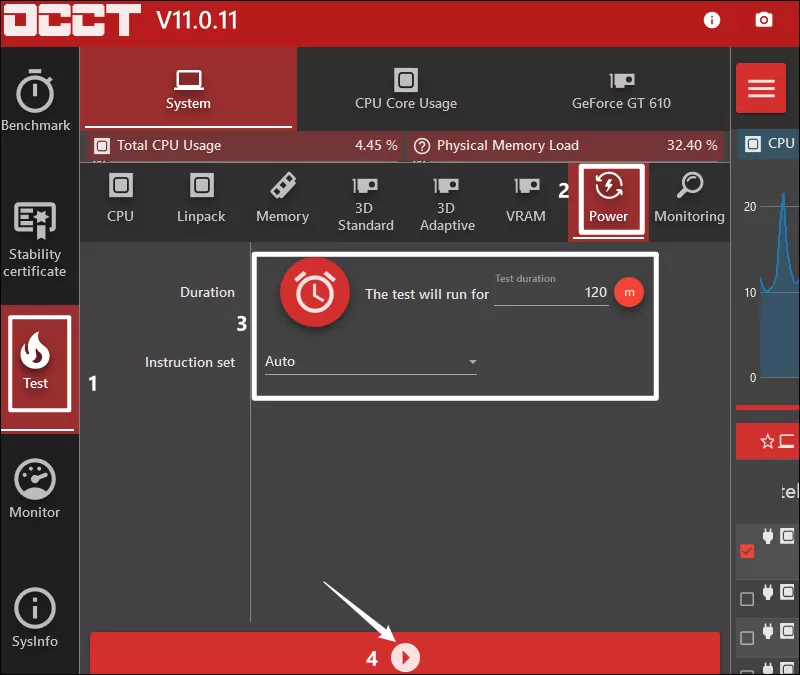
1. Using OCCT
Step 1: Download OCCT from the official website.
Step 2: After launching the application, select Test option at the left side and click the Power icon.
Step 3: Choose Auto next to Instruction set. You can set the test duration as you wish and you will have a more detailed result if you run the test longer.
Step 4: Click the Start button.
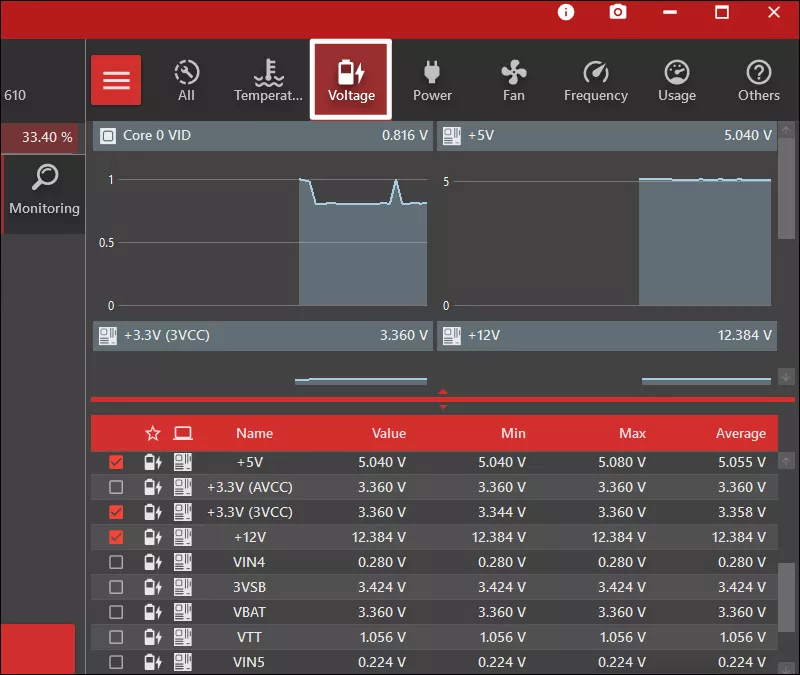
From the right panel, you can monitor the curve of the voltage, which should be stable and has no surprising spikes.
2. Using a power supply tester
The main function of the PSU is to convert 210V AC into +3.3V, +5V, +12V and -12V DC and thus it can provide a set of 5V Standby (abbreviated as 5VSB) DC for use when the computer is switched off and on standby. The power tester is designed to measure whether these converted DCs are working properly.
Step 1: Turn off your PC and open the PC case. Then locate the power supply unit and unplug the PSU from your motherboard completely.
Step 2: Place the power supply in a spacious area so that all cables can be easily handled. Then find out the 20/24 pin connector, which is the widest and largest socket with colorful cords on the PSU for outputting power to the motherboard.
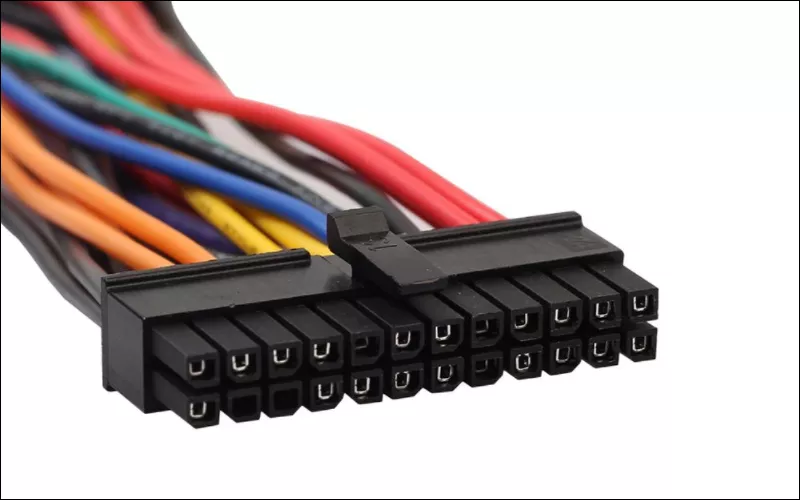
Step 3: Plug the 20/24 pin connector into the testing device.
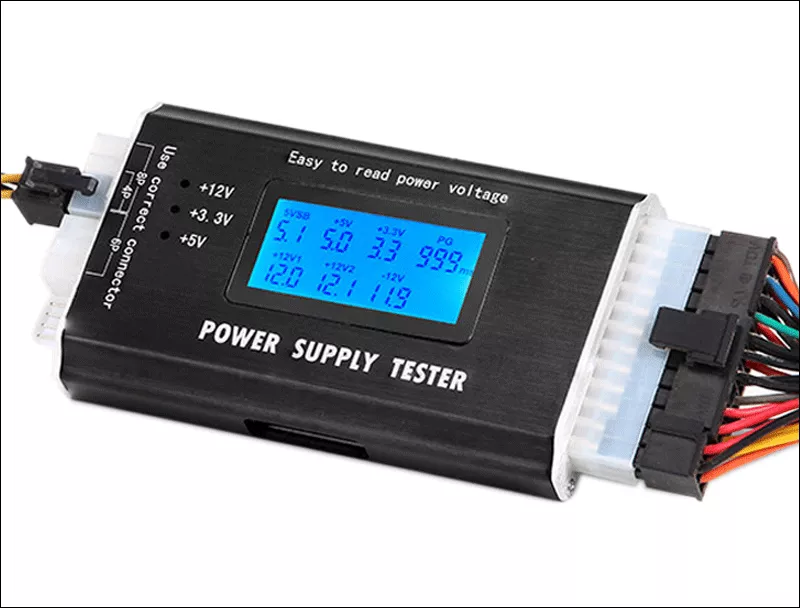
Step 4: Plug the power supply into a outlet and switch it on. Some power supply testers may need to be turned on by using a button and make sure turn on these two.
Step 5: Check the readings on the LCD screen. You may see seven parameters:
+5V/+3.3V/+5VSB, these voltage values are normal within +-5%. And there should be no problems when +12V1/+12V2/-12V values are within the range of +-10%. If any voltage value is flashing on the screen, or the voltage appears as "LL" or "HH", it means that the value is out of the normal range and your power supply is not working properly. The PG value should range from 100 to 900 ms. If it is outside this range, it will flash to indicate a problem with the PSU.
After verifying the main connector is working without fault, you can test for peripheral power connectors. Insert other connectors such as 4/8pin cables which provides power for the CPU, and you will have the readouts on the screen. Please plug only one connector together with the 24-pin connector at a time.
There are three lights on the testing unit: +12V, +3.3V, +5V. The SATA cable should have all three lights lighted. Other connectors should light up the +12V and +5V lights.