[Examples] Windows File Recovery (CMD) - Recover Formatted Data

September 23, 2021
![[Examples] Windows File Recovery (CMD) - Recover Formatted Data](../img/software/examples-windows-file-recovery-cmd-recover-formatted-data/examples-windows-file-recovery-cmd-recover-formatted-data.webp)
"I have accidentally formatted my hard disk with so many important documents and data in it, but I do not have a backup at all. Is there any way to get my files and data back? What do I do?"
Maybe you have encountered a situation similar to the one above. In this article, I am going to tell you how to recover data from formatted hard disk in Windows 10 using CMD by giving you several easy-to-use command examples you can just copy and paste.
Note:
Do NOT perform any operation on the hard disk you just formatted, as this will make the recovery more difficult.
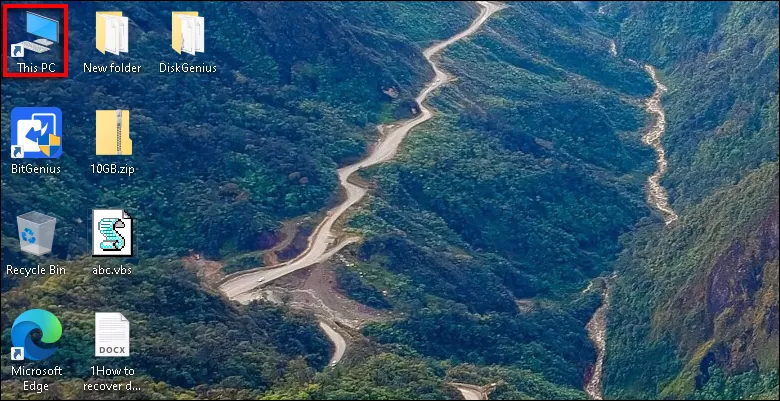
1. Check file system
The first thing you need to do is to check the file system of the hard drive you formatted.
Just simply open This PC by double-clicking.
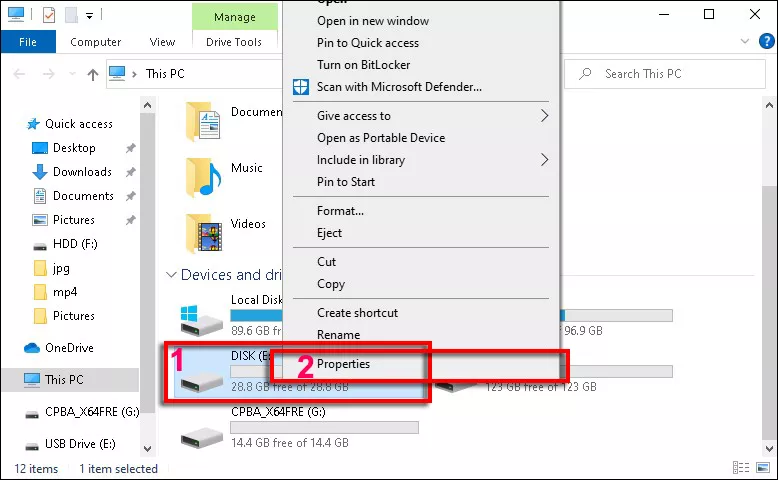
Right-click the formatted drive and select Properties.
Then you will know its File system.
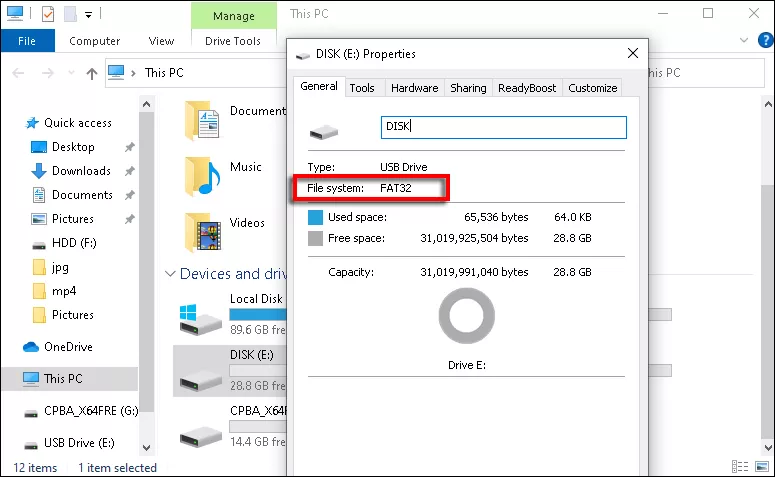
Note:
Only the two most common file systems, NTFS and FAT32, are supported.
2. Download and launch Windows File Recovery
Click the Start button and type Microsoft Store, select to open it.
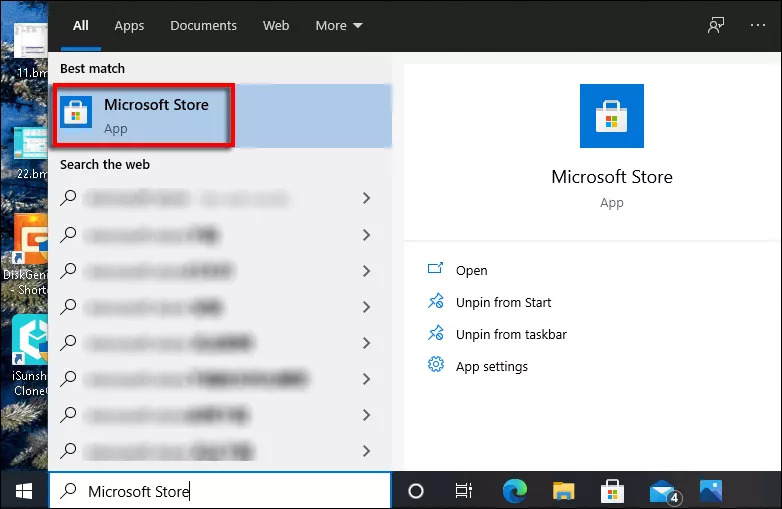
Select the Search button, type Windows File Recovery, and click it.
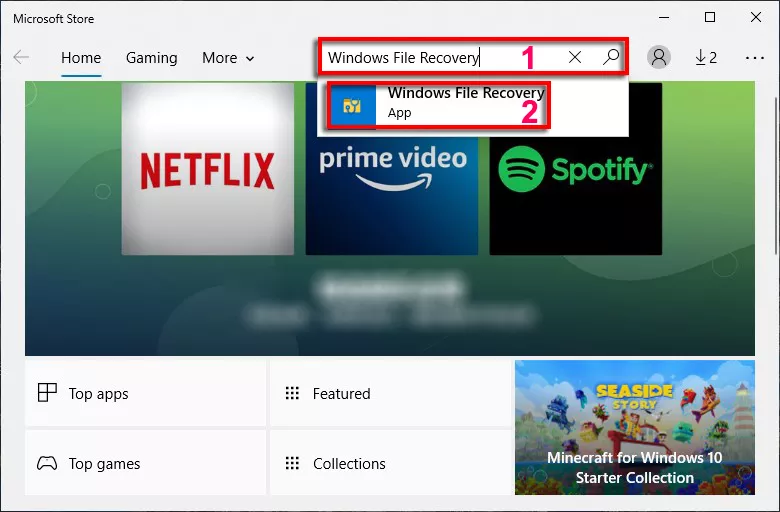
Click Get and it will download automatically.
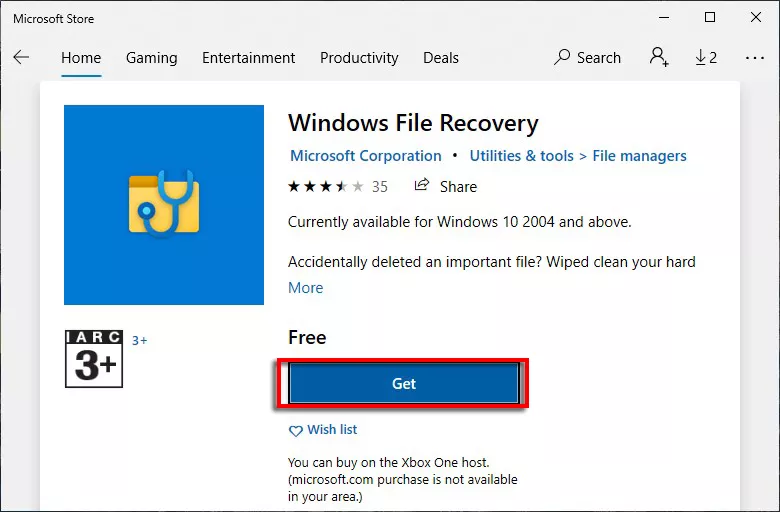
Select Launch.

Note:
1. This software is currently availble for Windows 10 Version 2004 and above. How to update my Windows?
2. You will be asked to sign in to the Microsoft Store if haven’t.
3. Copy and paste command Example below
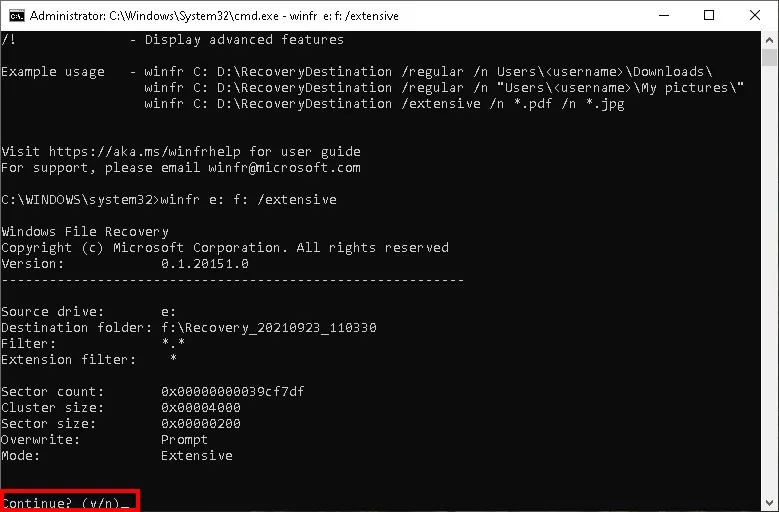
winfr e: f: /extensiveCopy the command above, and replace the underlined word(s) with others to meet your need.
The first underlined word e should be replaced with your own formatted hard disk (d, e, f, g, etc.).
The second one f can be replaced with another drive you want to store the recovered files, except for the formatted drive itself.
After that, copy the modified command, open Windows File Recovery, and right-click on it to paste the command. Then press Enter.
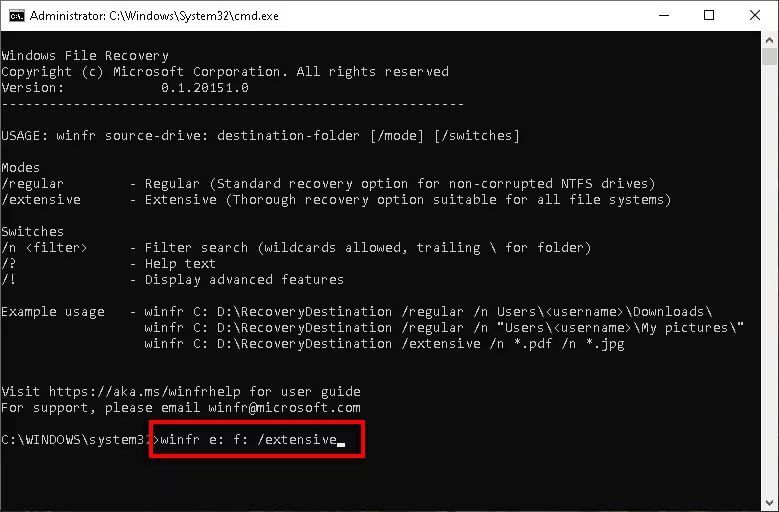
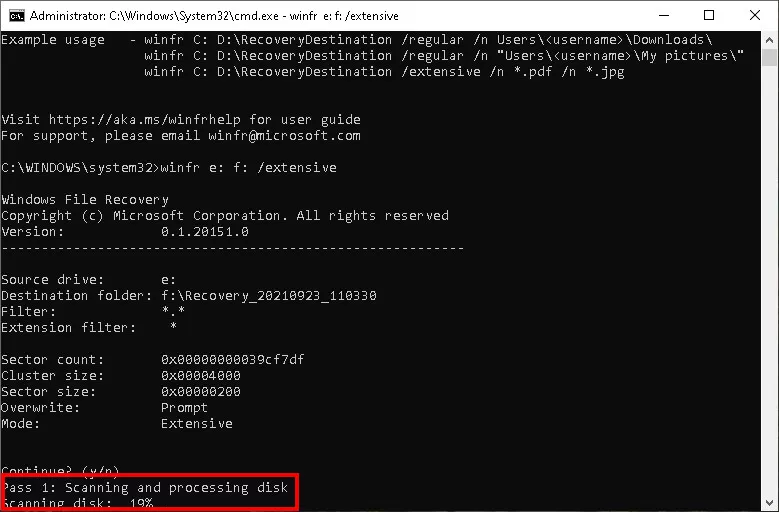
Hit the Y Key when it asks for confirmation.
It will start scanning and processing the disk.
Note:
File with extensions below cannot be restored.
_, adm, admx, appx, appx, ascx, asm, aspx, aux, ax, bin, browser, c, cab, cat cdf-ms, catalogItem, cdxm, cmake, cmd, coffee, config, cp, cpp, cs, cshtm, css, cur, dat, dll, et, evtx, exe, fon, gpd, h, hbakedcurve, htm, ico, id, ildl, ilpdb, iltoc, iltocpdb, in, inf, inf_loc, ini, js, json, lib, lnk, log, man, manifest, map, metadata, mf, mof, msc, msi, mui, mui, mum, mun, nls, npmignore, nupkg, nuspec, obj, p7s, p7x, pak, pckdep, pdb, pf, pkgdef, plist, pnf, pp, pri, props, ps1, ps1xm, psd1, psm1, py, resjson, resw, resx, rl, rs, sha512, snippet, sq, sys, t4, targets, th, tlb, tmSnippet, toc, ts, tt, ttf, vb, vbhtm, vbs, vsdir, vsix, vsixlangpack, vsixmanifest, vstdir, vstemplate, vstman, winmd, xam, xbf, xm, xrm-ms, xs, xsd, ym
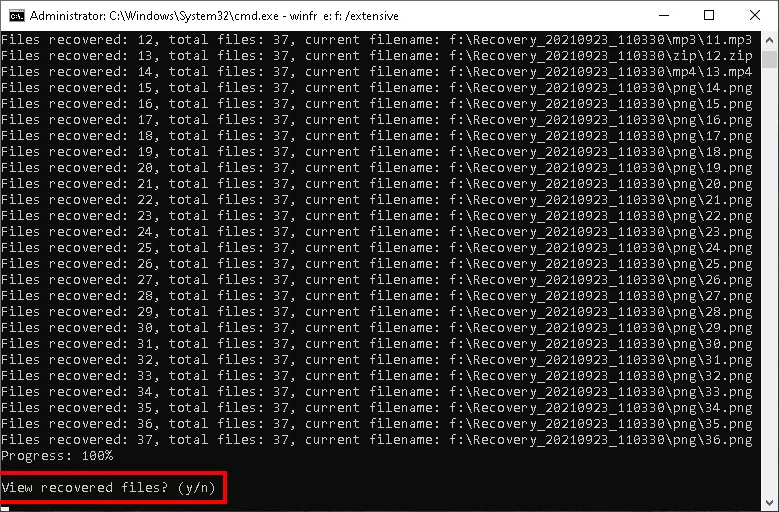
4. View recovered files
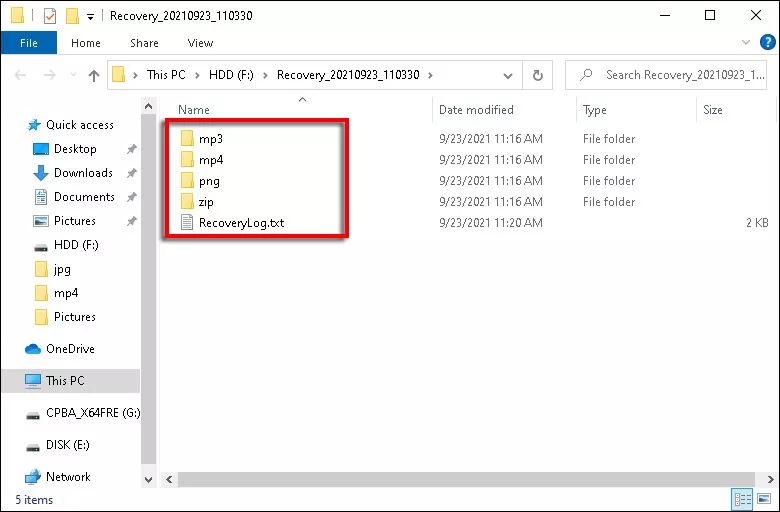
At last, press the Y Key again.
The recovered folder with files will pop up.
![[Examples] How to Recover Permanently Deleted Files Using Command Prompt in Windows 10](../img/software/examples-how-to-recover-permanently-deleted-files-using-command-prompt-in-windows-10/examples-how-to-recover-permanently-deleted-files-using-command-prompt-in-windows-10-m.webp)

![[Fixed] How to Recover Deleted Excel File Not in Recycle Bin](../img/office/fixed-how-to-recover-deleted-excel-file-not-in-recycle-bin/fixed-how-to-recover-deleted-excel-file-not-in-recycle-bin-m.webp)