[Fixed] How to Recover Deleted Excel File Not in Recycle Bin

January 22, 2021

If you have ever deleted a file by accident, you aren't worried about it because it can be stored from Recycle Bin. But it's frustrating when you find out you accidentally delete an important file in the Recycle Bin. Fortunately, deleting a file in Recycle Bin may not be the end of the world. In most cases, the deleted Excel file can be retrieved when it's not in Recycle Bin.
1. Recover Excel files with Recent file option
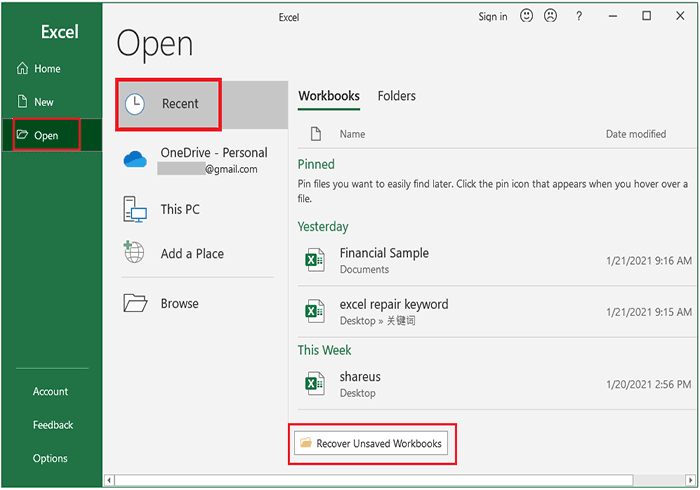
Microsoft office will save temporary files as backups. If the file has an unsaved experience due to power failure or improper handling etc., you can use the Excel 'Recover Unsaved Workbooks' option to restore it.
It's easy to find the temporary files. Open Microsoft Excel, click on "Open" in the left navigation pane, and then click Recover Unsaved Workbooks below the interface on the right. Then you can get all unsaved Excel files from the pop-up window. Select the file you want and restore it.
It should be noted that only files in Excel format can be seen here. If the file isn't saved in Excel format, it couldn't show here. So you can go directly to the file location where Office automatically backs up temporary files. In this way, you can see all the unsaved files with different file types, like ASD. You can edit the username and paste the file path below into This PC.
C:\Users\username\AppData\Local\Microsoft\Office\UnsavedFilesAnother function that MS Excel comes with to save temporary files is AutoRecover. You can also retrieve your documents by copying the AutoRecover file location to This PC. For specific information and steps, please refer to this article: How to Extract Data from Corrupt Excel File.
2. Find the backup files created by the Excel backup function
It's another built-in function of Microsoft Excel. When users save a file, automatic backups will save the file that was saved last time as a copy. Automatic backups are very suitable for the backup of important files because there is no need to worry about files being permanently deleted. After the file is backed up, the backup copy is saved in the same folder as the original copy, and the backup file is saved with the XLK extension. Unlike automatic saving, automatic backups can only be set for one file at a time. To activate this function, follow the steps below:
a. Click the "File" tab and then click "Save As".
b. Follow the given route: Browse > Tools > General Options.
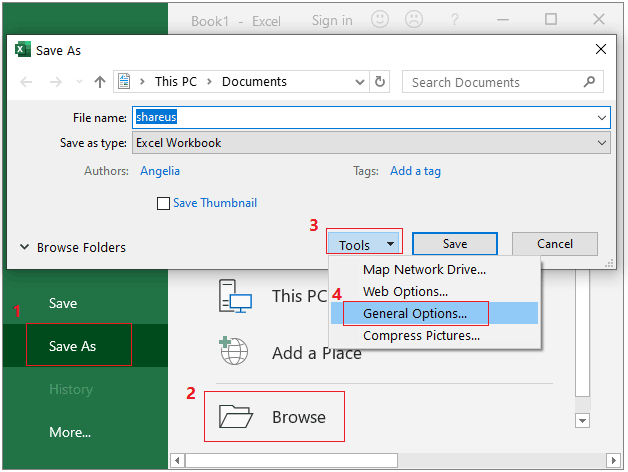
c. Tick the Always create backup.
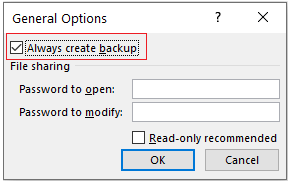
d. Click "OK" to confirm.
Please notes that this feature is effective for the specific files that have this feature set. Besides, it begins to back up files after the user saves the file the second time. If you don't set up this function for your file, move to the next method.
3. Retrieve Excel files with Windows backup
To retrieve deleted Excel files not in recycle bin, try the function of Windows backup. Follow these steps to restore your deleted files.
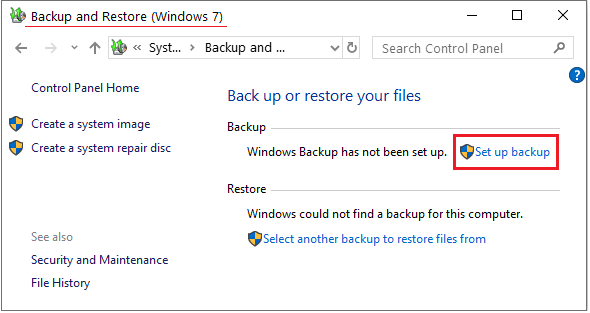
a. Open the Control Panel and select System and Security < Backup and Restore (Windows 7).
b. Click Restore my files.
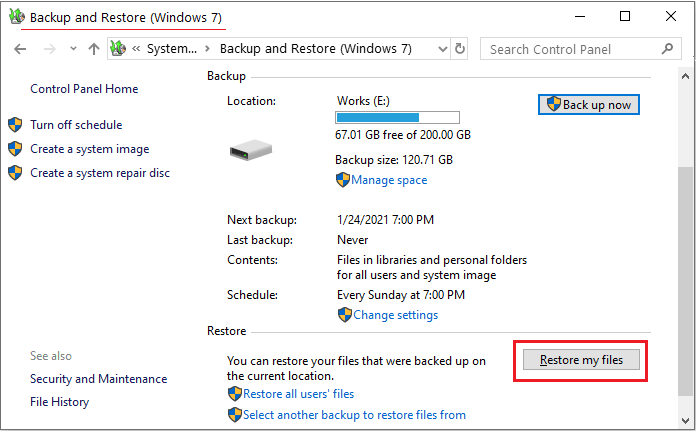
c. Search or browse for Excel files to restore and then choose the file location for your restored files on the next page.
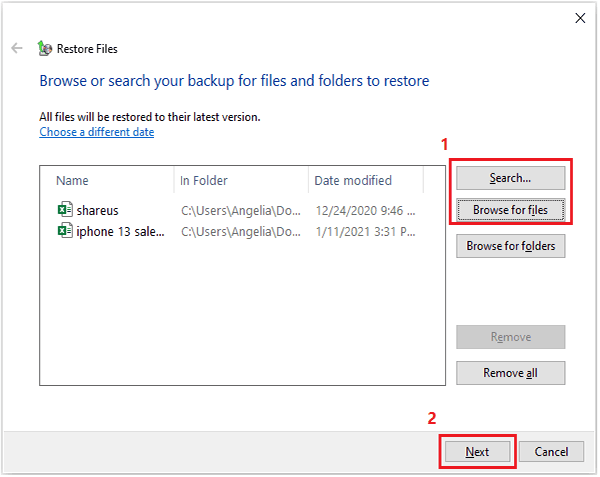
d. Click on the "Restore" button to confirm.
Windows backup is off by default. If you couldn’t find the button of Restore my files, then you need to activate it. Here are steps on how to activate Window backup.
a. Click Set up backup.
b. In the pop-up windows named "Set up backup", choose a drive to save your backup.
c. Choose "Let Windows choose" on the next page.
d. Click on Next to review your backup settings. You can change the schedule on this page.
e. Choose on "Save settings and run backup" to confirm.
4. Restore Excel files with File History
Windows File History allows you to recover deleted files that are not in Recycle Bin. And this function also needs to be activated to find the automatically saved files in the file history. File History is off by default. Ensure that File History is activated, so that Windows can automatically back up your files.
Here's how to activate File History:
a. Click on the "Start" button on the desktop.
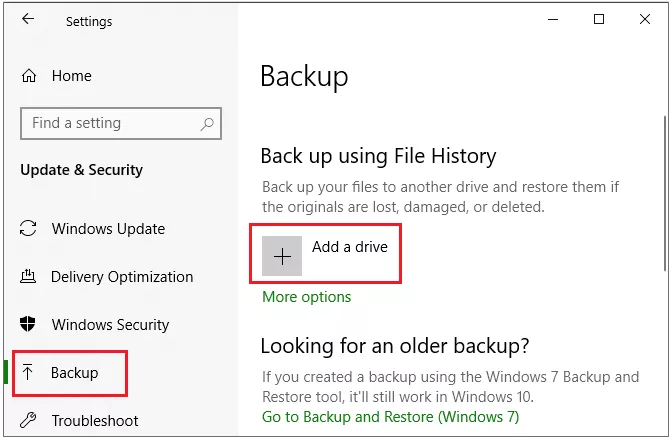
b. Follow the given route: Settings > Update and Security > Backup
c. In the "Back up using File History" section, click Add a drive.
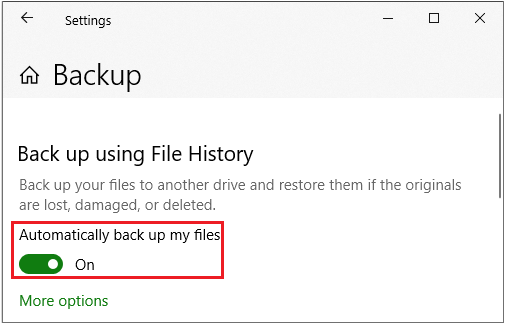
d. After selecting a drive, simply move the slider and turn on the "Automatically back up my files".
How to restore Excel files with File History:
a. In the search box on the taskbar, type file history and then select "Restore your files with File History"'.
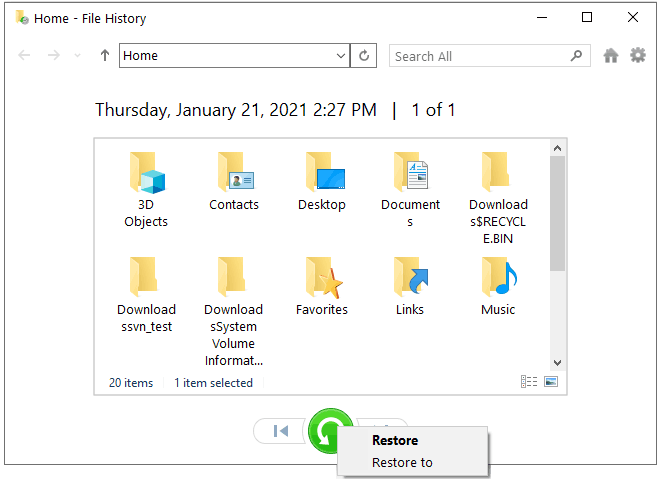
b. The pop-up interface will allow you to view your backups and restore files. Browse the available files and look for the file you need. You can preview them by right-clicking them and use the arrows to see all their versions.
c. When you find the version you want, select Restore to save it in its original location. To save it in a different place, right-click Restore, select Restore to, and then choose a new location.
![[Examples] Windows File Recovery (CMD) - Recover Formatted Data](../img/software/examples-windows-file-recovery-cmd-recover-formatted-data/examples-windows-file-recovery-cmd-recover-formatted-data-m.webp)
![[Examples] How to Recover Permanently Deleted Files Using Command Prompt in Windows 10](../img/software/examples-how-to-recover-permanently-deleted-files-using-command-prompt-in-windows-10/examples-how-to-recover-permanently-deleted-files-using-command-prompt-in-windows-10-m.webp)