6 Easy Fixes | CMD not Opening/Working in Windows 11/10

May 12, 2022
Command prompt is an important utility to handle administrative tasks in the Windows OS. The command prompt terminal allows you to execute advanced commands and scripts as well. But all of these functions can be invalid if you suddenly cannot open your CMD or it has stopped working.
Fortunately, by reading this post, you will know how to get the Command Prompt back to a working condition on Windows 11/10.
- CMD not opening in Window 11/10 - try 3 fixes
- 1. Create a CMD desktop shortcut
- 2. Open command prompt from file explorer
- 3. Open command prompt from task manager
- CMD not working in Windows 11/10 - try 3 fixes
- 1. Update the path system environment variable
- 2. Make changes in the windows services
- 3. Edit the local group policy editor
CMD not opening in window 11/10 - try 3 fixes
1. Create a CMD desktop shortcut
Step 1: Right-click any empty space on your computer's desktop, choose New and select Shortcut.
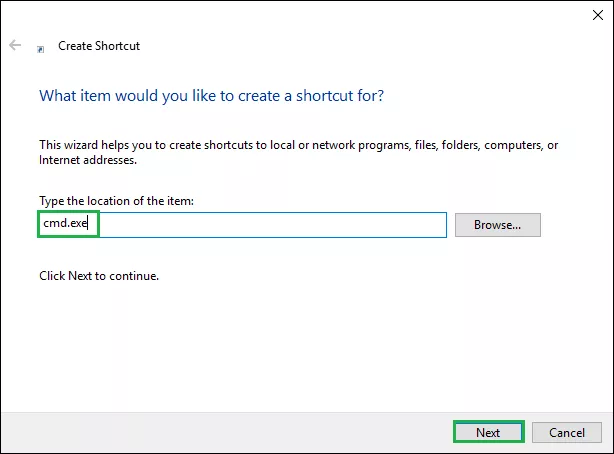
Step 2: In the Create Shortcut window, type cmd.exe and click Next.
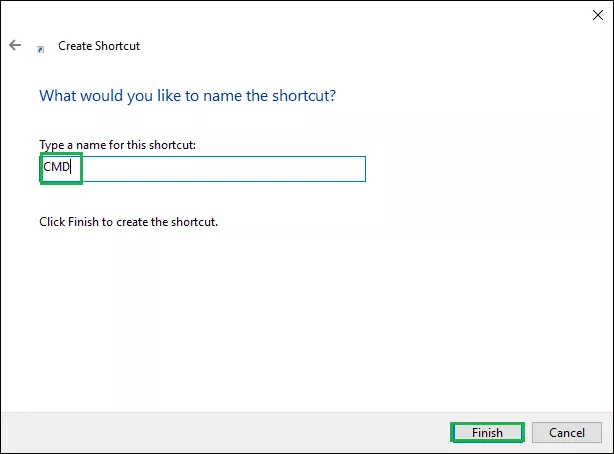
Step 3: Put a name for this shortcut and click Finish.
Step 4: After creating the command shortcut on your desktop, you can launch command prompt by double-clicking the shortcut.

2. Open command prompt from file explorer
Step 1: Press Windows + E to open file explorer.
Step 2: Navigate to the local disk of your windows.
Step 3: Look for Windows folder.
Step 4: Inside the Windows folder, find the folder named System32 and double-click to open it.
Step 5: Look for cmd and right-click it, then select Run as administrator.

3. Open command prompt from Task Manager
Step 1: Press Ctrl + Shift + Esc to open Task Manager.
Step 2: On the menu bar, click File and then click Run new task.

Step 3: A Create new task dialog box will present in your screen. Fill the address space with cmd or cmd.exe.
Step 4: Before click OK, check the box below the address space saying Create this task with administrative privileges.

CMD not working in windows 11/10 - try 3 fixes
1. Update the path system environment variable
Step 1: Press Windows + R to open Run, type sysdm.cpl to open the system configuration.
Step 2: In the Advanced tab, hit environment variables…
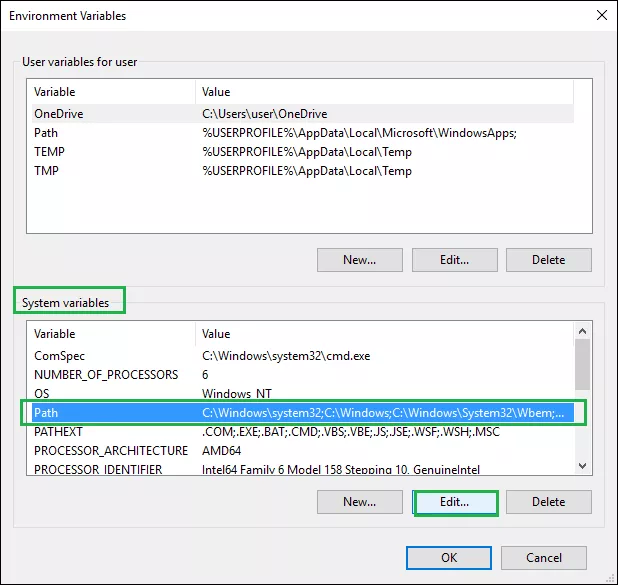
Step 3: In the System variables, click Path and Edit...
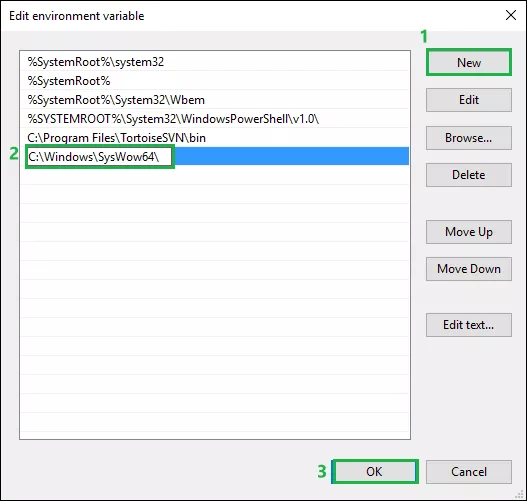
Step 4: In the Edit environment variable, click New and type the path given below.
C:\Windows\SysWow64\Then click OK.
2. Make changes in the Windows services
Step 1: Press Windows + R key together to open Run. Type services.msc and hit Enter to open Windows services.
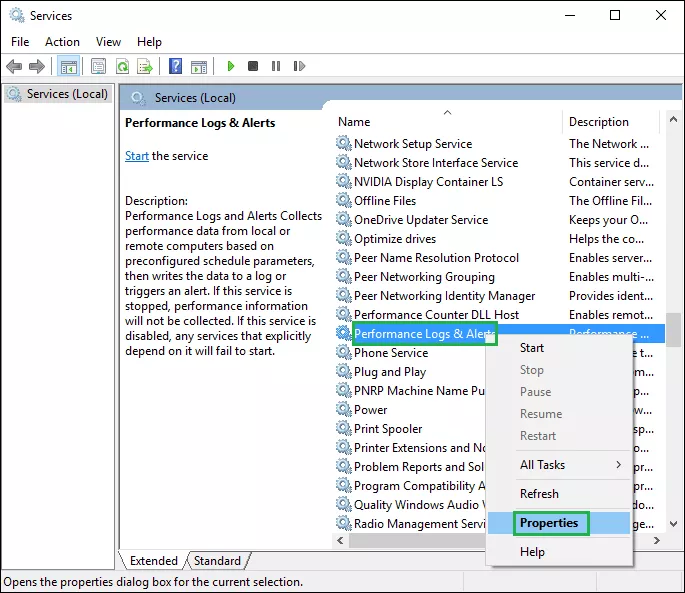
Step 2: Locate the Performance logs & Alerts service, right-click it and choose Properties.
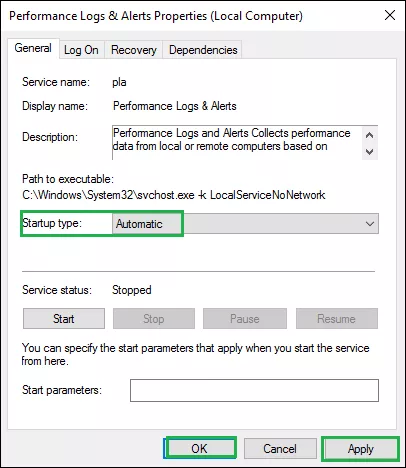
Step 3: In the General tab, change the Startup type to Automatic. Then click Apply and OK.
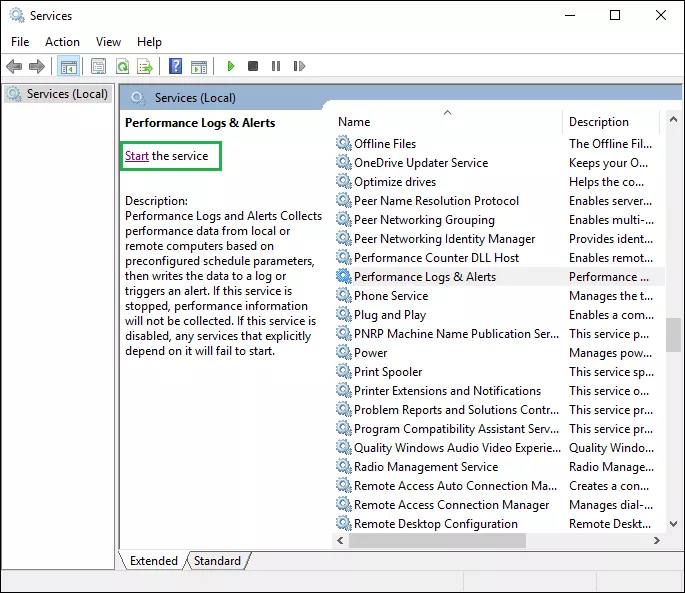
Step 4: Back in the Services window, click the Start link in the left pane to start this service.
3. Edit the local group policy editor
Step 1: Press Windows + R key together to open run dialog, type gpedit.msc and hit Enter to open local group policy editor.
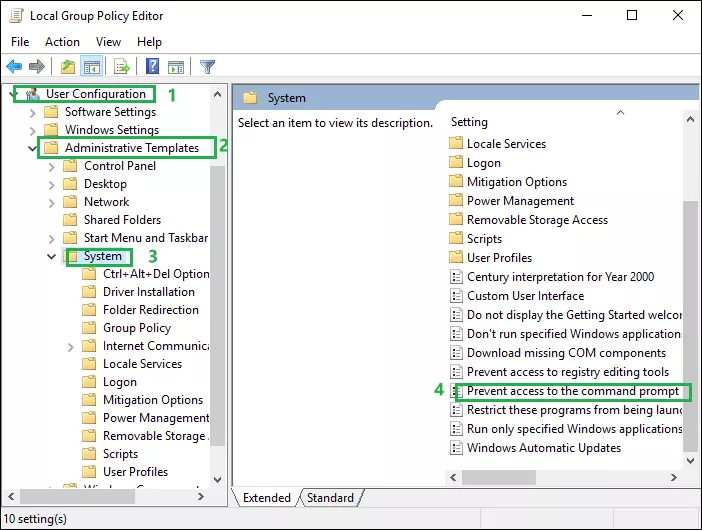
Step 2: Navigate to User Configuration > Administrative Templates > System.
Step 3: On the right side, look for a setting named Prevent access to the command prompt and double-click the setting.
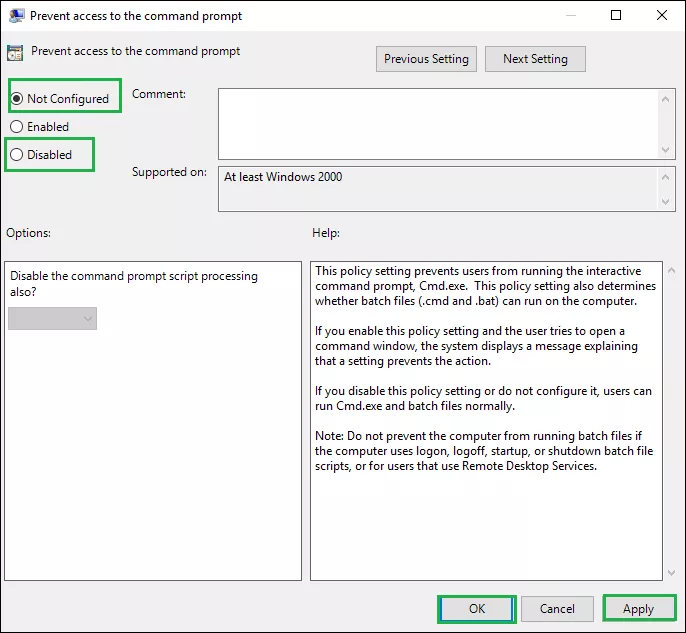
Step 4: Click Disabled or Not configured to access to the command prompt. Then click Apply and OK.
![[Examples] Windows File Recovery (CMD) - Recover Formatted Data](../img/software/examples-windows-file-recovery-cmd-recover-formatted-data/examples-windows-file-recovery-cmd-recover-formatted-data-m.webp)
![[Examples] How to Recover Permanently Deleted Files Using Command Prompt in Windows 10](../img/software/examples-how-to-recover-permanently-deleted-files-using-command-prompt-in-windows-10/examples-how-to-recover-permanently-deleted-files-using-command-prompt-in-windows-10-m.webp)