[Drive Repair] Drive Not Showing Up in Windows 11

July 14, 2023
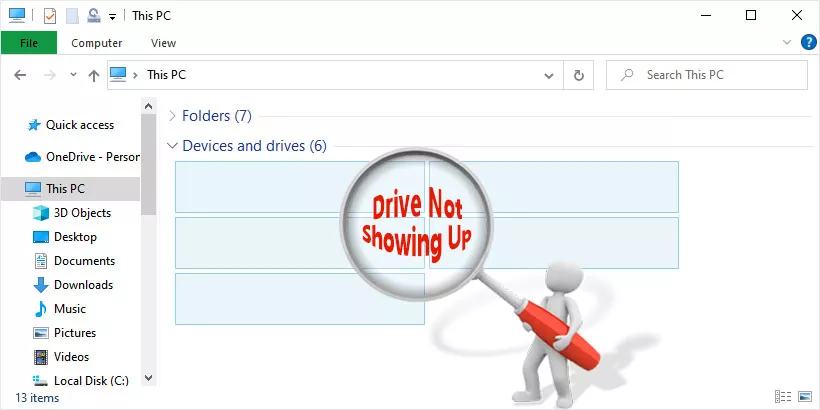
When you want to view the files stored in the drive, you find that the related drive is not showing up in the File Explorer. This is a very anxious Windows error, which makes it unable to view the relevant files or images previously stored in that drive, even including Windows system files. Don't worry, this article will show you the reasons and repair methods for this problem of the drive not showing up in Windows 11.
Part 1: Why Drive Not Showing Up
If you are facing the problem of the drive missing or not showing up, then you need to know the reason for this problem to happen first. This missing drive is either not showing up in File Explorer or not showing up in Disk Management. The most common reasons for this to happen are:
1. The most common reason is that the drive has been formatted or accidentally deleted. When trying to resize or reformat a partition, you may accidentally delete the drive. Hence the drive not showing up.
2. When you update Windows, the new system changes some system settings and configurations. So, the next time you try to boot, you may see the error message: "Drive Missing". And this can also be caused by improper operation.
3. The reason for the drive not showing up in File Manager could be that the drive is hidden. You can check if the hidden option is turned on in Disk Management.
Part 2: How to Repair Drive Not Showing Up
If your drive is not showing up in the File Explorer, you can try the following methods to repair it.
Method 1: Adding Drive Letter with Disk Management
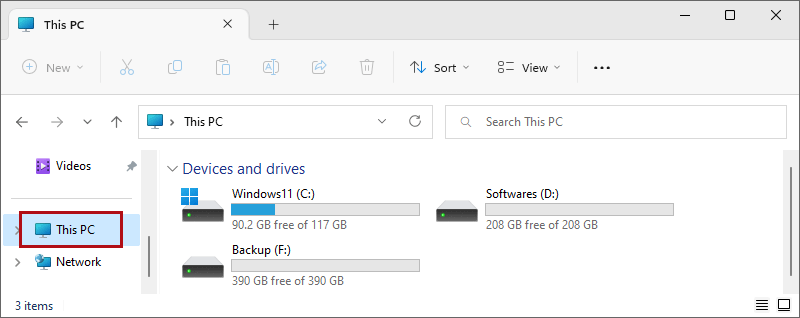
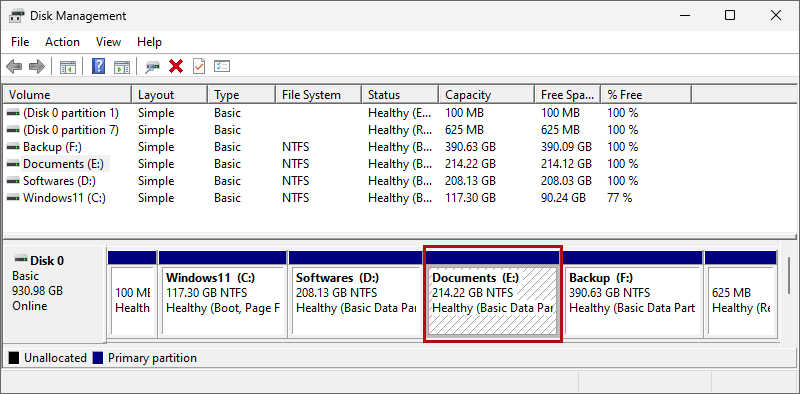
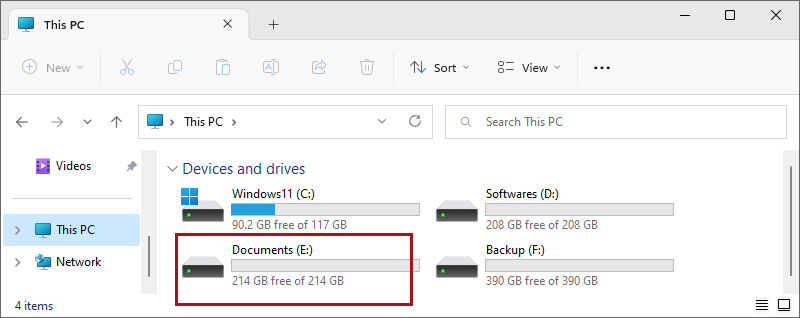
As shown below: open This PC and find the E drive is not showing up under Devices and drives. Follow the steps below to recover the E drive by adding a drive letter to the partition in Disc Manager.
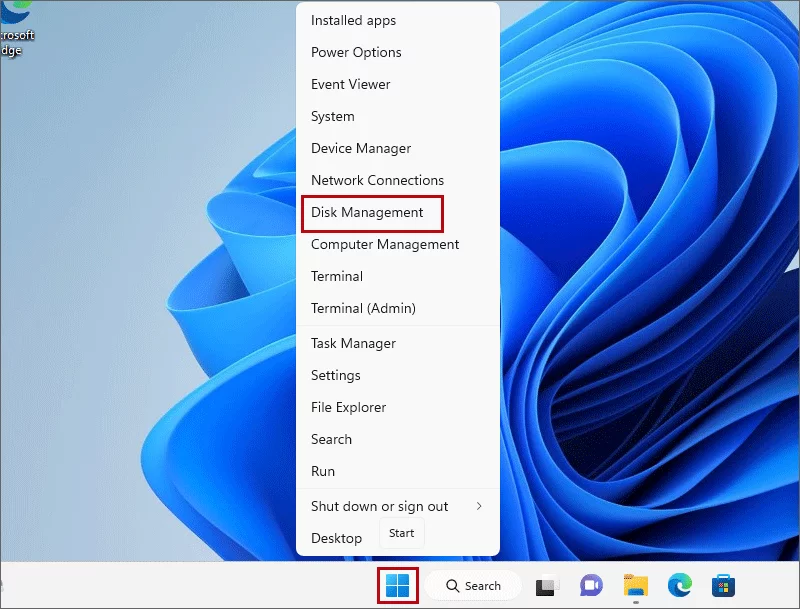
Step 1: Right-click Start on the taskbar to open the menu, then select Disk Management on the menu.
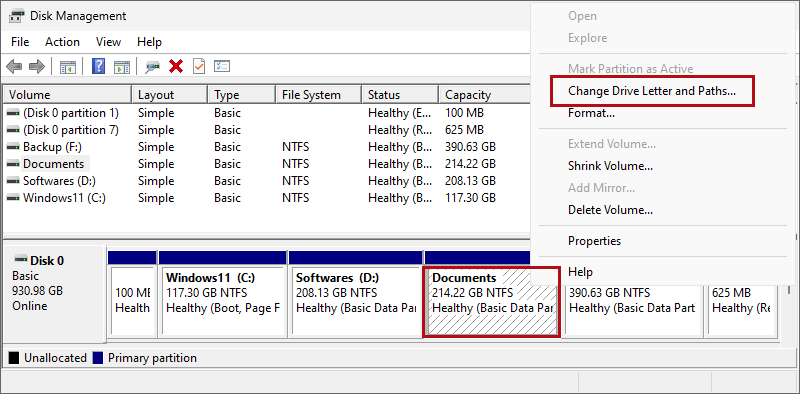
Step 2: In the Disk Management window, find the Documents partition that is missing the drive letter and right-click on it to open the menu. Then click on the Change Drive Letter and Paths... item on the menu.
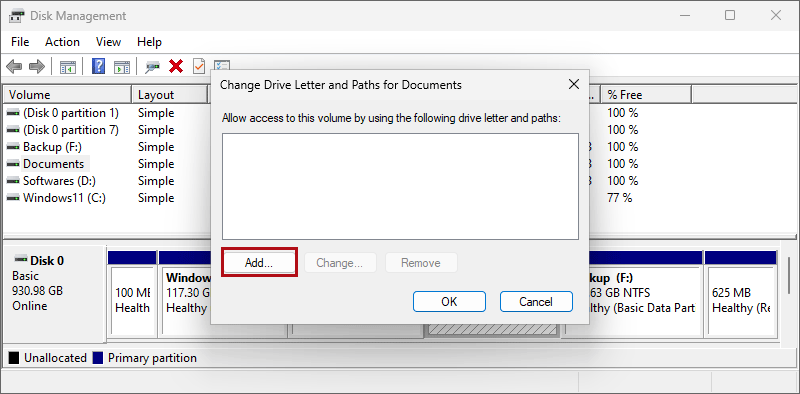
Step 3: Click on “Add…” to allow access to this volume by using the following drive letter and paths.
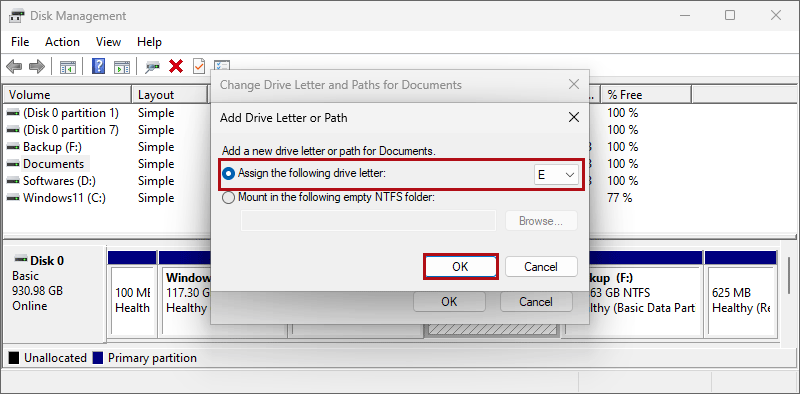
Step 4: Select Assign the following drive letter E, then click OK.
Step 5: Complete adding a drive letter to the Documents partition: E.
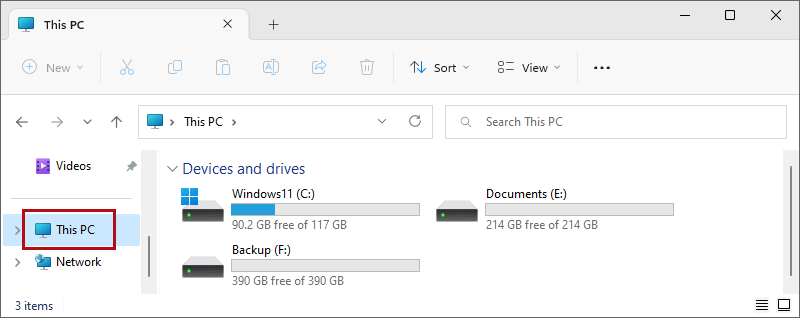
Step 6: Open This PC in the File Explorer, and see that the E drive is showing up successfully.
Method 2: Add Drive Letter with Diskpart Command
As a further example, the D drive under Devices and Drives is not showing up, use the diskpart command in the Command Prompt to add the drive letter to recover the D drive in the following steps.
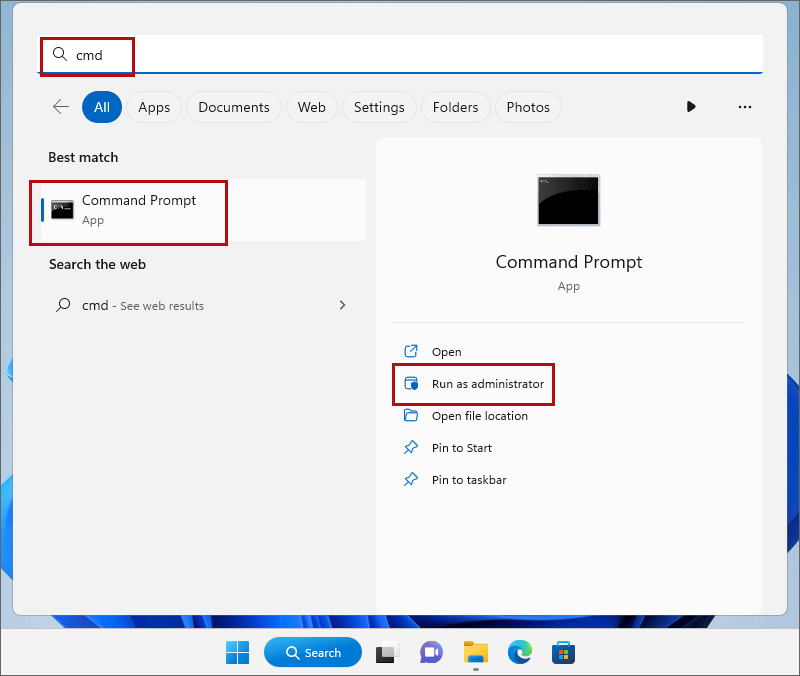
Step 1: Type cmd on the Windows search bar, find the Command Prompt and click Run as administrator to open the CMD program.
Step 2: In the CMD program window, type the command and press Enter: diskpart.

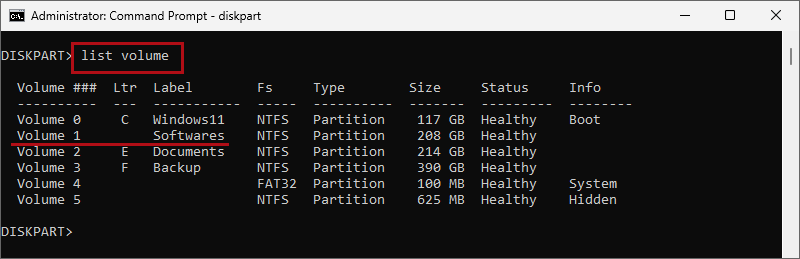
Step 3: Type the command and press Enter: list volume to list all volumes. Seeing that the drive letter for volume 1 has missing.
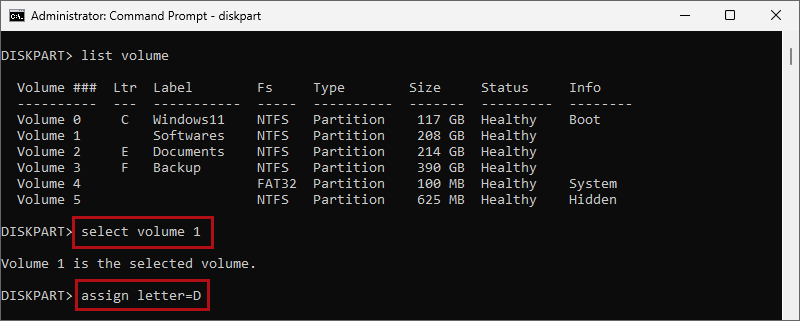
Step 4: Type the command and press Enter: select volume 1. Then type the command and press Enter: assign letter=D
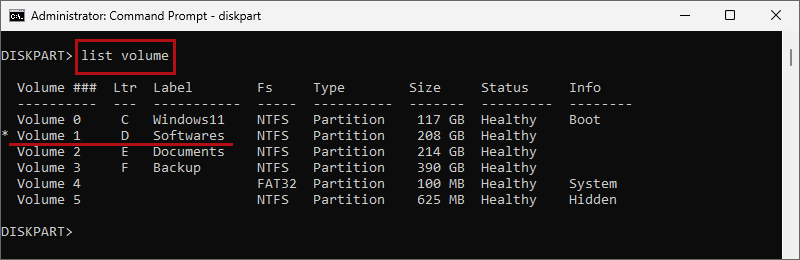
Step 5: Type the command and press enter: list volume to list all volumes again. Seeing that volume 1 has finished assigning the drive letter: D.
Step 6: At last, type exit and press Enter to leave Diskpart.

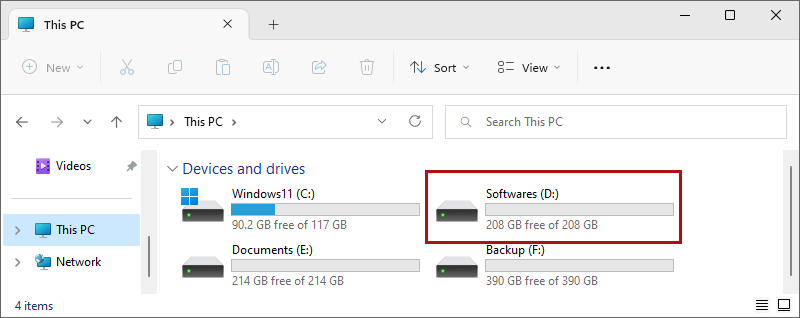
Step 7: Open This PC in the File Explorer, see that the missing drive is showing up.
Part 3: What to Do If Lost Files
After solving the problem of the drive not showing up according to the above two methods, you may find that the original files and images stored in the hard drive are missing. This may be due to the loss of partition table which causes the partition not showing up and files missing.
To repair this situation, you require professional data recovery tools. Here I want to introduce you to a powerful data recovery tool: iSunshare BitGenius, it can quickly scan your drive and list all the recoverable files and images. It is very simple to operate and you can recover the data you want in just a few steps.
Download: iSunshare BitGeniusThe steps to operate this data recovery software are simply shown to you below:
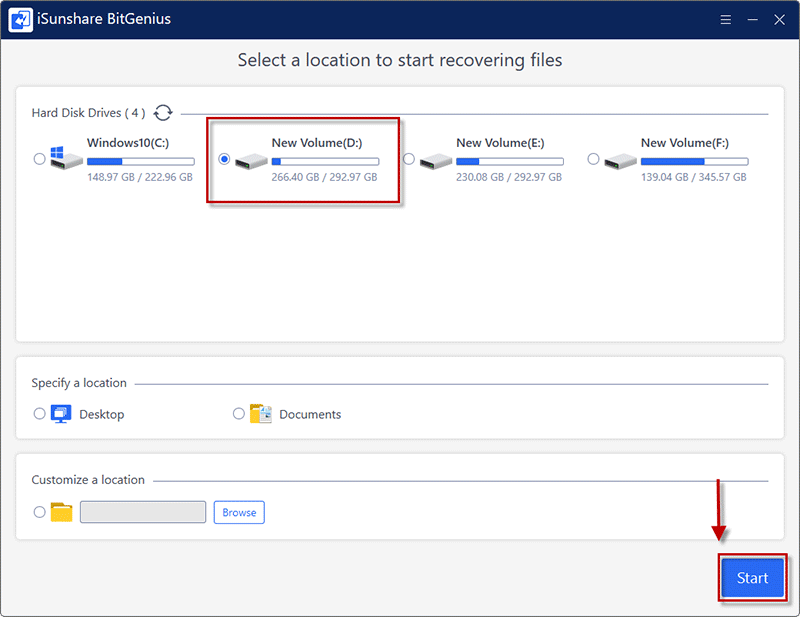
Step 1: In the BitGenius main interface, select the drive that needs to recover data and click on the Start button.
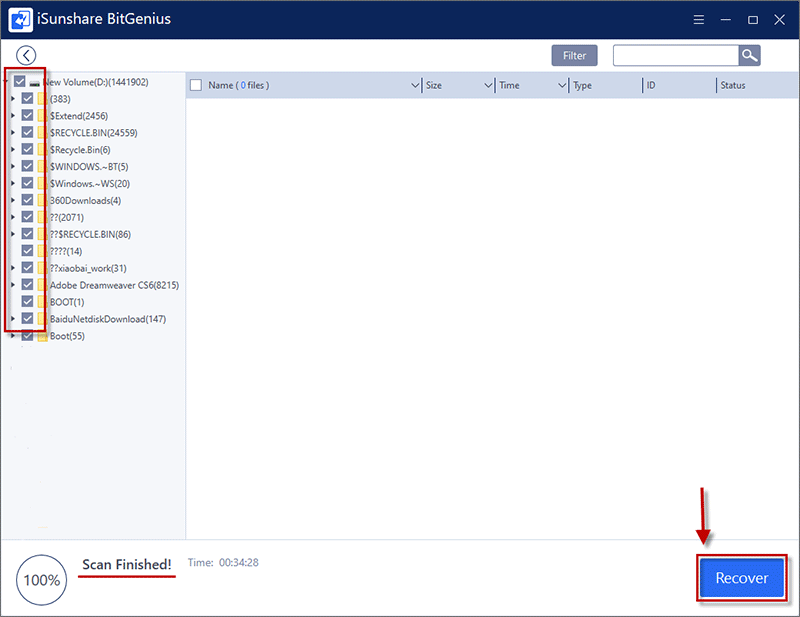
Step 2: BitGenius will start scanning automatically. Once the scan is complete, you will be presented with a list of recoverable files. You can select the ones you want to recover.
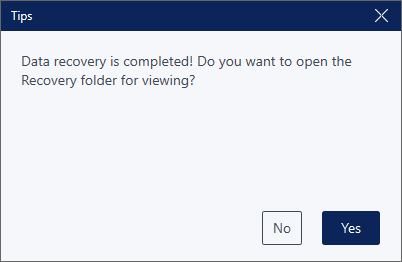
Step 3: Once the recovery process is complete, you can choose a location to save the recovery result, and have a viewing.
iSunshare BitGenius also has a powerful screening function that can help you quickly filter out the files you want to recover. For detailed steps please click the link to view the article.