Full Fix: Windows Sockets Registry Entries are Missing

May 16, 2022

Windows sockets are supposed to help users connect the internet. But sometimes you may encounter the error message "Windows sockets registry entries required for network connectivity are missing". This is because the required Windows sockets registry entries get corrupted or missing after Windows update, making Winsock unable to process the request for internet and your internet connection will not be fully functional. Here are five solutions for you to fix the missing Windows sockets registry entries error.
1. Run network troubleshooter
Right-click on the network icon in the system tray and select Troubleshoot problems, wait until the process completes.

2. Reset Windows sockets
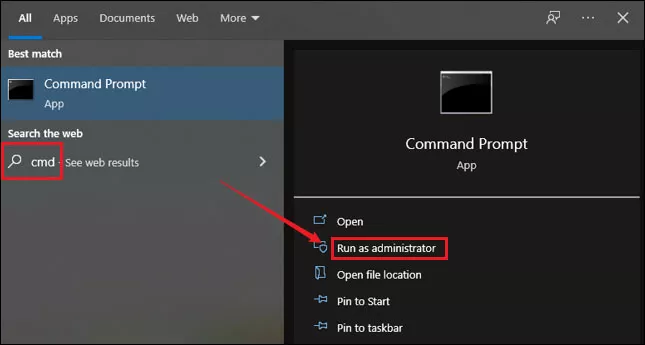
Step 1: Type cmd in the search box on the taskbar and hit Enter. Select Run as administrator to open Command Prompt.
Step 2: Run the below command one by one in the command prompt window and hit Enter after each to execute it.
netsh winsock reset
netsh int ip reset
ipconfig /release
ipconfig /renew
ipconfig /flushdns
After all the commands are completed, reboot your computer to check if you can access the internet.
3. Via netsh int ipv4 install command
Step 1: Same as step 1 in method 2, enter cmd in the search box and choose run as administrator to open Command Prompt.
Step 2: Enter netshint ipv4 install and hit Enter to run this command.
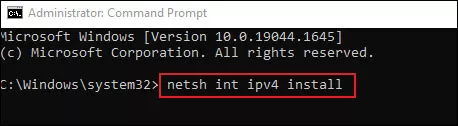
Restart your computer and check if the error is solved.
4. Disable ipv6
Step 1: Press Windows+R to open run command and type regedit in the box. Press Enter to open Registry Editor.
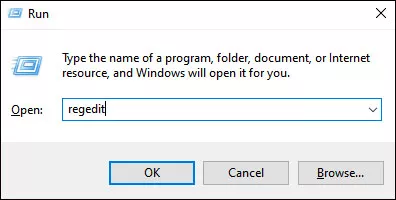
Step 2: Navigate to the below path:
Computer\HKEY_LOCAL_MACHINE\SYSTEM\CurrentControlSet\Services\Tcpip6\Parameters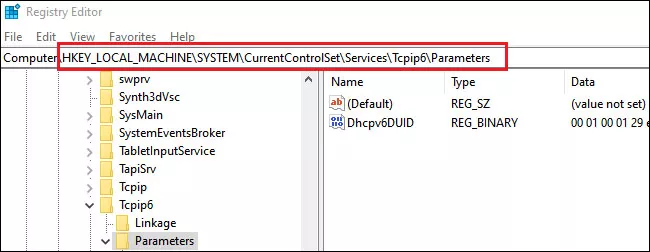
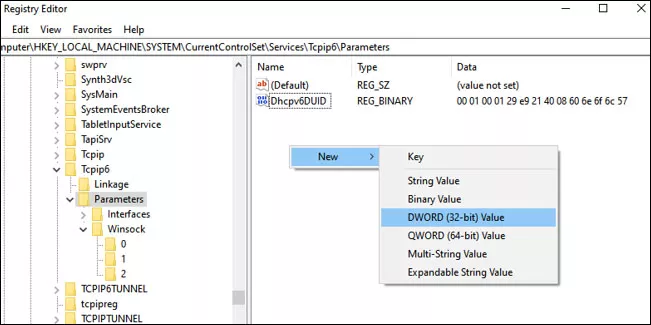
Step 3: Right- click on an empty area in the left pane, select New>DWORD(32-bit) Value to create a new value and rename it as DisableComponent.
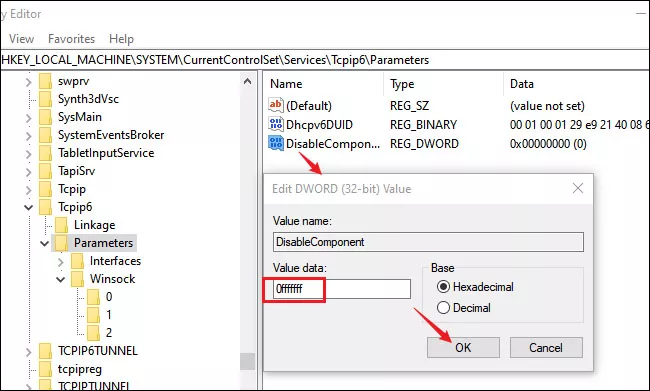
Step 4: Right-click on DisableComponent and select Modify to edit this value. In the pop-up window, change the value data to 0ffffffff and click OK to save changes.
Then reboot your computer to apply changes and check if you can access internet now.
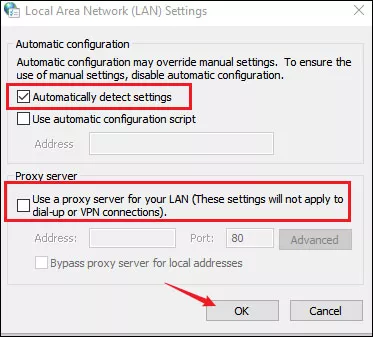
5. Disable proxy
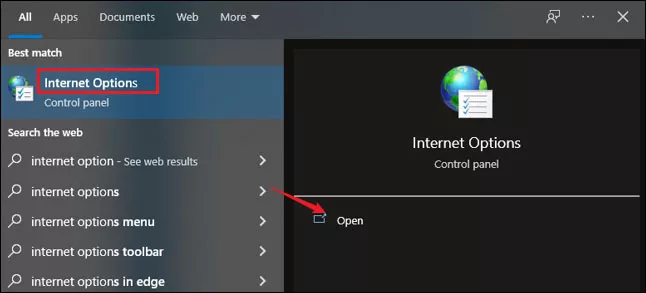
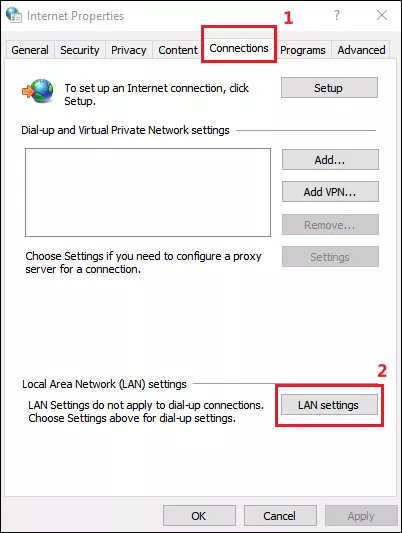
Step 1: Type internet options in the search box on the taskbar and press Enter. Then select Internet Options in the menu.
Step 2: In the Internet Properties window, select Connections > LAN settings.
Step 3: Make sure Automatically detect settings is checked and Use a proxy server for your LAN is not checked. Then click OK to save your change.