How to Create a MacOS Bootable USB Drive on Windows 10/11

November 2, 2022
If you someday find that your Mac refuses to start, a system repair can be done with the macOS bootable USB installation media, with which you can reinstall or reset the system. It's not a difficult matter to create the macOS bootable USB drive on a Mac device, but what to do if you don't happen to have any other Apple device around? In such case, you can seek for a Windows computer, whether Windows 11, 10 or 7 is feasible. This article will guide you to create a bootable macOS USB installer in Windows.
Requirements:
To create a macOS bootable drive, you will need to prepare for the following:
- A USB drive with at least 16GB of storage
- A copy of macOS DMG file
You'd better back up the important data on the USB drive since the drive will need to be formatted afterwards.
Guide on creating macOS bootable USB drive:
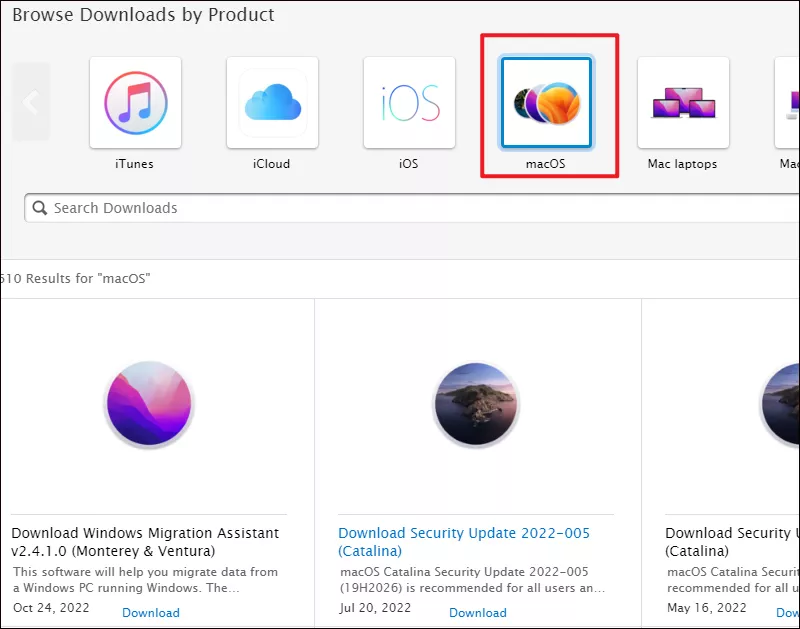
1. Download DMG file
Download the version of macOS which is compatible with your Mac device from the Apple Download center, and you will get the DMG files for the latest version of macOS Catalina, macOS Mojave or macOS X Lion.
2. Get a trial copy of TransMac
Step 1: Connect the USB drive to your Windows device and make sure all the data is backed up.
Step 2: Download and install TransMac on your Windows computer.
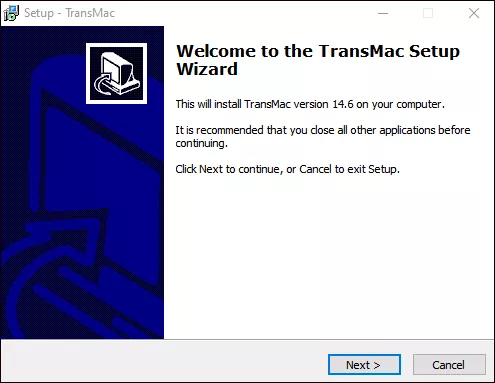
Though the TransMac is a paid software, it also offers a 15-day trial. If you just prepare for a bootable USB this time, the trail version is more than enough.
Step 3: After you finished installation, click on Run button to continue.

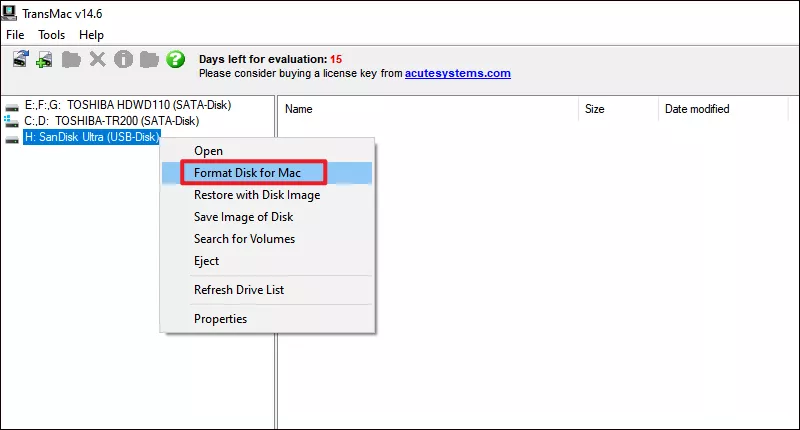
3. Format USB drive
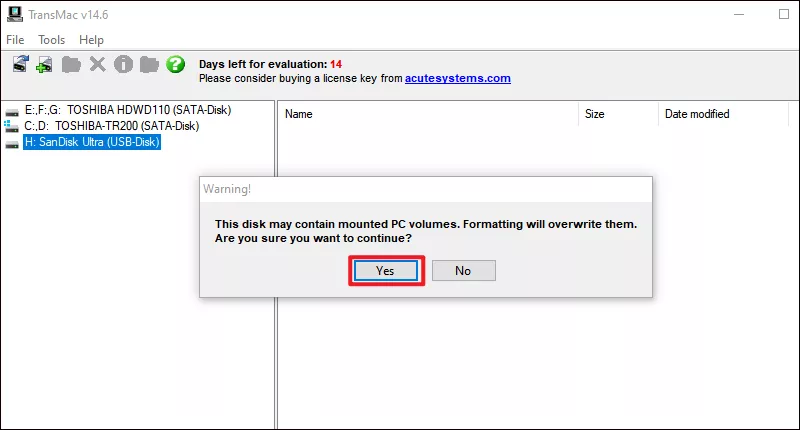
Step 1: In TransMac, right-click on your USB drive and select Format Disk for Mac on the left pane.
Step 2: Click Yes if the Warning window pops up.
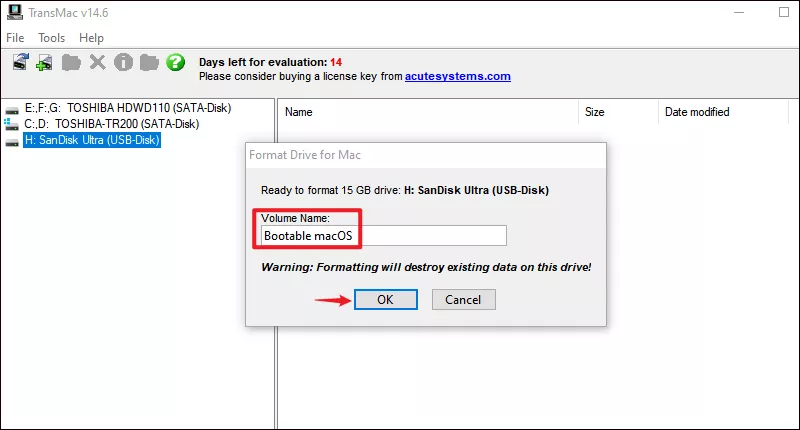
Step 3: Name the volume and click OK in Format Drive for Mac prompt.
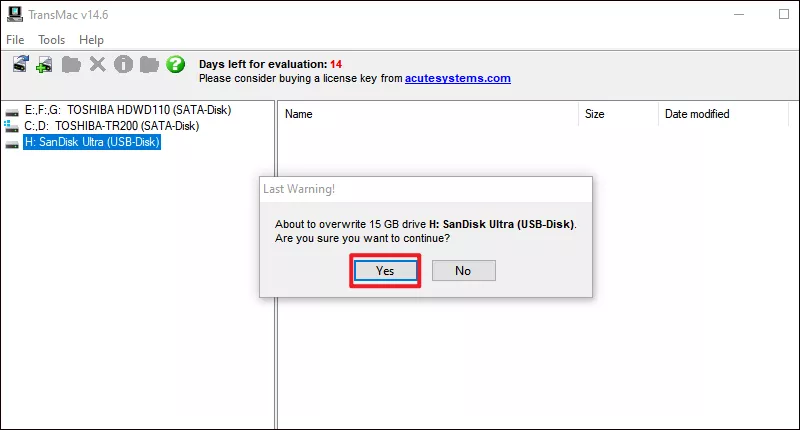
Step 4: Confirm the format by clicking Yes when you are presented with last warning.
4. Burn DMG to the USB drive
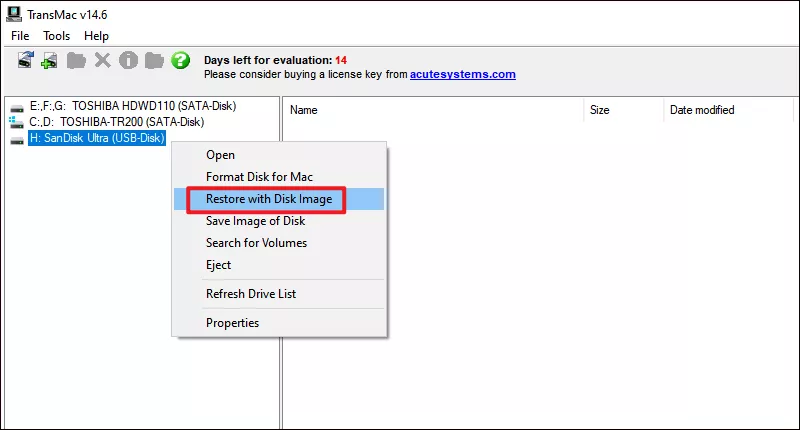
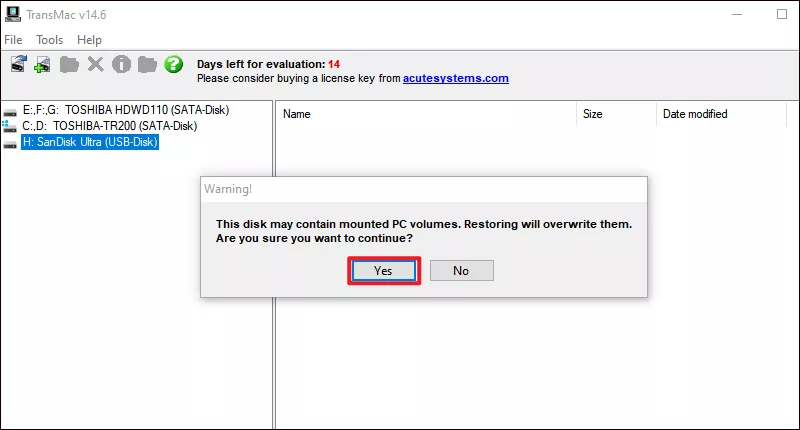
Step 1: Right-click the USB drive and select Restore with Disk Image.
Step 2: Click Yes to continue wiping the data from the USB drive.
Step 3: Click the three dots to browse the DMG files containing macOS installation files.
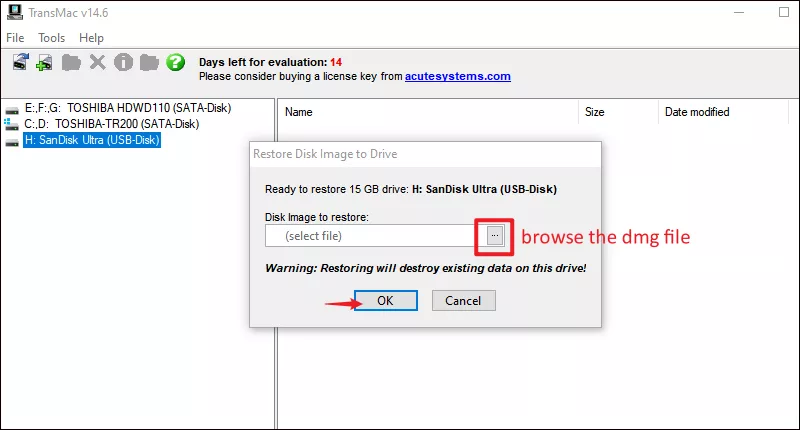
Step 4: Click Yes to go ahead if you are asked for confirmation. Restoring image to Disk may take 15 minutes to 45 minutes and you will see the Restore Complete prompt after done.
Once finished, the bootable USB drive should be ready and you can insert it to your Mac device and begin installing.