How to Speed up Slow Internet on Windows 11

January 19, 2022

Slow internet is a frustrating thing. A lot of people blame slow progress and terrible connectivity on the internet connection, but that's not the case. Slow internet speeds can be due to multiple problems, such as system settings, apps, and background processes.
If you are suffering from slow internet and want to make your WIFI faster, here are some small tips for how to speed up your Windows 11 internet connection. You can try one or more of these methods to solve your problem.
If you want to know more relevant information about internet speed, readHow to Check NIC (Ethernet & WIFI) Speed in Windows 10.
Solution 1: Change the bandwidth limit to zero
Bandwidth is often mistaken for Internet speed, which refers to the volume of information that can be sent over a connection in a measured time - calculated in megabits per second (Mbps).
Windows by default keeps some amount of bandwidth for its application and operation requirements. You can limit the reservable bandwidth from Group Policy editor.
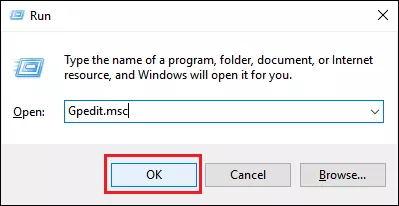
Step 1: Press Windows+R to launch Run command.
Step 2: Type in Gpedit.msc, then click OK.
Step 3: Navigate the following path: Computer Configuration > Administrative Templates > Network > QoS Packet Scheduler > Limit reservable bandwidth.
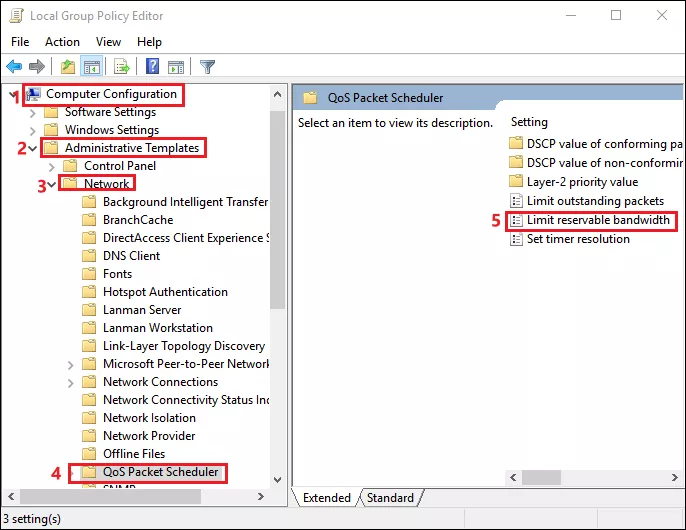
Step 4: When you click Limit reservable bandwidth, it should open a new window, where it must be in Not Configured mode.
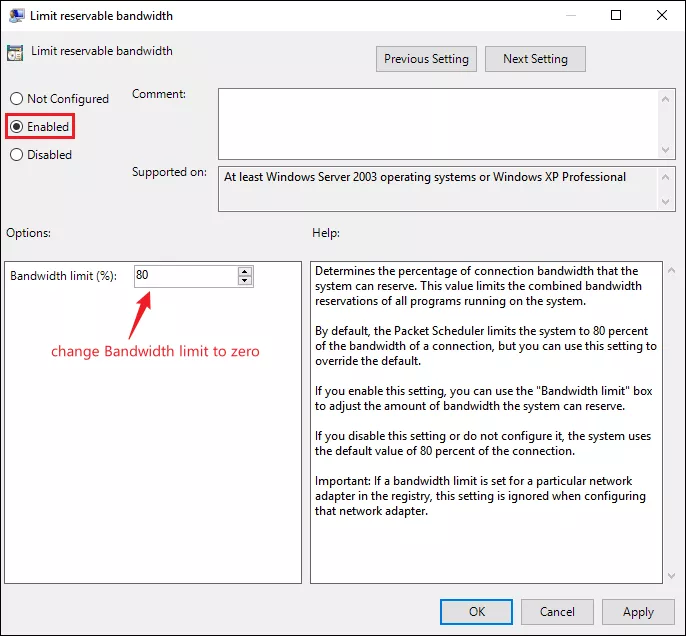
Step 5: Change the mode to Enabled and reduce the Bandwidth limit to Zero.
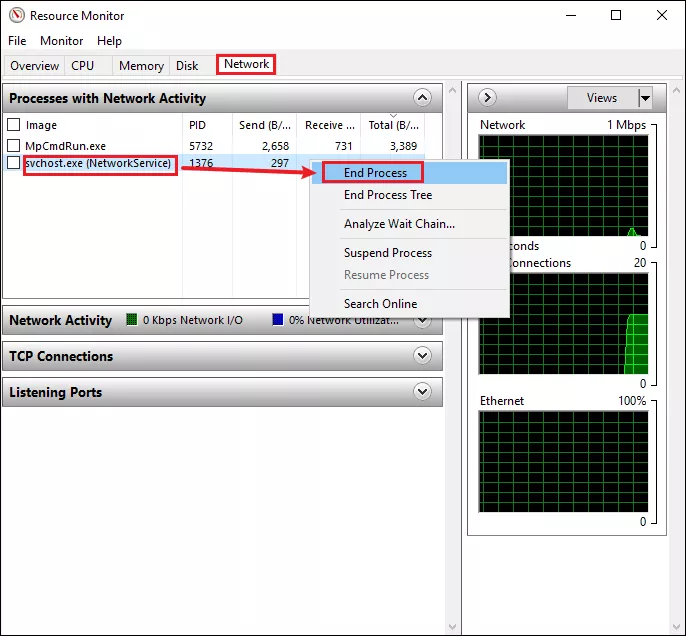
Solution 2: Close background programs consuming too much data
Some apps run in the background and consume a certain percentage of bandwidth, thereby slowing the internet speed. In addition to slowing down the internet, these apps also slow down the system, which makes it all the more necessary to terminate them.
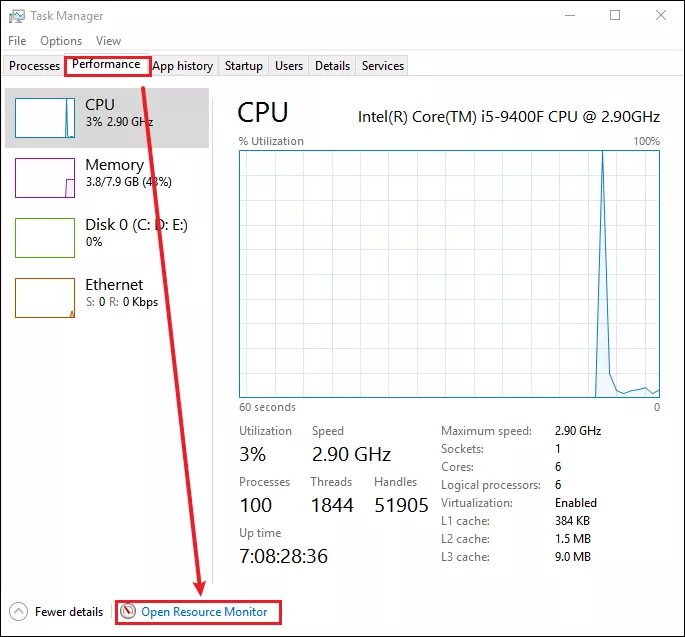
Step 1: Press Ctrl+Shift+Esc to open the Task Manager.
Step 2: Navigate to the Performance tab and click Open Resource Monitor at the bottom of the Task Manager, this will open the Resource Monitor window.
Step 3: Navigate to the Network tab, right-click the task you want to terminate, and select End Process from the context menu.
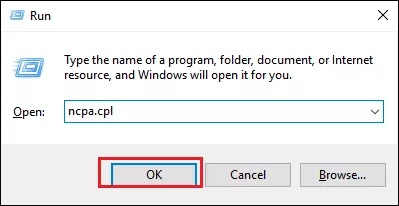
Solution 3: Change the DNS server
DNS server contains the name of website along with the corresponding IP address. The selection of the DNS server is by default, set to automatic - which may cause a slow internet connection. In this case, it is recommended to switch to an open-source DNS server.
Step 1: Press Windows+R to launch Run command.
Step 2: Type in ncpa.cpl, then click OK.
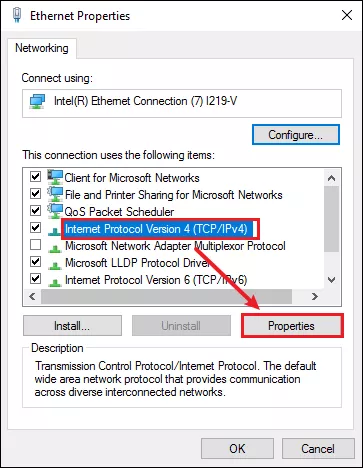
Step 3: Right-click your network adapter and click properties.
Step 4: Find and select Internet Protocol Version 4(TCP/IPv4). Then click on Properties.
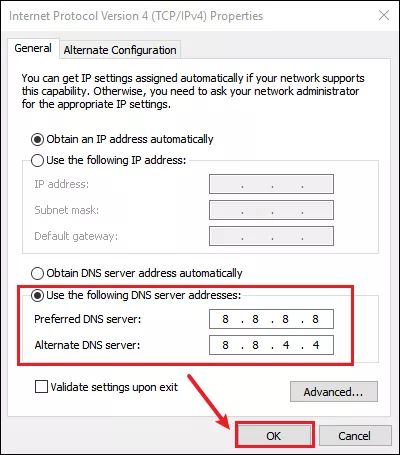
Step 5: Select Use the following DNS server addresses in the Internet Protocol Version 4(TCP/IPv4)Properties dialogue box, and enter the following in the fields below it.
Preferred DNS server: 8 . 8 . 8 . 8
Alternative DNS server: 8 . 8 . 4 . 4
Now click OK.
Solution 4: Empty the TEMP files
Overpopulated Temp folder may reduce your browsing speed over time. Here's how you can delete the Temp folder.
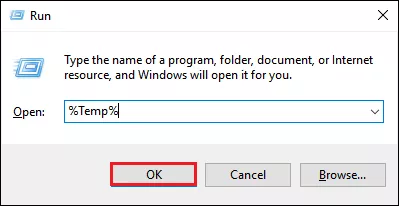
Step 1: Press Windows+R to launch Run command.
Step 2: Type in %Temp%, then click OK.
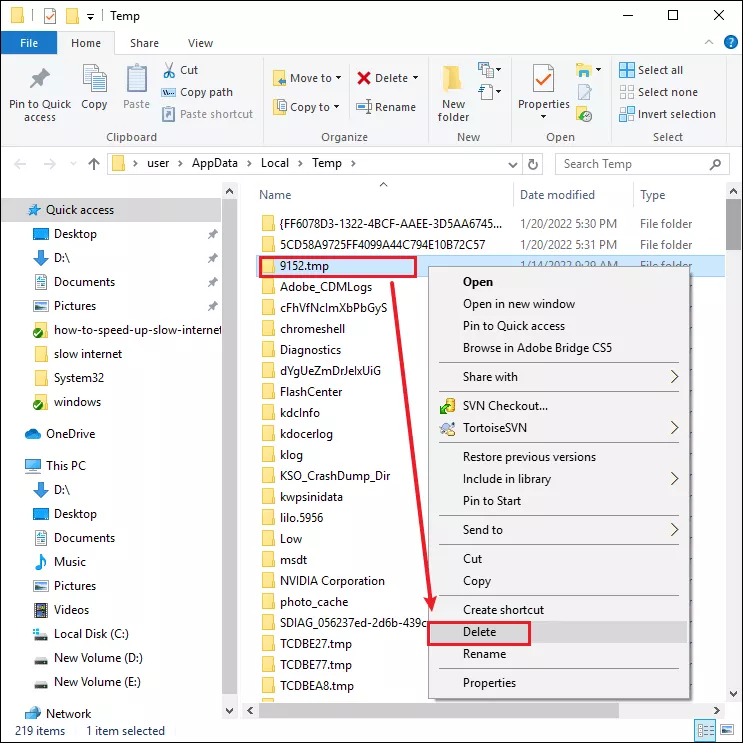
Step 3: Right-click any of the selections and from the menu select delete.
Final word
These are the four ways to increase internet speed on Windows 11, you will experience a improved speed after making the above adjustments.