Mount Google Drive as a Local Drive on Windows: Expand Disk Space for Free

April 9, 2024
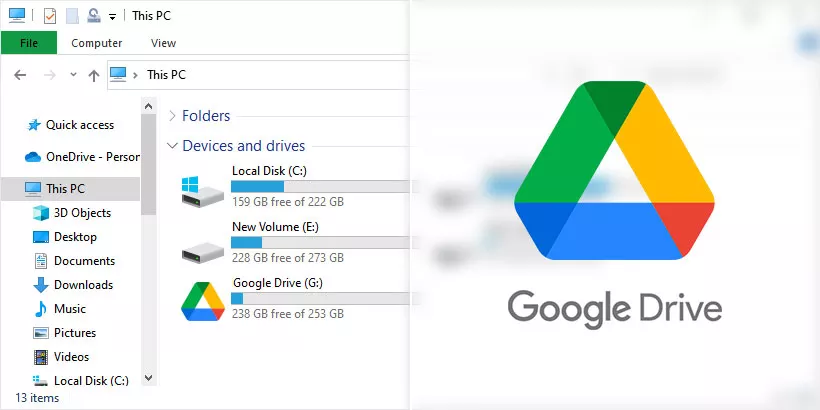
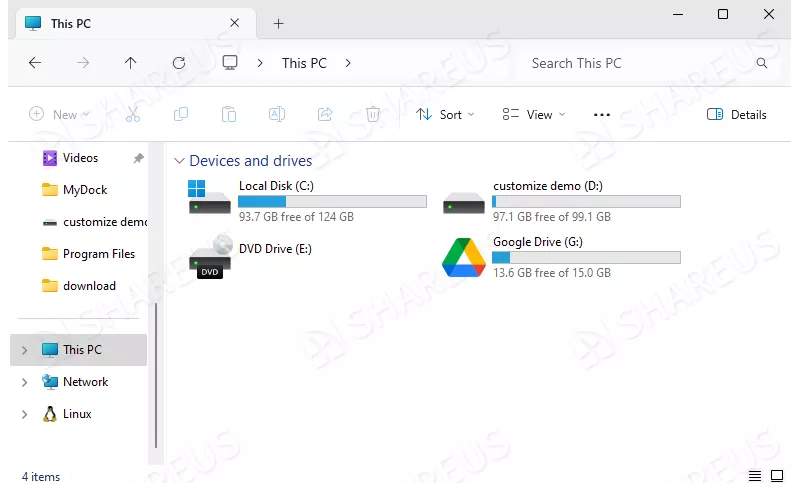
Be annoyed with this thing - every time you want to manage the resources saved in Google Drive, you must launch the browser and log in to your Google Account. Sometimes, you may also need to log in again when using a different browser or user profile. Fortunately, you can solve this issue by mounting Google Drive as a local drive on Windows. By this way, you can easily operate your resources stored in your cloud drive, just like managing them on your local drive. Meanwhile, you will get an extra 15 GB free disk space from Google Drive.
The entire operation can be divided into three main steps: download and install the Google Drive Desktop package, connect your Google Drive account, and configure the Google Drive Desktop. So without further delay, let's begin.
Proc 1: Download and Install the Google Drive Desktop Package
This step is same as installing any other software.
Step 1: Search the term "google drive download" in your search engine.
Step 2: Open the Google Drive Desktop download page. Generally, the URL is https://www.google.com/drive/download.
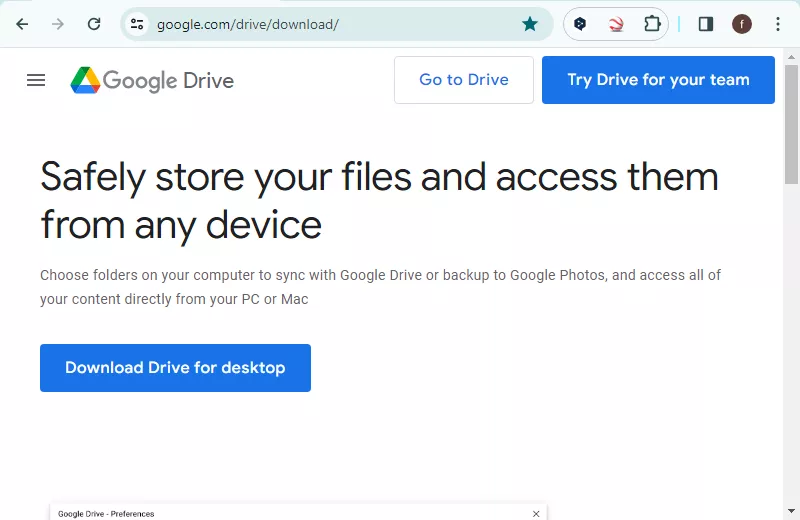
Step 3: Download the installation package to your computer.
Step 4: Locate the downloaded package and install it, just like installing any other software application.
Tips: Add its shortcut to your Desktop through checking the corresponding checkbox.
Proc 2: Connect Your Google Drive Account
This section requires a stable network connection to sign in to your Google account.
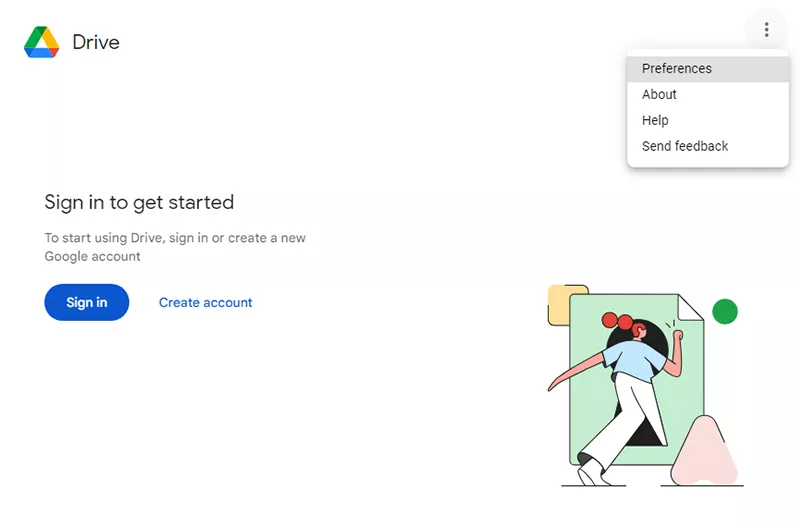
Step 1: Click "Launch" and select the "Get started" option.
Step 2: Click "Sign in" on the page and follow the prompt to complete the sign in process.
Tips: You can pre-config the application through click the three dots on the top-right corner of the page. And I will also show how to configure it in the next section.
Proc 3: Configure the Google Drive Desktop
Google Drive is now mounted as a local drive in Windows. You can proceed to configure Google Drive Desktop options to customize the experience.
Change the cache location and limit cache size
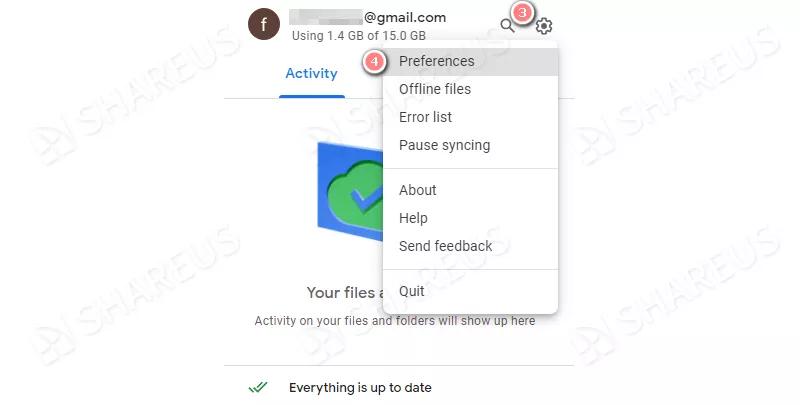
Step 1: Click the system tray icon in the right of taskbar.
Step 2: Right-click on Google Drive Desktop icon and click the gear icon on the pop-up menu.

Step 3: Select "Preferences" options to open "Google Drive Preferences" window.
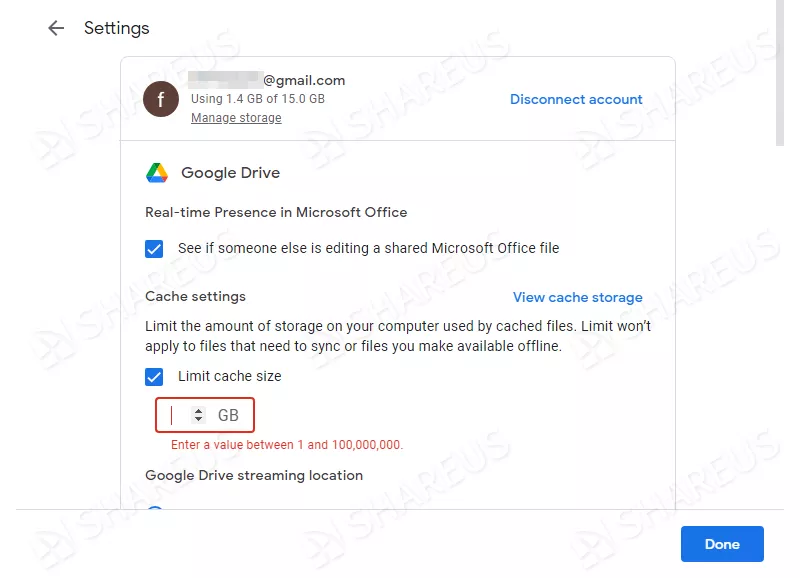
Step 4: Click the gear icon on the top-right corner of that window.
Step 5: Check the "Limit cache size" option and set your desired cache size in that page.
Step 6: Next, scroll down to locate the "Local cached files directory" section and click "Change" option to change the cache location.
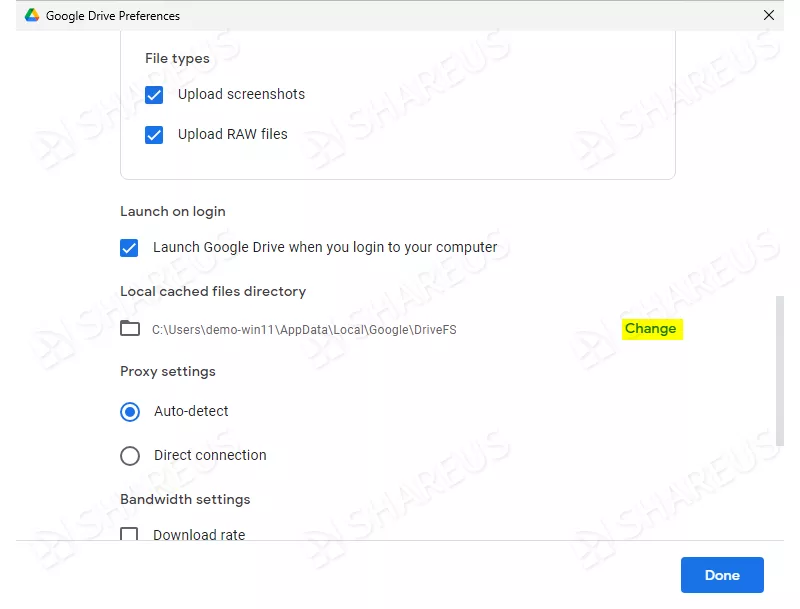
Step 7: Select a folder in the pop-up "Choose content cache folder" window.
Step 8: Click "Save" option and select "Restart now" to restart the Google Drive Desktop for applying these changes.
Note: The changes won't take effect until you click "Save" in the bottom-right corner of the window. If you want to set more options, you can save it later.
Tips: If the application doesn't restart automatically, you can launch it manually.
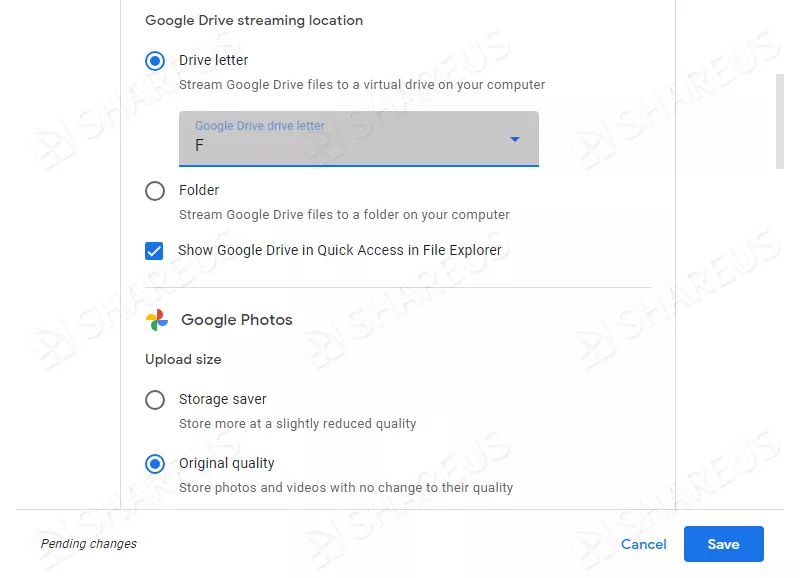
Change Drive letter
Step 1: Navigate to the "Google Drive Preferences" window by performing the above step 1 to step 3.
Step 2: Click the "Google Drive drive letter" drop-down menu under the "Google Drive streaming location" section.
Step 3: Select a desired drive letter for this Google Drive account.

Step 4: Click "Save" option on the bottom-right corner of the window to save changes.
Make files or folders available offline
You may want to make some files available offline, and it is easy to make it. Navigate to the file or folder you want to make available offline, and press "Shift" key then right click it. Next, move cursor to "Offline access" option and then select "Available offline" option in the context menu.

Note: In Windows 11, you can show more options by above method. And in Windows 10, you don't need to press "Shift" key.
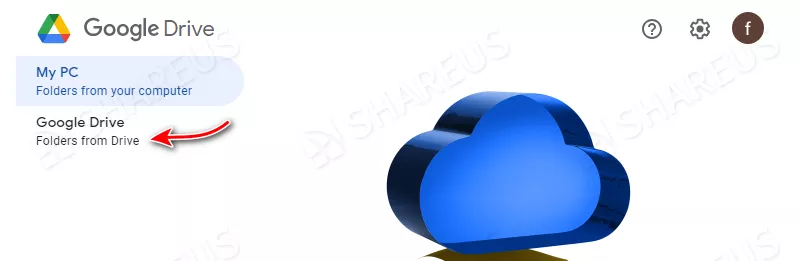
Select "Stream files" or "Mirror files"
Stream files don't download My Drive files to your computer until you make some files available offline. So it doesn't occupy your local space, and you can still view and open cloud files in your file manager and local applications. In contrast, Mirror files will download all My Drive files to your computer to make sure you have a complete copy of cloud files in your computer. Accordingly, it will occupy the same size of space as your cloud files, which varies depending on the size of your files.
I recommend "Stream files" more from the space perspective, and it's also the default syncing option. If you want to switch to "Mirror files", here's how you can change.
Step 1: Open the "Google Drive Preferences" again.
Step 2: Click "Google Drive" in the left side panel.
Step 3: Select "Mirror files" option in that page.
Add and remove accounts
This application supports up to 4 accounts. In other words, you can get extra 60 GB space free of charge by mounting 4 Google Drive Accounts. Here's how we can manage our accounts.
Add another accounts
Step 1: Click the account icon in the right-top corner of "Google Drive Preferences" window.
Step 2: Select "Add another account" in the pop-up menu.
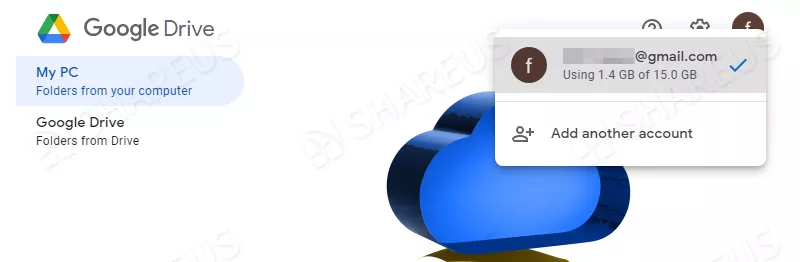
Step 3: Follow the prompt to connect another account.
Remove/Disconnect accounts
If you want to remove connected account, you can disconnect it. It is easy.
Step 1: Click the gear icon on "Google Drive Preferences" window.
Step 2: Locate to the account you want to remove and select "Disconnect account" option to disconnect it.
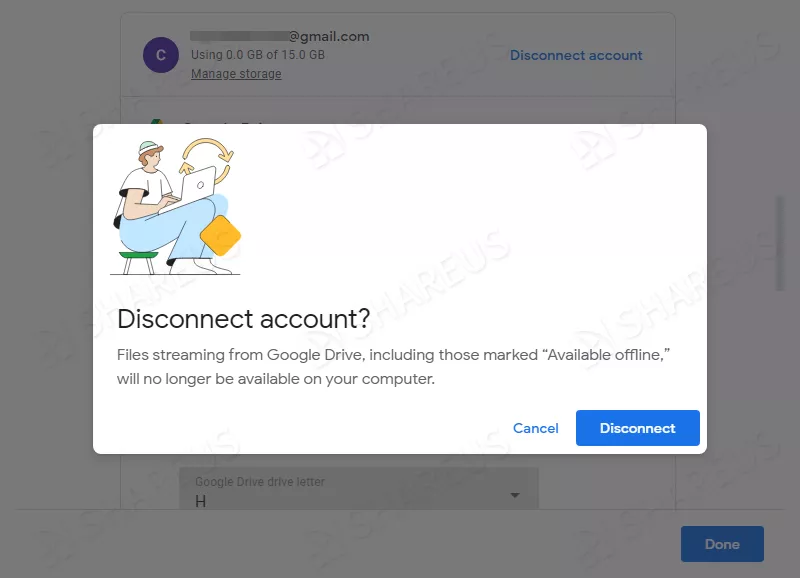
Note: You can also remove all accounts.
Conclusion
This article explains how to mount Google Drive as a local drive using the Google Drive Desktop app and how to configure the app in detail. If you want to manage your cloud files seamlessly and gain extra disk space, give it a try.