4 Ways to Fix No Bootable Device Found on the Laptop

December 28, 2023
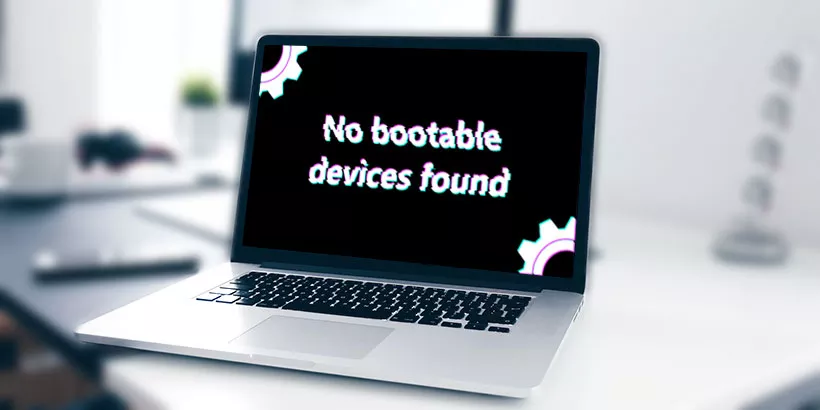
If you have a laptop, a disk error like “No bootable device” or “No bootable devices found” easily occurs. This type of error usually means that your computer cannot find an operating system or cannot find the hard drive with start files. “Damaged hard drive” “incorrect boot order” “corrupt boot files” and so on, may cause the error. So, how to fix no bootable device or no bootable device found on your laptop? Take a chance on the below-summarized methods!
Method 1: Slap the Laptop Bottom
You read that right! Just slapping your laptop bottom may help you fix the disk error “No bootable device." The hardware in your laptop's bottom may be loosened; slapping it can fasten it. No matter what brand of laptop you have (Dell, Acer, or others), just give it a try. Slap the bottom for a few seconds, then try restarting your computer to check if you can start normally.
Method 2: Change the Boot Mode
Step 1: Restart your computer and continuously press F10 or other buttons on the brand logo page. (Usually press F2, F10, or Delete at boot time, depending on your laptop model.)
Step 2: Choose the Boot tab and find the Boot Mode option.
Step 3: Change the Boot Mode from UEFI to Legacy. Then reboot your computer to check if the “No bootable devices found” or “No bootable device” errors have been fixed.

If changing UEFI to Legacy doesn’t work, try changing Legacy back to UEFI and restarting your computer. But there is a situation where the Boot Mode option is in gray status; you cannot change it. Try the other methods listed in this post instead.
Method 3: Activate the Primary Disk
You should first prepare a USB with Windows bootable media.
Step 1: Plug in your bootable USB, start your laptop, and press the specified key to enter BIOS.
Step 2: Select the Boot tab, find the Boot priority order, and set the USB as the priority. Then exit BIOS mode. Your computer will restart automatically.
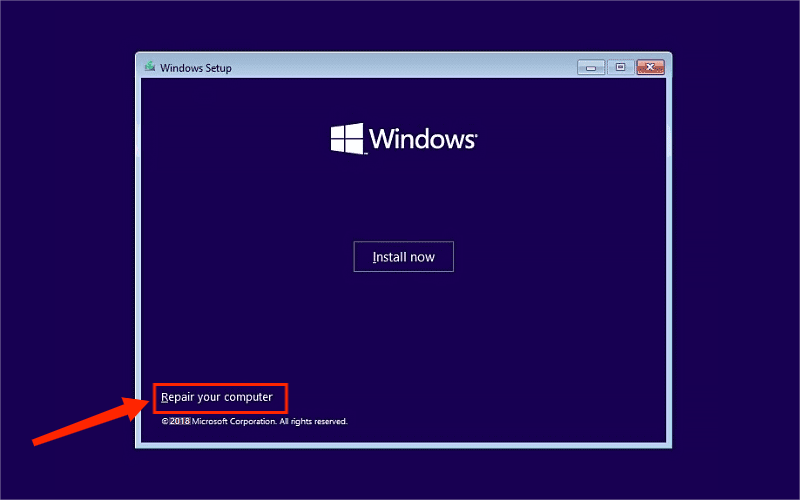
Step 3: When you stay on the page “Install now”, click Repair your computer to enter WinRE.
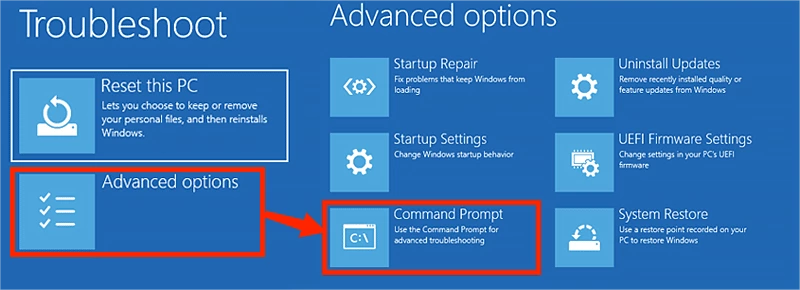
Step 4: Click Troubleshoot → Advanced options → Command Prompt.
Step 5: In the command prompt window, type the following commands and hit Enter after each command:
diskpart
list disk
select disk 0 (disk 0 is the system’s hard disk.)
list partition
select partition 1 (partition 1 represents the primary partition.)
active
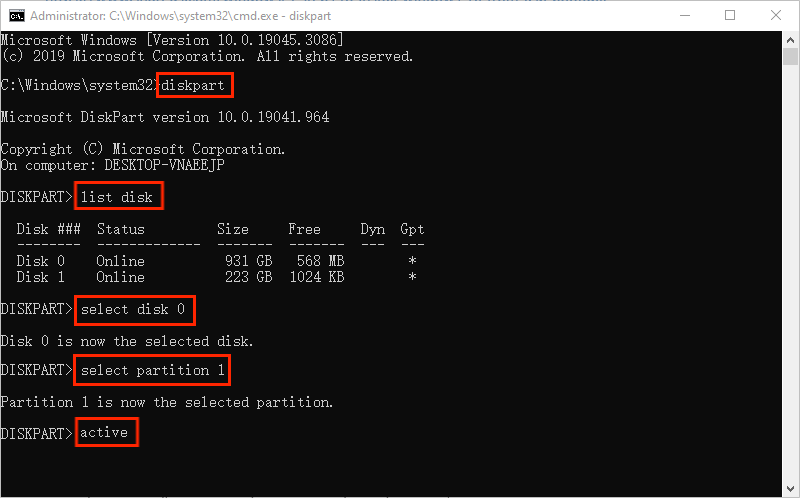
Once you have finished the above commands, reboot your laptop to check whether the disk error “No bootable device” or “No bootable device found” page has disappeared.
Method 4: Perform BCD Repair
Perform BCD repair also needs a bootable USB to start. You can refer to steps 1–4 of Method 3.
Steps: In the command prompt window, type the following commands and hit Enter after each command:
bootrec /fixmbr
bootrec /fixboot
bootrec /scanos
bootrec /rebuildbcd
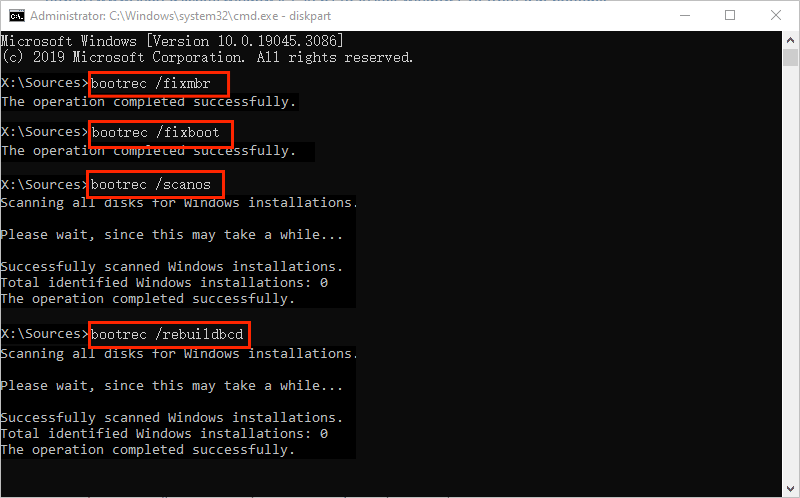
After finishing these four commands, restart to see if your laptop can boot normally.