Top Ways to Fix File Explorer Search Not Working in Windows 10

May 30, 2023

File Explorer has a powerful search function that allows users to quickly find files and folders on their computer based on the file name, file type, modification date, or keywords in the file, saving their time and effort in finding files and folders on their computer. However, some users have reported that File Explorer search not working in Windows 10 and does not give you relevant results, this article will show you several effective ways to fix this issue.
Way 1: Check If File Explorer is Running
To check if File Explorer is running, follow these steps:
Step 1: Press the Ctrl + Shift + Esc keys to open the Task Manager. Look for " Windows Explorer " in the list of Processes. If it is running, you will see its status as running in the Status column.

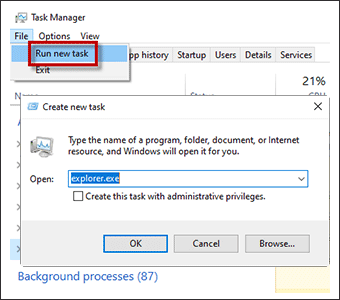
Step 2: If File Explorer is not running, you can start it by selecting " Run new task " on File, and type " explorer.exe " in the dialog box then click OK. This will start File Explorer and you should now be able to use it.
If you find that the File Explorer search is still not working, it may be the cause of any issues you are experiencing with it. Starting it again should resolve any issues.
Way 2: Reset File Explorer
To reset File Explorer, follow these steps:
Step 1: Open File Explorer and click on the " File " tab in the top-left corner, then select " Options ".

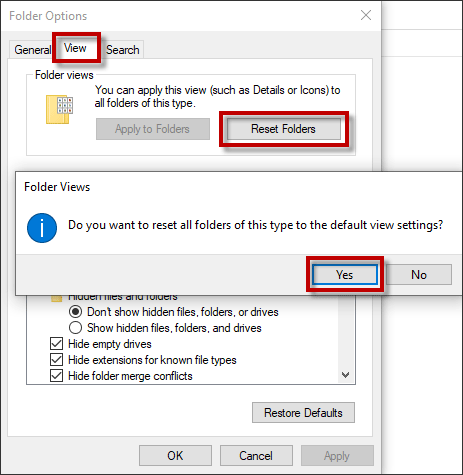
Step 2: In the Folder Options window, click on the " Reset Folders " button on the " View " tab. A confirmation dialog box will appear, click " Yes " to confirm.
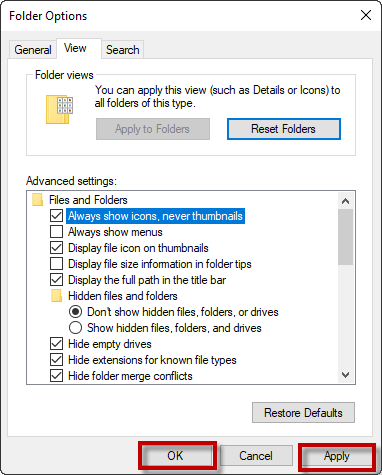
Step 3: Click " Apply " and " OK " to save the changes.
Note: Now the File Explorer search not working should be fixed. But this will reset all folder views in File Explorer to their default settings. And any customizations you have made to folder views will be lost.
Way 3: Rebuild the Search Index
To rebuild the search index in File Explorer, follow these steps:
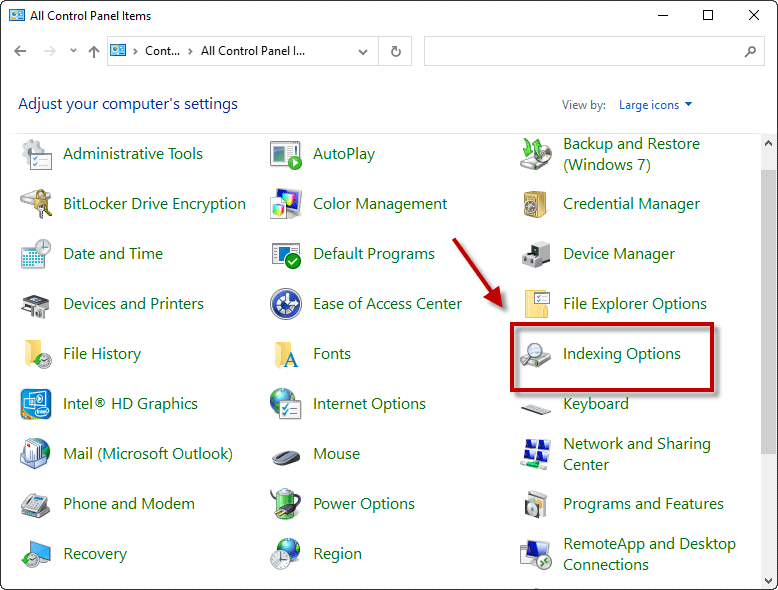
Step 1: Open the Control Panel and click on "Indexing Options".
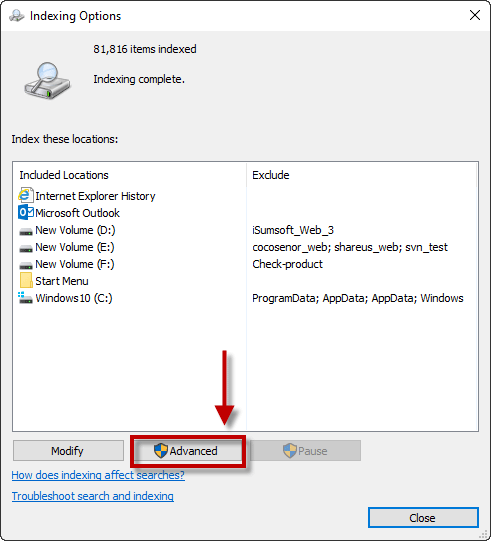
Step 2: In the Indexing Options window, click on the "Advanced" button.
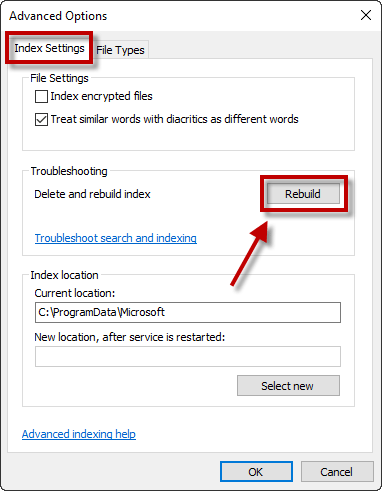
Step 3: In the Advanced Options window, click on the " Rebuild " button on the Index Settings tab.
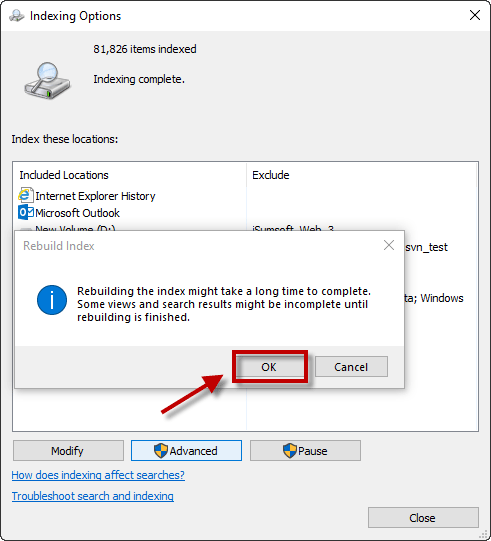
Step 4: A warning dialog box will appear asking if you want to rebuild the index. Click " OK " to proceed.
Step 5: Once the process is complete, click " Close " to exit the Indexing Options window. Your search index should now be rebuilt and the issues with File Explorer search not working should be resolved.
Way 4: Run the Search and Indexing Troubleshooter
Running the Search and Indexing Troubleshooter can help identify and fix any issues with File Explorer search functionality. If File Explorer search not working on your computer, this should be one of the first steps you take to troubleshoot the problem.
To run the Search and Indexing Troubleshooter, follow these steps:
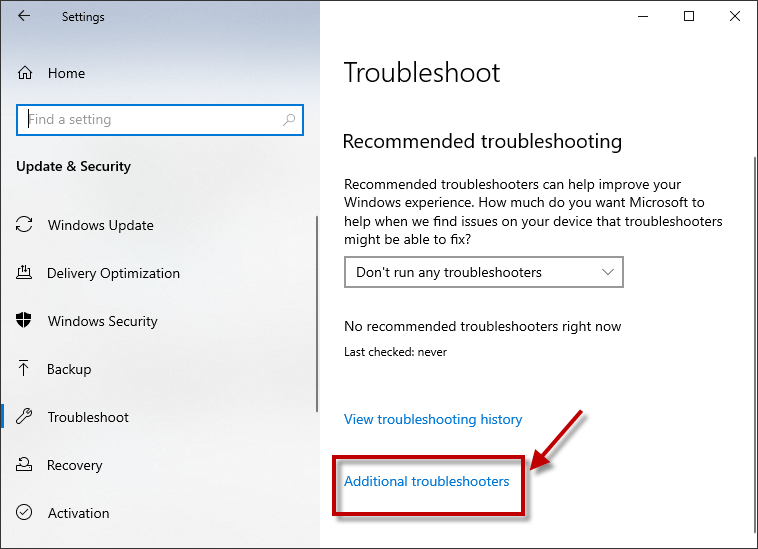
Step 1: Open the Settings window, and click on " Update & Security ". Then click on " Troubleshoot " in the left-hand menu.

Step 2: In the Troubleshoot window, click the "Additional troubleshooters".
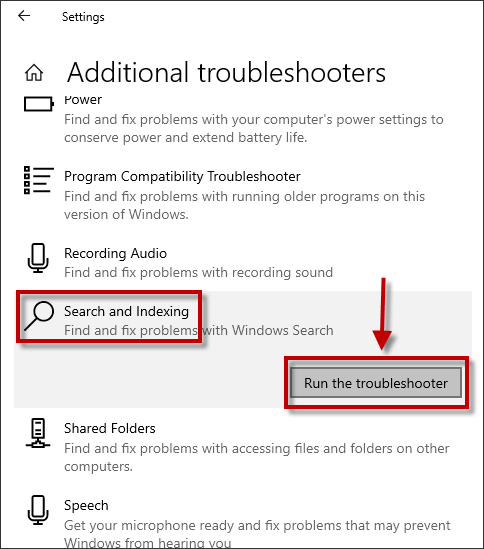
Step 3: Scroll down and open the " Search and Indexing ", then click the " Run the troubleshooter " button.
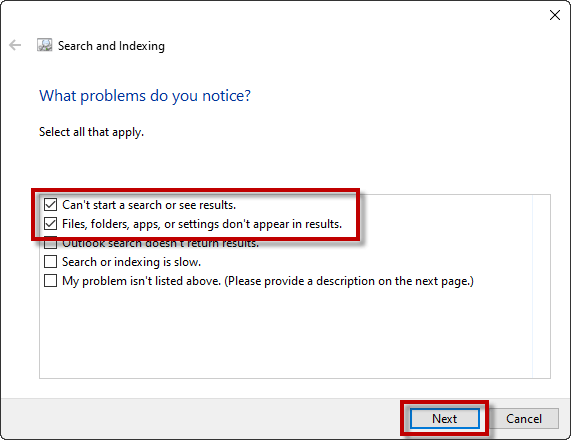
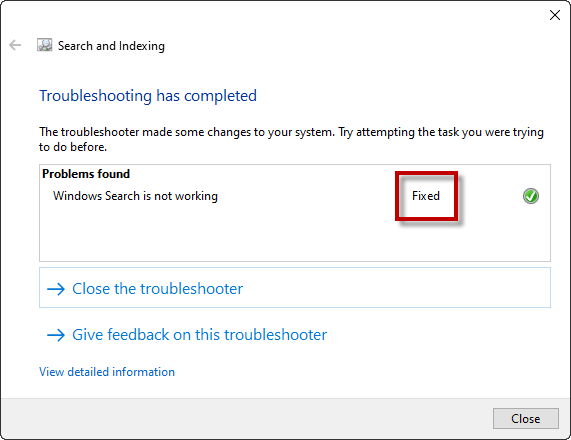
Step 4: The troubleshooter will list issues with the search and indexing functionality on your computer. Select the problems about File Explorer search not working, and click Next.
Step 5: Click on “ Try these repairs as an administrator ”. The troubleshooter will attempt to fix these problems automatically.
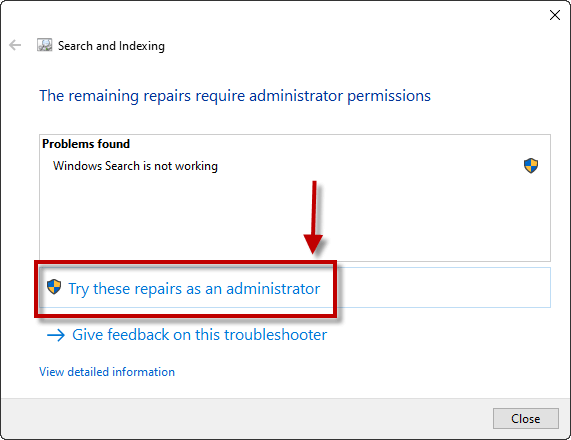
Step 6: Once the troubleshooter has completed its scan and any issues have been resolved, close the troubleshooter window.
Way 5: Recover Lost System Files Data
Lost system files data can also cause File Explorer search not working. Therefore, it is useful to take action to recover lost system files data. Here is a professional data recovery tool recommended for you:
Download: iSunshare BitGeniusiSunshare BitGenius is a powerful and easy-to-use data recovery software that allows users to recover lost or deleted files from various storage devices. It can quickly and effectively recover data from damage. Overall, iSunshare BitGenius is a reliable and efficient data recovery solution for both personal and professional use. Download and install the software, follow these steps:
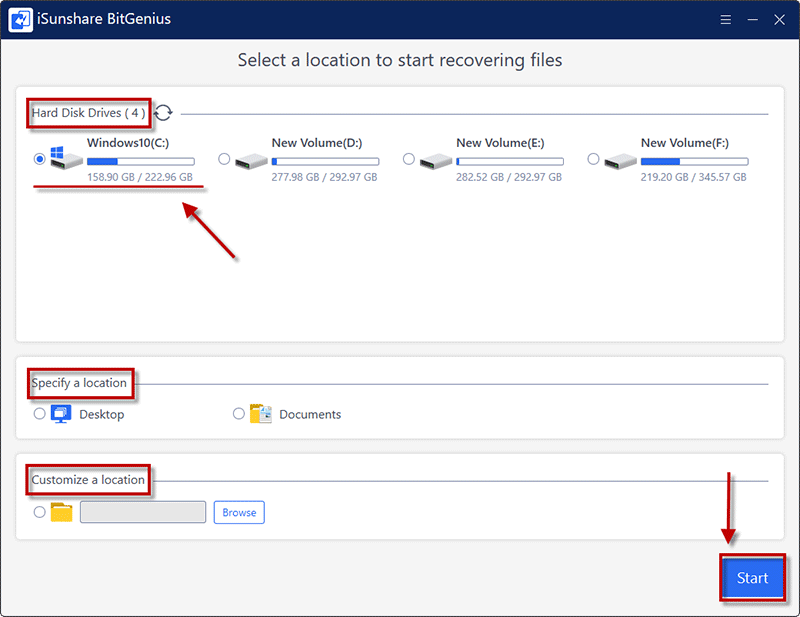
Step 1: Select a location to start recovering files, you can select hard disk drives, specify a location or customize a location. The File Explorer search’s system files are usually on disk C, then click Start to scan.
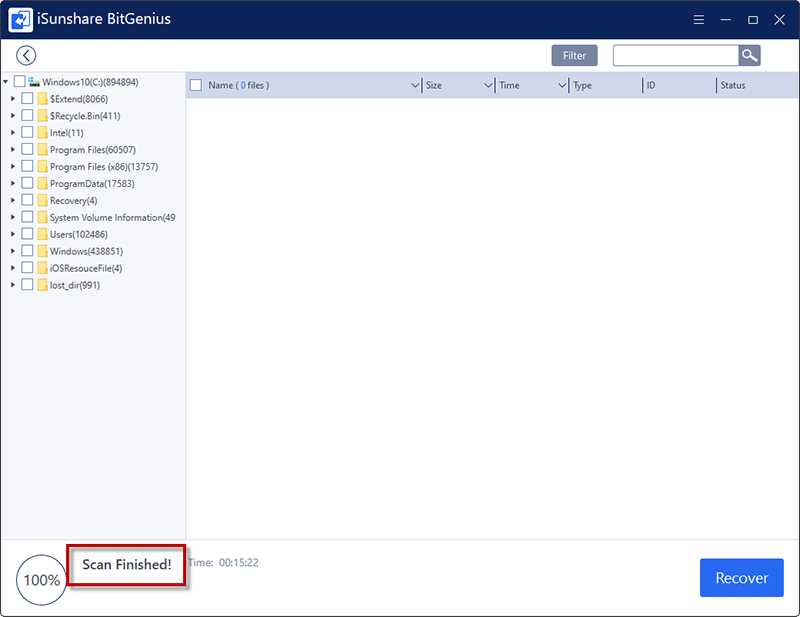
Step 2: Wait for the scan to finish, it will automatically do a quick scan and deep scan. This process will take a few minutes, please be patient.
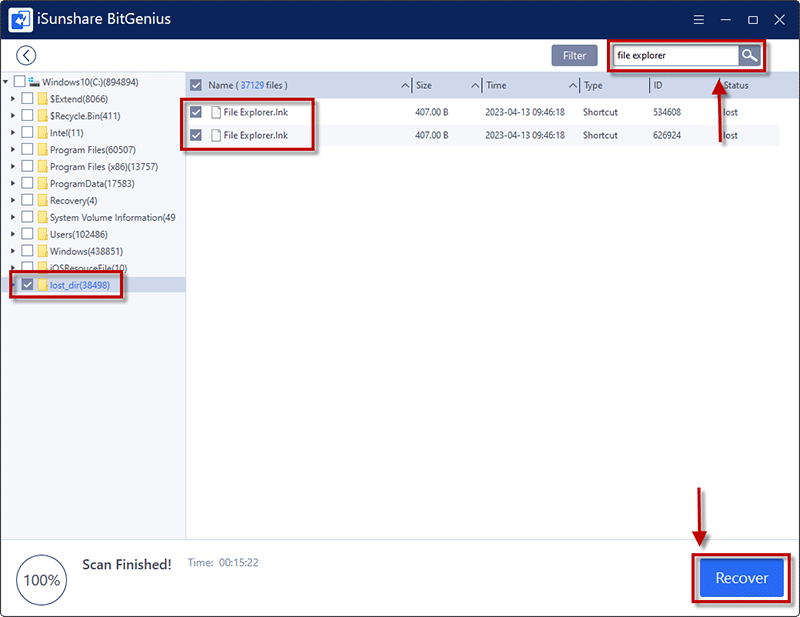
Step 3: Select the lost_dir on the left list, then type the “file explorer” in the search bar, choose the target files, and click Recover.
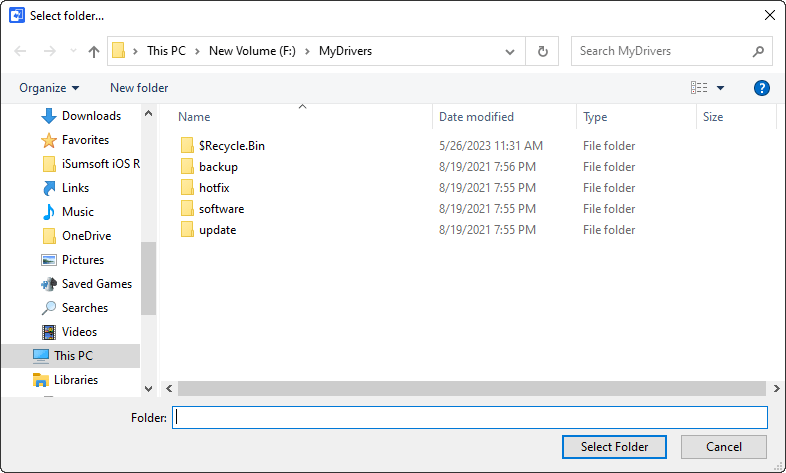
Step 4: Select a folder to store the recovered data. The destination could not be the location where you lost the data.
Step 5: Once the file data is recovered, you can click the Yes button to check the restored content or not.

Conculsion
In general, when your File Explorer search is not working, you can fix it by checking if File Explorer is running, resetting File Explorer, rebuilding the search index, running the search and indexing troubleshooter, or recovering lost system files data. If none of these methods work, you may need to perform a system restore or reinstall Windows.