How to Compress Pictures in PowerPoint 2010/2013/2016/2018

September 08, 2020

When you prepare a PowerPoint presentation, higher-quality and higher-resolution pictures may be your preference for slides. However, the more high-quality pictures you apply, the larger size of PowerPoint is, which could be the culprit for glitches and stuttering animations during slide show. For this point, this post will show you how to compress pictures in PowerPoint 2010/2013/2016/2018 to avoid the interruptions of a PowerPoint presentation.
Way 1: Compress Pictures via Format Settings
Photos and videos do really polish your slides, and catch audience's attention. But if these multi-media elements stutter your PowerPoint deck and take a long time to open and save, it's time to utilize built-in features to shrink the images' size in PowerPoint.
Step 1: Select the picture you want to compress first, then click on Picture Format shown in the Main PowerPoint Ribbon and then choose Compress Pictures in the Adjust group.
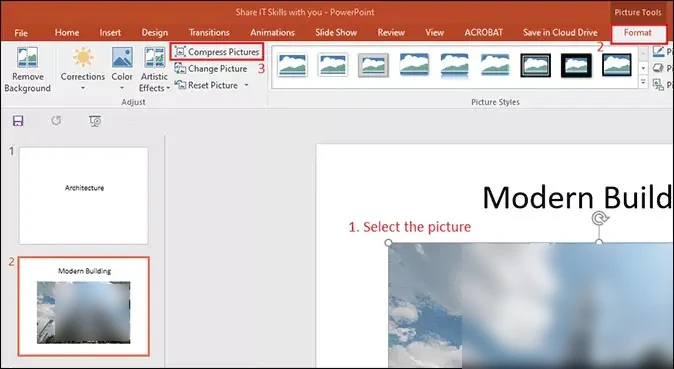
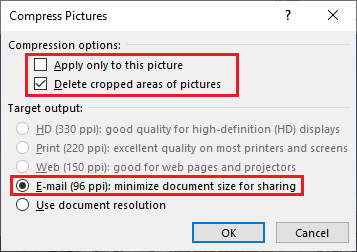
Step 2: A dialog box named Compress Pictures pops up. Several options are shown in the dialog box. If you want to compress the pictures throughout the whole slides, uncheck the option Apply only to this picture. It will save you a bunch of time for reducing all pictures' size.
As to the option Delete cropped areas of pictures, if you don't need to edit the picture later, leave it ticked. The reason is that the cropped areas of a picture will be hidden from you, but still kept in PowerPoint. Thus, the size of an image has no change after you crop it.
Way 2: Compress Pictures via PowerPoint Options
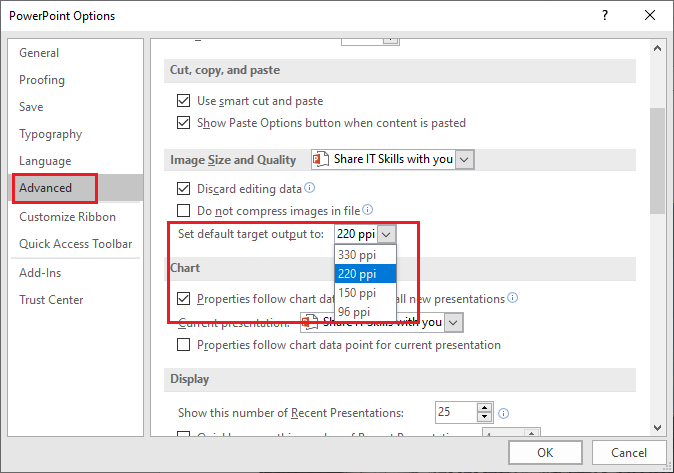
PowerPoint Options allows us to change the picture's default resolution. If you set a lower target output resolution, finally the PowerPoint file will be saved at a smaller size. What needs to be mentioned is the compression setting only applies to the current file.
Steps: Click File tab in the Ribbon -> Options -> Advanced -> set default target output resolution to a certain value under Image Size and Quality tab. Please deselect Do not compress images in file, otherwise the image compression setting will not take effect in PowerPoint file.
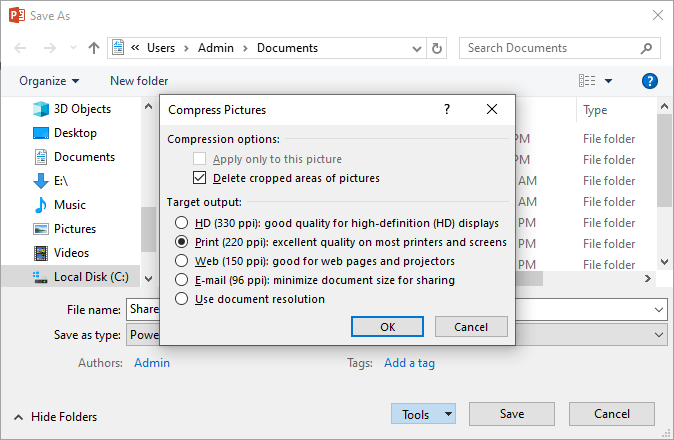
Way 3: Compress Pictures While Saving PowerPoint File
In addition, we can also compress all pictures while saving PowerPoint file. The steps are as following:
Step 1: Click File tab in the Ribbon -> Save As -> navigate to the location for saving the file and rename it -> click Tools -> select Compress Pictures in the drop-down menu.
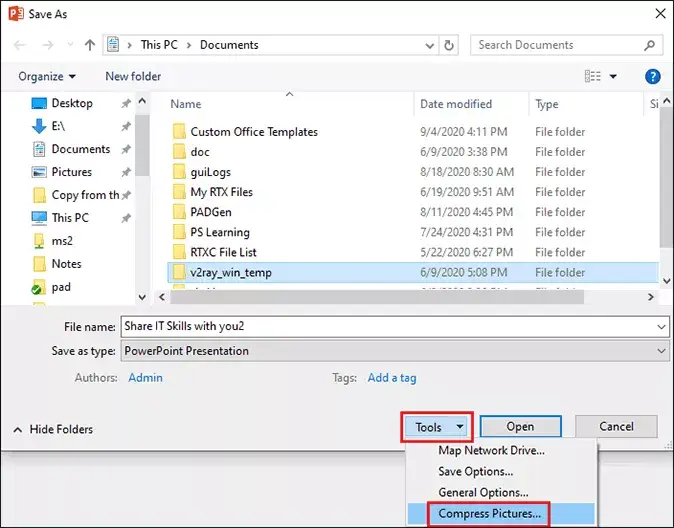
Step 2: Now you can select the desired resolution of pictures in PowerPoint. Then click OK and Save. You can according to your own needs to choose target output resolution, for example, if you need to send PowerPoint file to others through E-mail, 96 ppi may be your best choice, and 150 ppi is suitable for web pages and projectors, 220 ppi is for printing and 330 ppi is intended to display in high-definition.