How to Mount Google Drive on Linux Step by Step

April 16, 2024

Up to now, Google doesn't provide an official desktop client for Linux to mount Google Drive. Fortunately, there are some other ways to solve the issue of mounting Google Drive on Linux. This article will demonstrate two of those ways. Now let's get started.
Way 1: Mount Google Drive via Gnome Online Accounts
Gnome integrates many online accounts in its system, and Google account integration is included. So you can easily mount your Google Drive by using Gnome Online Accounts feature. Here's how to do it.
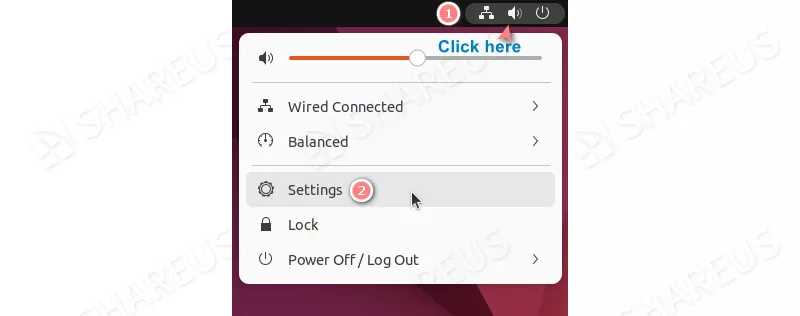
Step 1: Open the Settings window by clicking the top-right menu area and selecting the "Settings" option.
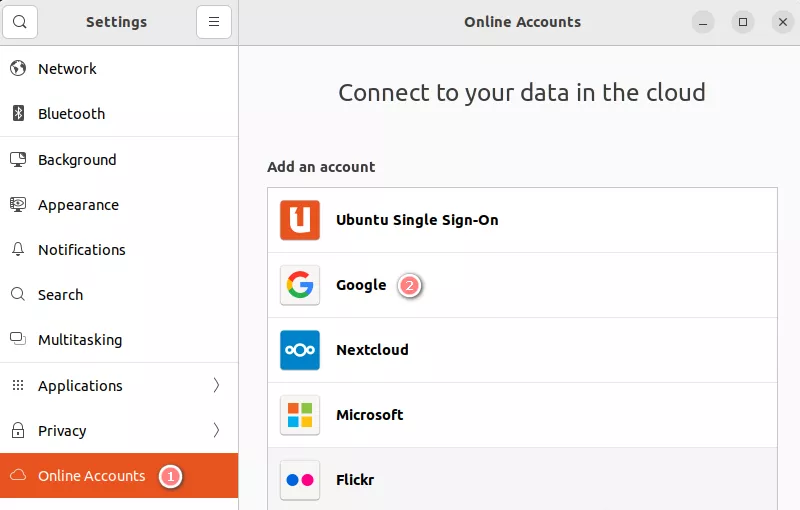
Step 2: Navigate to "Online Accounts" in the left panel, then click on the "Google" item in the main panel.
Step 3: Log in to your Google account and complete the connection according to the prompts on the screen.
Step 4: Finally, you can control which Google apps are connected to Gnome. Alternatively, you can manage it in this window later.

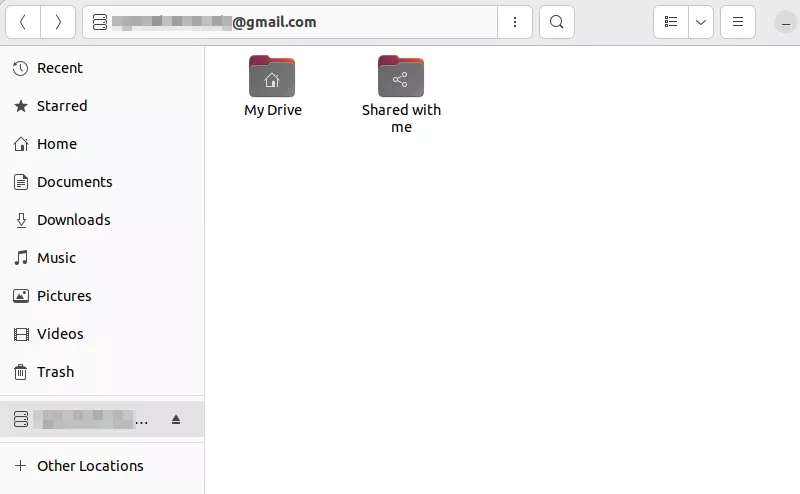
Step 5: The mount operation has been completed, and Google Drive now appears in the file manager.
Step 6: Additionally, if you want to unmount Google Drive, select "Remove Account" in the same location of "Settings" window.
Notes: The authorization of Gnome is not revoked, and you can revoke it on Google account management page.
Way 2: Mount Google Drive using Google Drive Ocamlfuse
The above way is relatively easy and convenient for most users, but if you want to try another way to achieve the same purpose, you can try Google Drive Ocamlfuse. Ocamlfuse is a free and open-source FUSE filesystem for mounting Google Drive on Linux. Let's get started with it.
Prerequisites
Create a Google Cloud project
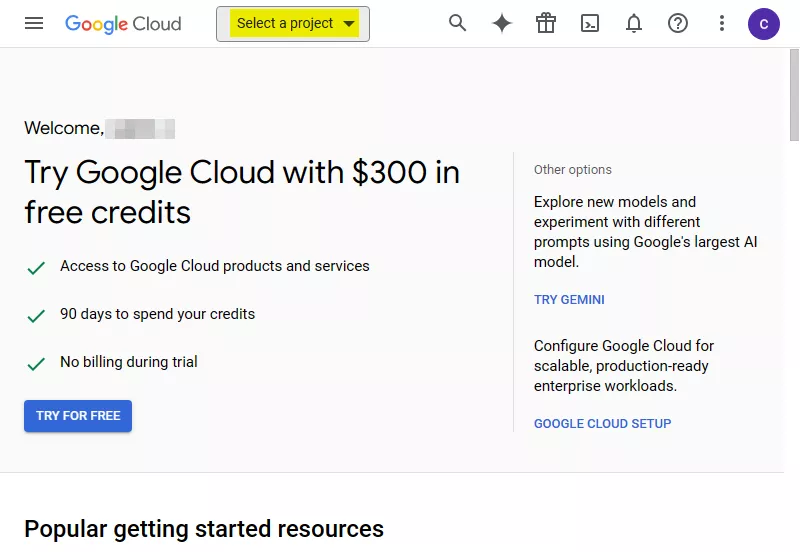
Step 1: Go to the Google Cloud Platform Console and log in to your Google account.
Step 2: Click on the "Select a project" dropdown menu and select the "NEW PROJECT" option in the top-right corner of the pop-up window.
Step 3: Follow the on-screen prompts to complete the creation of the project.
Create an OAuth Client ID
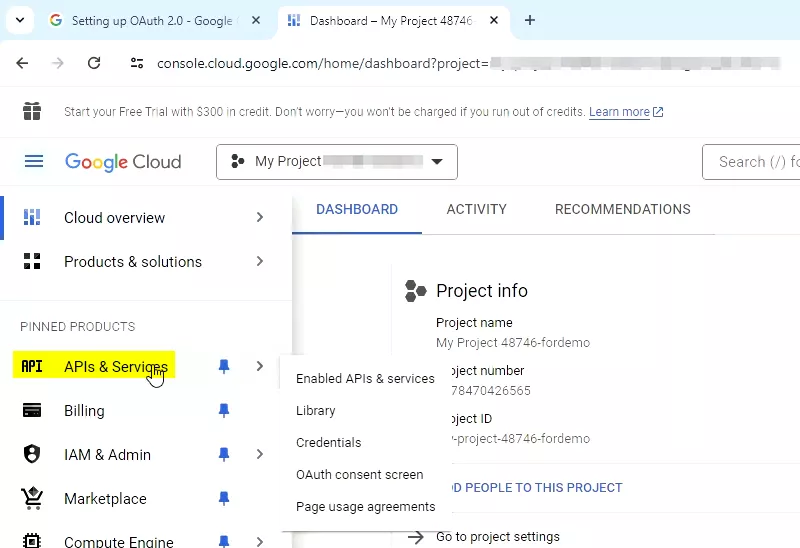
Step 1: Select the project and choose "APIs & Services" from the left panel.
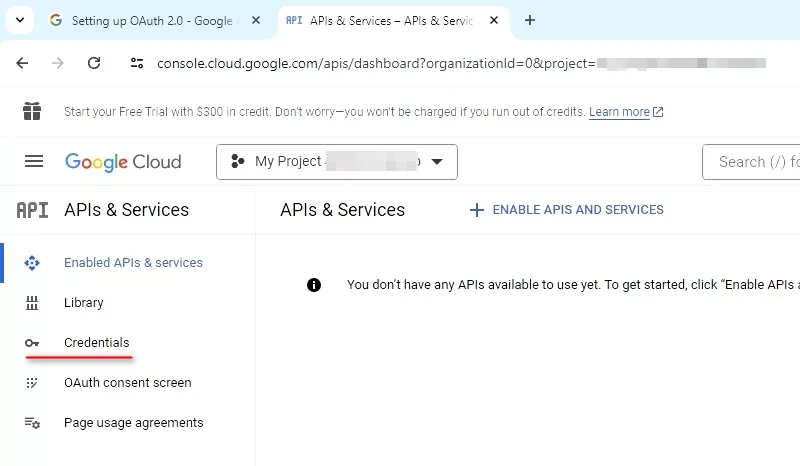
Step 2: Click "Credentials" in the left panel of the newly appeared page.
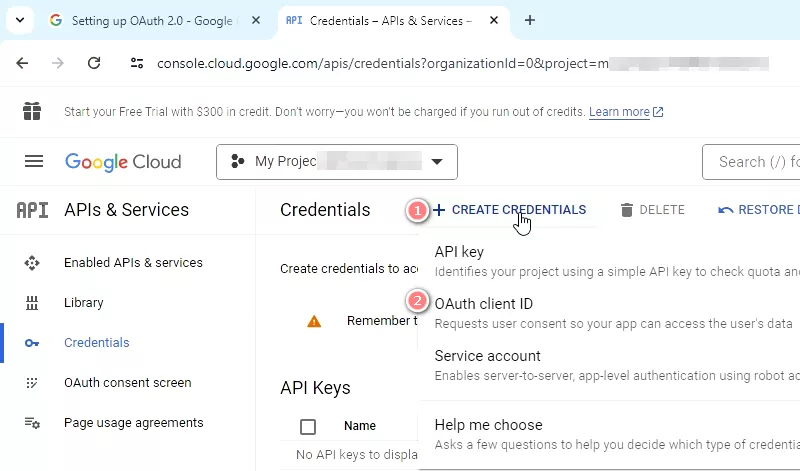
Step 3: Click "CREATE CREDENTIALS" at the top of the main panel and choose "OAuth client ID" from the dropdown menu.
Note: If it is your first time using this service, "configure consent screen" is needed. Click the "CONFIGURE CONSENT SCREEN" on the following page. Then select the appropriate options and fill in the necessary information to complete this process.
Step 4: Click "Credentials" again and repeat step 3.
Step 5: Select "Desktop app" from the "Application type" dropdown menu on the appeared page.

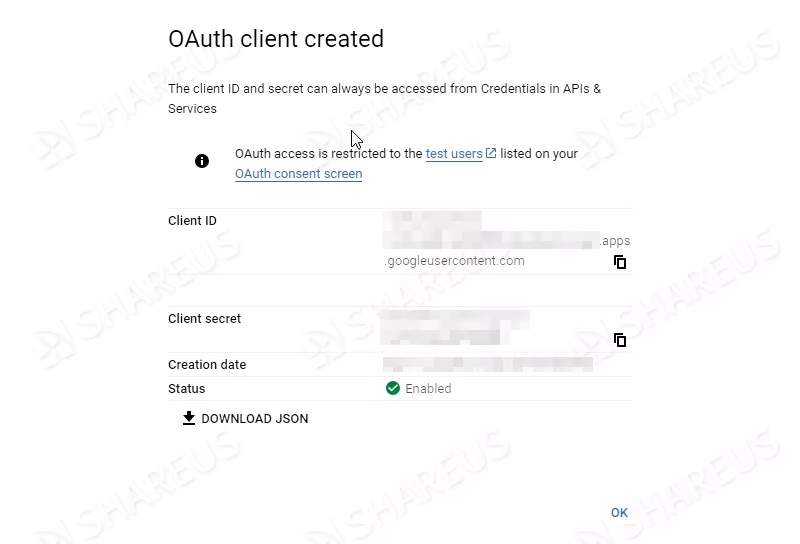
Step 6: Choose a name and click on the "CREATE" option to generate the OAuth client ID.
Step 7: Copy the Client ID and Client secret from the pop-up window for later use.
Enable Google Drive API
Step 1: Click "Library" in the left panel of this page and scroll down to find "Google Drive API".
Step 2: Click "Google Drive API" and then click "ENABLE" on the next page.
Step 3: Wait for the process to complete.
Publish the App
Step 1: Click "OAuth consent screen" in the left panel of this page.
Step 2: Click "PUBLISH APP" option on the page.
Step 3: Click "CONFIRM" in the pop up window to complete the publish operation.
Now you can try to mount Google Drive on Linux using Google Drive Ocamlfuse.
Mount Operations
Step 1: Open the terminal using the "Ctrl + Alt + T" shortcut key.
Step 2: Add the repository by running the command: sudo add-apt-repository ppa:alessandro-strada/ppa.

Step 3: Install ocamlfuse by running the command: sudo apt update && sudo apt install google-drive-ocamlfuse -y.
Step 4: Authorize access permissions for ocamlfuse by running the command: google-drive-ocamlfuse -id xxx.apps.googleusercontent.com -secret xxx-yyy-zzz.
Note: Replace the underlined part with your actual Client ID and Client secret. This step will open a browser window, log in to your Google account, and complete the authorization process by following the instructions displayed on the screen.
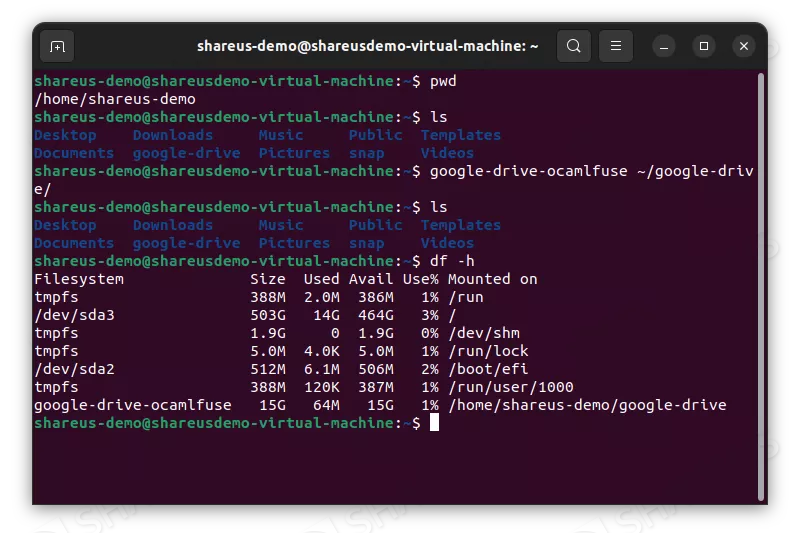
Step 5: Create a mount point for Google Drive by running the command: mkdir -v ~/google-drive.
Step 6: Mount Google Drive by running the command: google-drive-ocamlfuse ~/google-drive/.
Tips: Use thedf -hcommand to check the mount status.
Step 7: Configure automount by adding startup applications.
7.1: Click the "nine small rectangular" icon at the bottom-left of the desktop.
7.2: Find and launch the "Startup Applications".
7.3: Select "Add" and fill in the information to configure a new startup item.
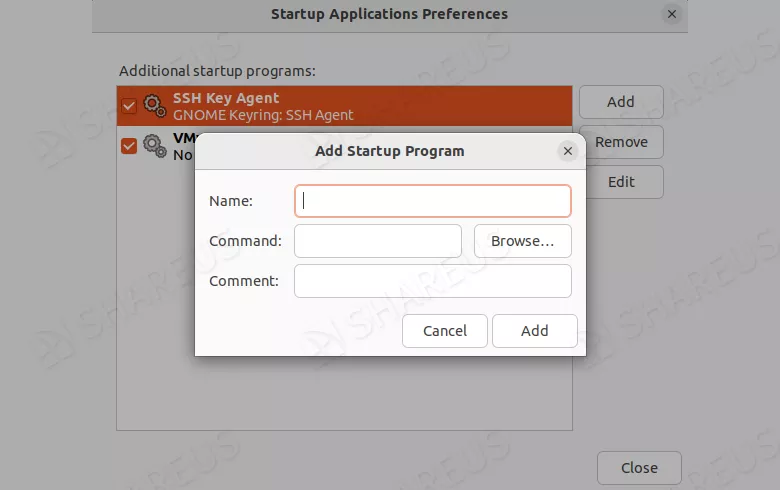
Note: The command should begoogle-drive-ocamlfuse"/home/user/google-drive". Remember to replace the underlined part with your actual mount path.
Step 8: The Google Drive is now mounted on Linux and will be automatically mounted in the future.

Step 9: If you want to unmount it, you can use thefusermount -u~/google-drivecommand or unmount it in the file manager.
Tips: If you don't plan to use it later, remember to revoke the permissions for it in the Google account management page. You can also remove the project from the Google Cloud Platform Console. Find the corresponding URL from the above.
Notes: It's worth mentioning that the changes are not real-time. This application will sync with the server every 60 seconds. You can configure it refer to this wiki page. Futrhermore, you can learn more about ocamlfuse from this page.
Conclusion
This article provides two ways for mounting Google Drive on Linux. The first way is easy and practical on Gnome desktop environment, while the second way is available on most platforms. If you are using the Gnome desktop environment, the first way is a good choice due to its practicality. Meanwhile, although the second way is more compatible, it is a bit complex. Choose the way that best suits your situation.