6 Ways to Fix Error Code 0x80070570: Windows Cannot Install Required Files

October 9, 2023
When you install the Windows system, it prompts that “Windows cannot install required files. The file may be corrupted or missing. Make sure all files required for installation are available, and restart the installation. Error code: 0x80070570.” How to fix this error? You can find 6 effective ways to fix error code 0x80070570 in this article.
Note: The error code 0x80070570: Windows cannot install required files, which may cause data loss. Backing up your files with CloneGo is recommended in case of data loss.
- Part 1: What It Is & What Are the Reasons?
- Part 2: How to Fix the Error Code 0x80070570?
- 1. Plug in the Other USB Ports
- 2. Physically Clean or Change the Memory Module
- 3. Change the BIOS Settings
- 4. Run CHKDSK in Windows RE
- 5. Run Startup Repair in Windows RE
- 6. Upgrade the System via the Media Creation Tool
Part 1: What It Is & What Are the Reasons?
Error code 0x80070570 is common in the Windows operating system and often occurs in Windows installation or file copy. The reasons may be due to factors such as improper insertion or removal of external storage devices, lost or corrupted installation files, the presence or accumulation of bad sectors on the hard drive, etc., which cause Windows to fail to install required files.
Part 2: How to Fix the Error Code 0x80070570?
1. Plug in the Other USB Ports
If you are using USB to install the Windows system, try to change other USB ports to plug in. Then to check if the error message is fixed.
2. Physically Clean or Change the Memory Module
Sometimes, the error 0x80070570 is due to a memory problem. First, you can use a brush to slightly dust the memory module, then retry to reinstall Windows. If it is still not working, then try to change memory modules on your motherboard (you should check the compatibility between the memories and your motherboard before plugging in memories), and then check if the Windows system can be successfully installed on your computer. Once the system is installed, you can change your original memory module.
3. Change the BIOS Settings
The following steps are set example of Dell PC.
Step 1: Restart your computer → Press F2 continuously to enter BIOS (different brands use different buttons, you can check it online) → System Configuration → SATA Operation → AHCI.
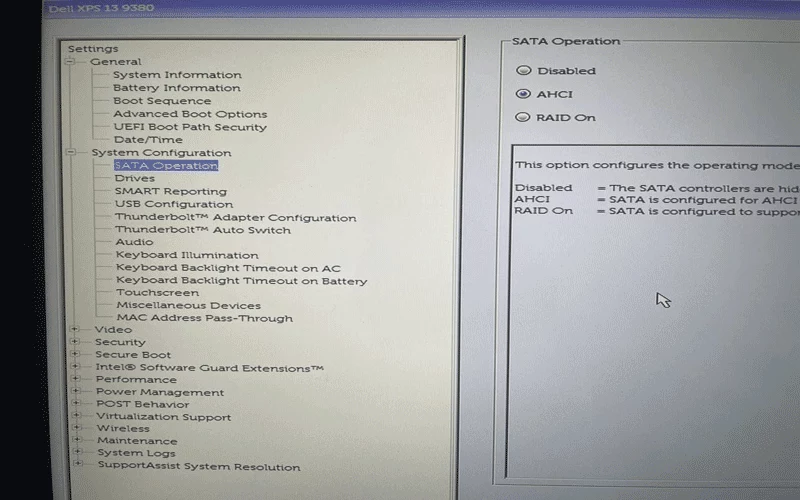
Step 2: Click Apply → Click Exit. After that, reboot your computer and check if the error code 0x80070570 has been fixed.
4. Run CHKDSK in Windows RE
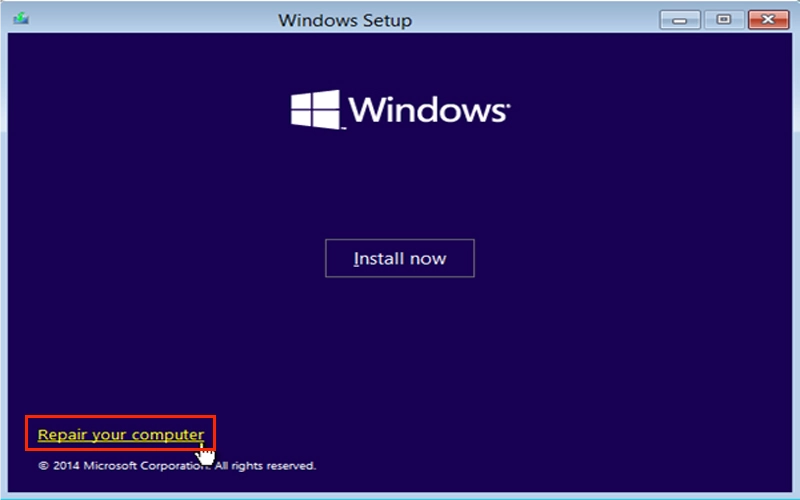
Step 1: Insert your installation media → Follow the installation steps until you stay on the “Install now” page.
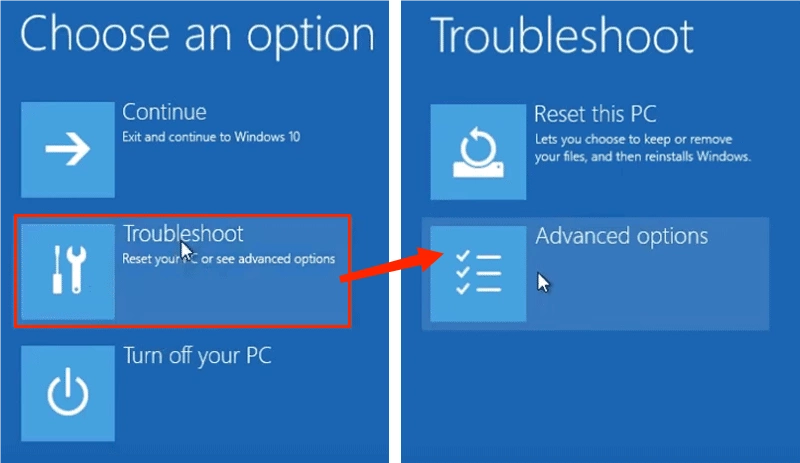
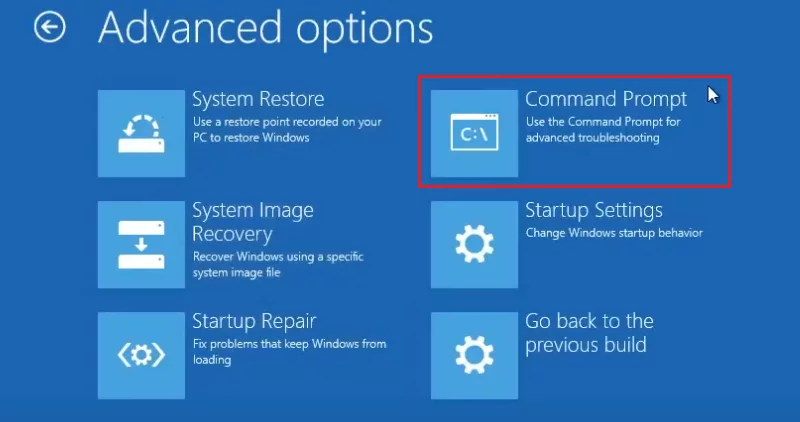
Step 2: Click Repair your computer → Troubleshoot → Advanced options → Command Prompt.
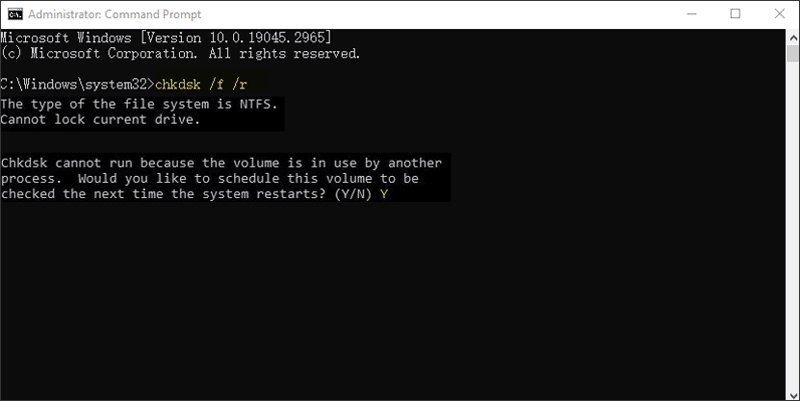
Step 3: Type “chkdsk /f /r” (/f means fix the error found on the disk; /r means scan and fix the bad sectors.) → Hit the Enter button.
If it prompts that “Chkdsk cannot run because the volume is in use by another process. Would you like to schedule this volume to be checked the next time the system restarts? (Y/N)”. Press “Y” to agree.
Wait for the process to finish, then reboot your computer and install Windows to check whether the error message Windows cannot install required files 0x80070570 has been repaired.
5. Run Startup Repair in Windows RE
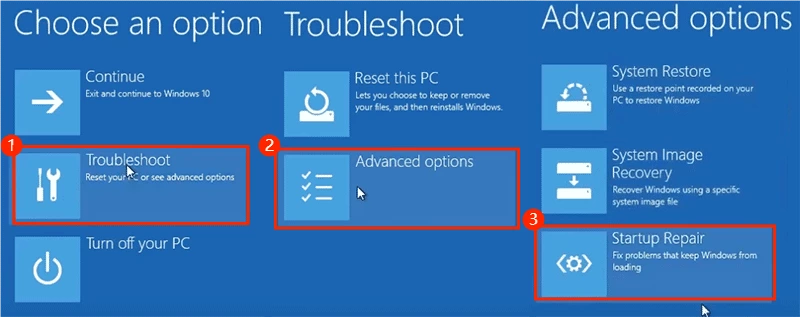
Steps: Repair your computer -> Troubleshoot -> Advanced options -> Startup Repair.
6. Upgrade the System via Media Creation Tool
Step 1: Download the Media Creation Tool from the Microsoft official -> Run the tool.
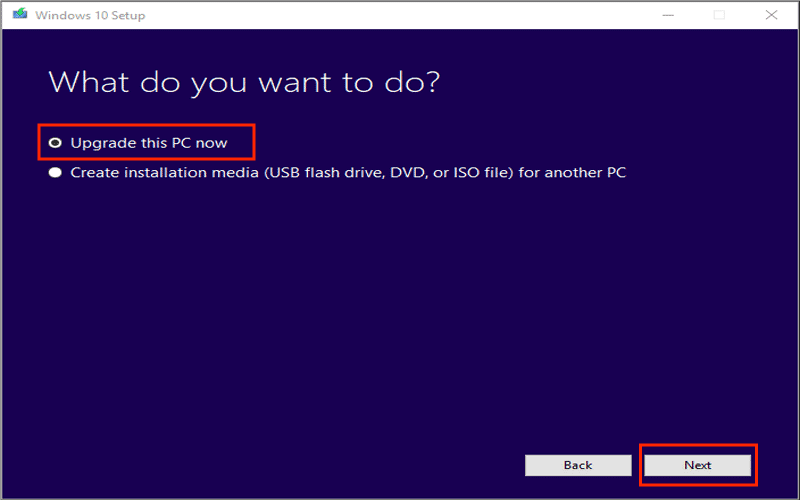
Step 2: On the “What do you want to do” page, choose “Upgrade this PC now” -> Click Next.
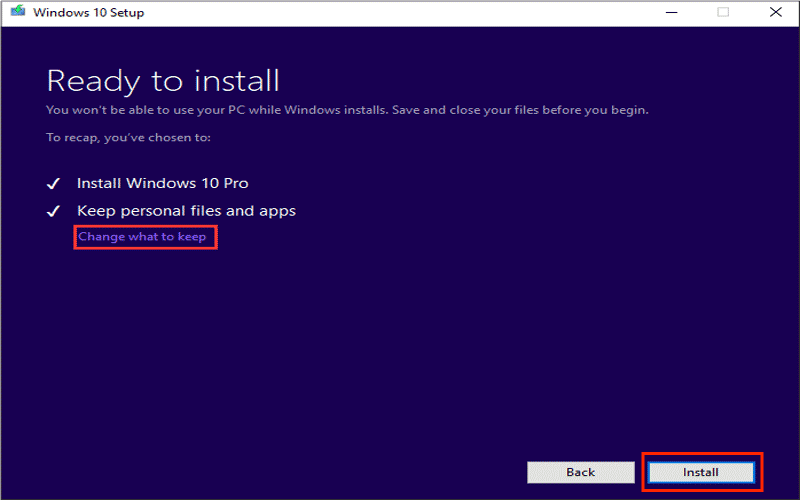
Step 2: On the “Ready to install” page, click “Change what to keep” to confirm whether to keep personal files and apps -> Click install. In this process, the computer will restart. Please be patient to wait.