Customize Windows 10 Start Menu: Elevate Desktop Experience

April 3, 2024
The Start menu feature provides a convenient way to quickly access our apps, folders, settings, accounts, power options, and more. While it meets our basic needs, there may be times when we want to personalize it to better suit our preferences. If you have this need, this article will guide you through customizing your Windows 10 Start menu in detail. Let's continue reading to discover all the tips.
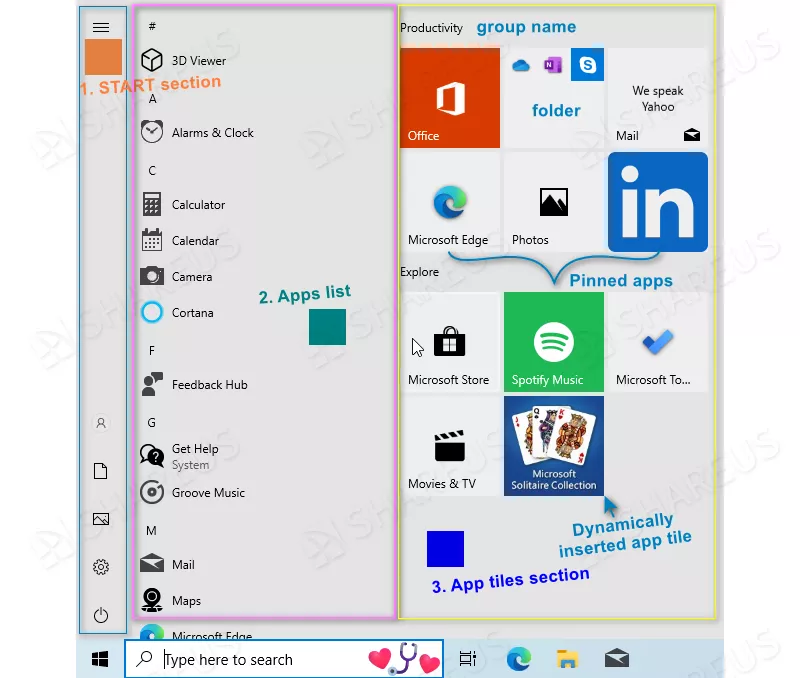
I will demonstrate this topic by dividing it into three sections: the leftmost START section, the middle apps list section, and the rightmost app tiles section. An illustration with annotations has been attached below.
Part 1: Leftmost START Section
From this section, you can conveniently access your "Accounts", "Documents", "Pictures", "Settings", and "Power" options. If you want to add more options or hide some, you can do so through the "Choose which folders appear on Start" option. Here's how:
Step 1: Open Windows Settings by pressing the Windows logo key and 'I' simultaneously.
Step 2: Select "Personalization", then choose "Start" from the left panel.
Step 3: Scroll down to the bottom of the page and click on "Choose which folders appear on Start".
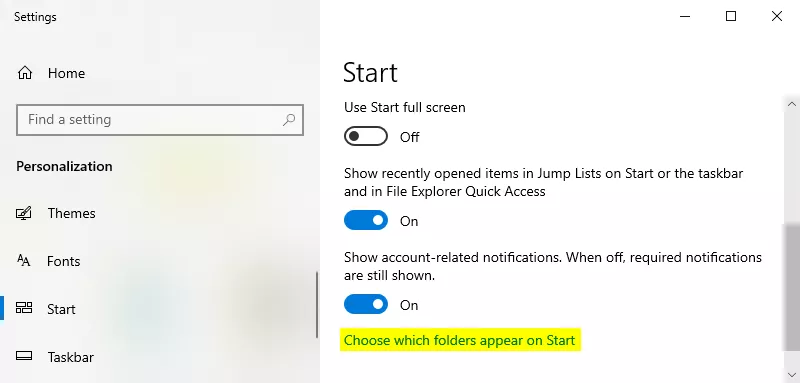
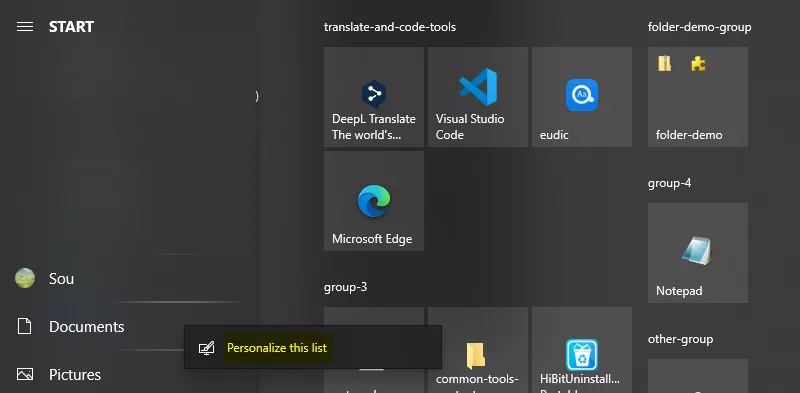
Tips: You can access this option directly by hovering over the "Documents" or "Pictures" option, right-clicking, and selecting "Personalize this list" in the Start menu. (You can open the Start menu by pressing the Windows logo key or clicking the "Start" icon in the bottom-left corner of the desktop.)
Step 4: In the "Choose which folders appear on Start" page, toggle the items you want to display or hide.
Step 5: Congratulations, the START section has been personalized.
Part 2: Middle Apps List Section
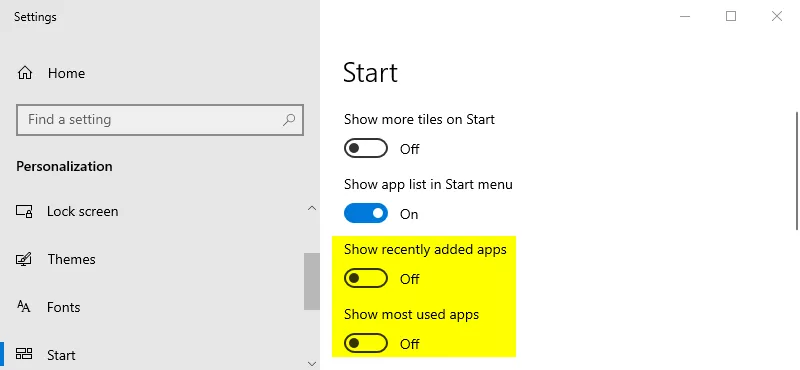
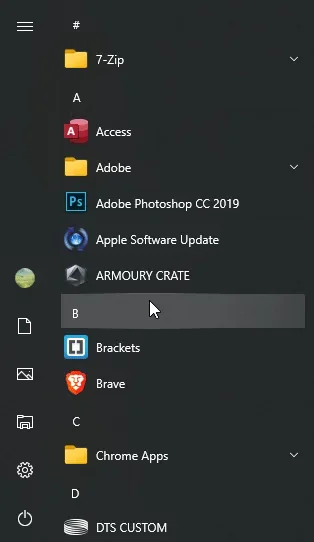
In this section, you can find all the applications you've installed. These apps are sorted alphabetically, making it easy to locate them quickly. To further speed up your search, you can enable the "Show recently added apps" and "Show most used apps" options. Here's how:
Step 1: Navigate to the "Start" page by following the same steps as in step 1 and 2 above.
Tips: You can also access this page by typing ms-settings:personalization-start into the address bar of your browser and pressing Enter.
Step 2: Locate the "Show recently added apps" and "Show most used apps" options, then toggle them on to display these apps on the Start menu.
Tips: Additionally, you can quickly locate apps by clicking on the initial section on the top of each apps section and selecting the initial of the desired app. This method allows you to jump to the corresponding initial part of the target application quickly.
Part 3: Rightmost App Tiles Section
You can add app shortcuts, folder shortcuts to this section by using the "Pin to Start" option in the context menu. And if you don't like some of the displayed shortcuts, you can hide them by using the "Unpin from Start" option. Furthermore, you can perform additional operations such as resizing, reordering, grouping, organizing shortcuts into folders, and renaming the display names of shortcuts/folders. Let's get started.
Add/Remove Tiles
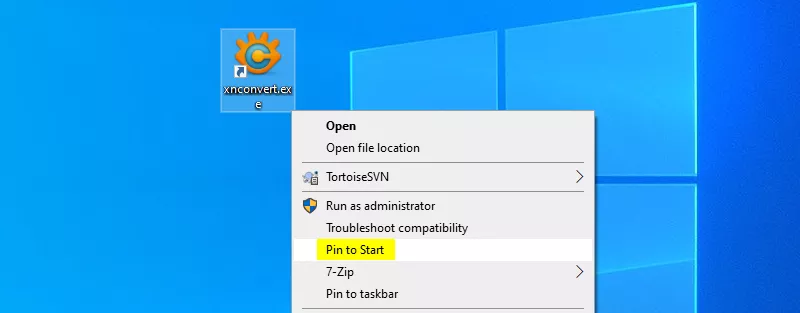
Step 1: Navigate to the desired application or its shortcut.
Step 2: Right-click it and choose "Pin to Start" option in the context menu.
Step 3: The app tile will now appear in the Start menu.
Step 4: To remove a tile, right-click on it and choose "Unpin from Start" from the context menu.
Tips: To remove multiple tiles at once, you can group them first. Then right-click the top area of group and select "Unpin group from Start" option.
Resize Tiles
To adjust a tile's size, right-click on it and choose "Resize" from the context menu, then select the appropriate size. The available size options are: small, medium, wide and large.
Note: In most cases, you can only choose between small and medium sizes, which should be sufficient.
Organize Tiles
As we add more and more tiles to the Start menu, it will become bloated and disorderly. So we need to organize the displayed tiles in this case.
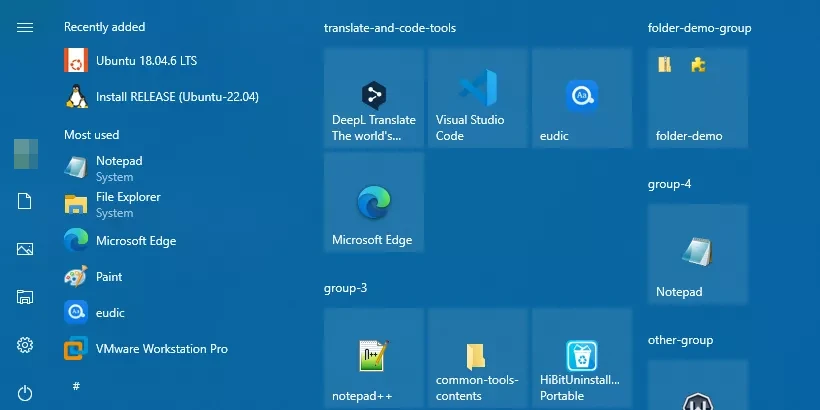
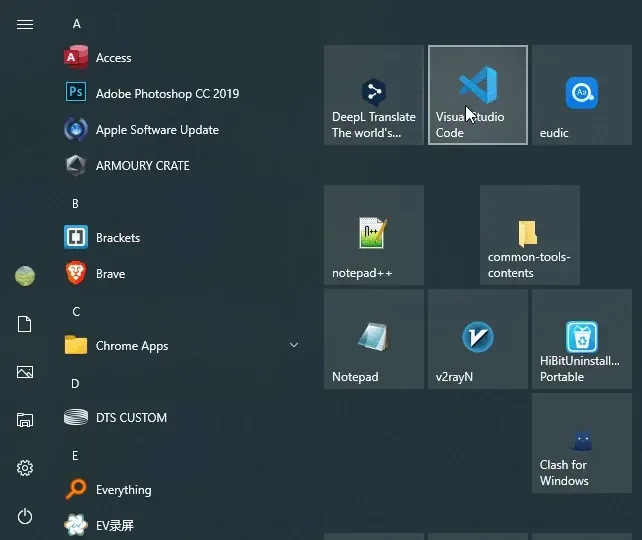
If you want to group tiles, you can hold and drag a tile to the targeted location. Generally, we group tiles of the same class together, and can name this group by clicking on its top area. (As shown in the image below.)
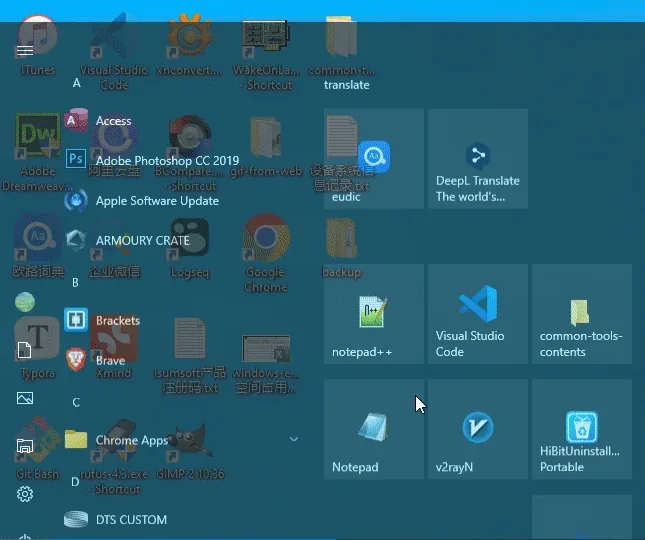
Sometimes, we may add too many tiles making the Start menu look crowded. We can then use the folder feature to mitigate this issue. Hold a tile icon and drag it over another to group them into a folder. You can also name this folder. (The following image is available for reference.)
Alternatively, you can choose to show more tiles in the Start menu. Go to Settings -> Personalization -> Start, and enable the "Show more tiles on Start" option on that page.
Rename Tiles
If we don't like the displayed name of a tile, can we change it? Here are the steps.
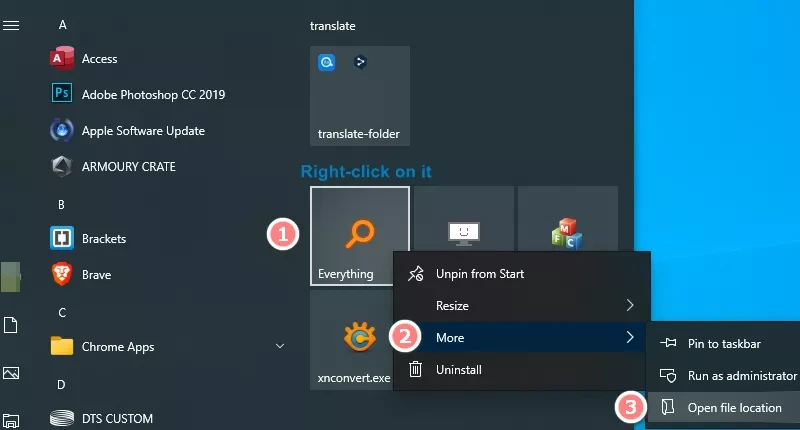
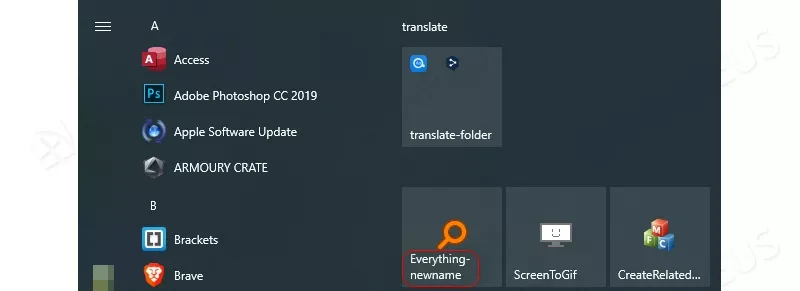
Step 1: Right-click the tile you want to rename, select "More" option, then choose "Open file location".
Step 2: Rename the item in the pop-up Windows Explorer window.

Tip: To rename native Windows app tiles, you'll need administrator permissions.
Step 3: Go back to the Start menu, and the tile's display name will be changed.
Part 4: Other Personalization Options
There are some additional tips for you to customize the Start menu. Let's explore them.
Adjust Start Menu Size
You can resize the Start menu by dragging and dropping directly. First, move the cursor to the edge of the Start menu, drag it to the desired size when the cursor changes to a two-way arrow cursor. Besides, you can resize it by using the Ctrl and direction keys.
If you want it to be displayed in full screen, you can turn on the "Use Start full screen" option in the Start page.
Customize the Background Color
Don't like the background color? There is a solution to optimize it.
Step 1: Navigate to the "Colors" page by going to Settings -> Personalization and selecting "Colors" in the left panel.
Step 2: Scroll down and pick a color in the "Windows colors" section.
Step 3: Keep scrolling down, then select the checkbox in front of "Start, taskbar, and action center".
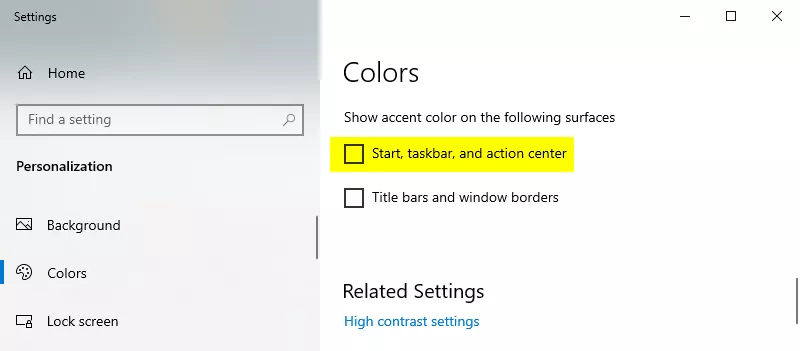
Step 4: The Start menu's background color has now been changed.
Back to Windows 7 Display
If you want to restore the Start menu to a Windows 7-style appearance, there is an easy way to do it.
Step 1: Remove all app tiles.
Step 2: Move the cursor to the right edge and stretch to the left until the Start menu takes a Windows 7-style appearance. Sometimes, this step is unnecessary.
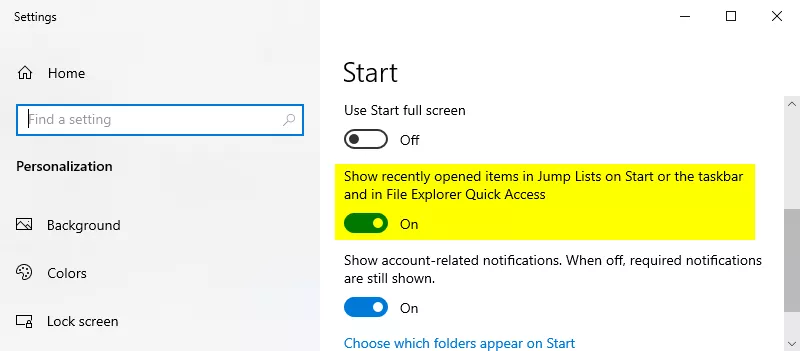
Clear and Disable Recently Opened Items
Turn off the "Show recently opened items in Jump Lists on Start or the Taskbar and in File Explorer Quick Access" option in the Start page to clear and disable the display of recently accessed items.
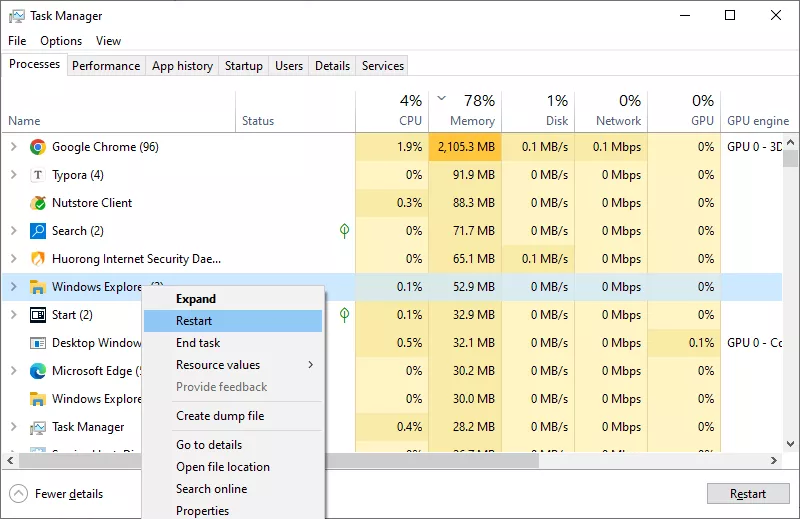
Tips: If the Start menu is not working properly after setting, you can fix it by ending "Windows Explorer" task and rerunning "explorer.exe" task in Task Manager. In this article, you can see more methods about fixing this issue.
Alternatively, if you want to export this configuration, refer to this official article.
Conclusion
This article thoroughly demonstrates how to customize the Windows 10 Start menu step-by-step. You can refer to the corresponding sections to personalize your Start menu according to your needs. Furthermore, there's even more to explore on your own.