Downloads Folder Not Responding in Windows 11/10: How to Fix It?

June 10, 2022

The Downloads folder is the default folder storing all the files downloaded from various sources on your PC. Occasionally, it takes a long time to open or you even can't open it. Then it can be very troublesome if a downloaded file is urgently needed. Also, when this folder stops responding to the system, it's possible that File Explorer would stop working, making you unable to access any files. But there's no need to worry, in this post, we will discuss how to fix unresponsive Downloads folder in Windows.
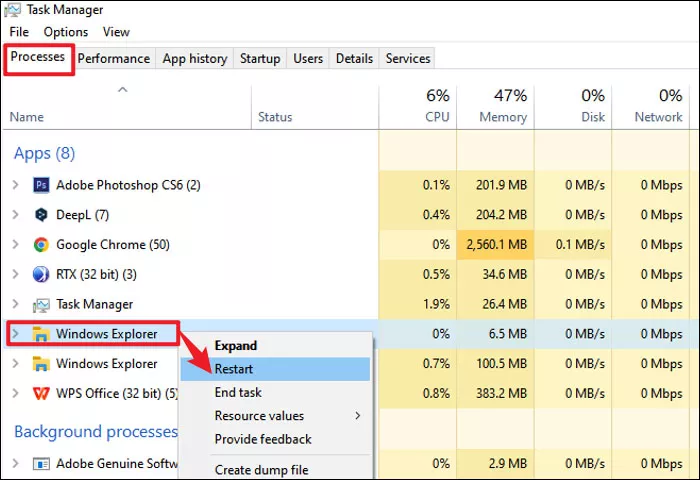
1. Restart Explorer task
Press Ctrl + Shift + Esc to open Task Manager and select Processes tab. Then locate Windows Explorer, right-click on it and select Restart.
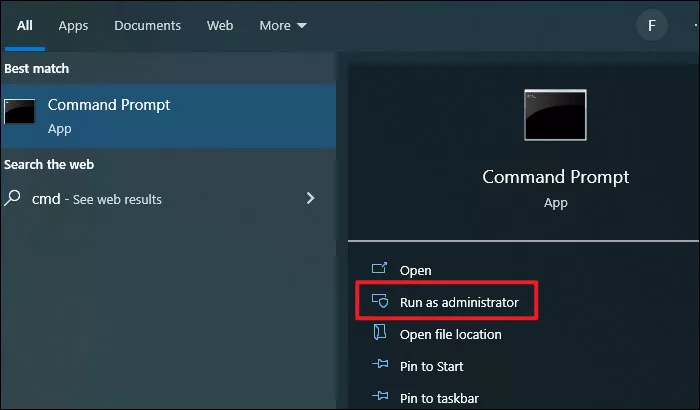
2. Run a SFC scan
Step 1: Type and search cmd in the search bar and select Run as administrator.
Step 2: Type sfc/scannow in Command Prompt window and press Enter to launch this command. Wait until the process completes.
Step 3: Restart your PC and check if you can access to the files in Downloads folder.
3. Clear up unnecessary files
Excessive old or outdated files could slow down the opening speed. As the Downloads folder is frequently used, it is necessary to delete unwanted files and useless installation package to free up more memory for the folder and thus accelerate opening speed.
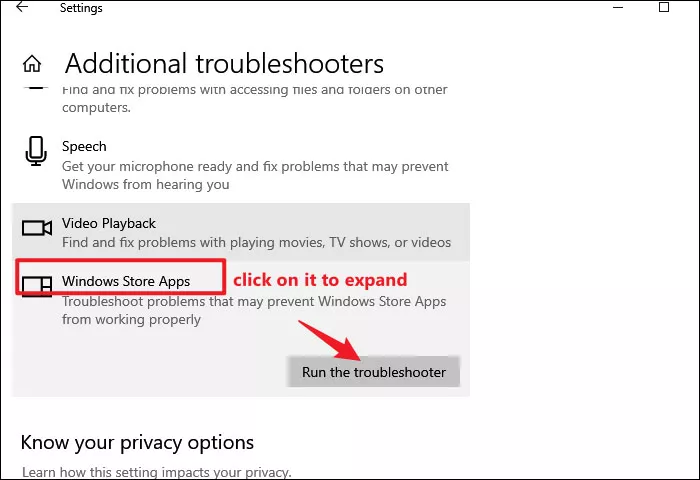
4. Run a Windows Store Apps troubleshooter
Step 1: Press Windows+I to open Settings and select Update & Security >Troubleshoot >Additional troubleshooters.

Step 2: In the next window, scroll down to find Windows Store Apps under Find and fix other problems and click on Run the troubleshooter.
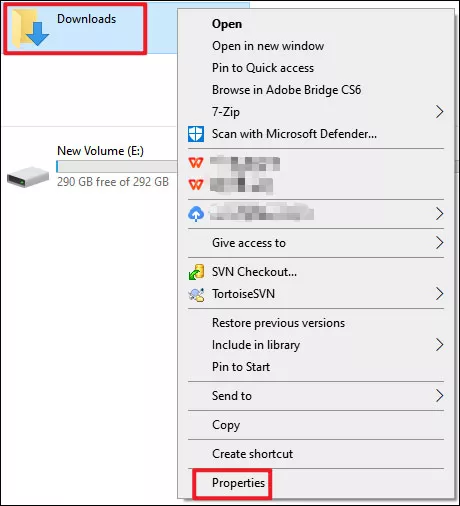
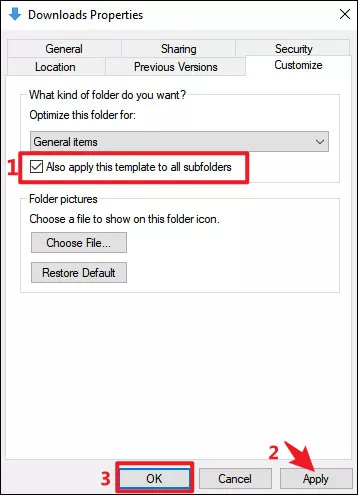
5. Tweak the properties of Downloads folder
Step 1: Press Windows+E to open File Explorer, right-click on the Downloads directory and select Properties.
Step 2: Choose Customize tab and select General items from the drop-down menu.
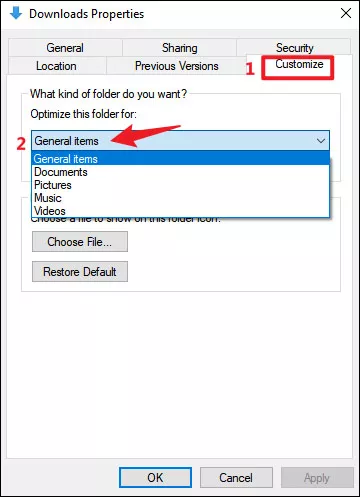
Step 3: Mark the checkbox in front of Also apply this template to all subfolders and click Apply. Then click OK to close the window.
6. Change File Explorer settings
Step 1: Press Windows+E to start File Explorer.
Step 2: Click File option in the top-left corner and select Options.
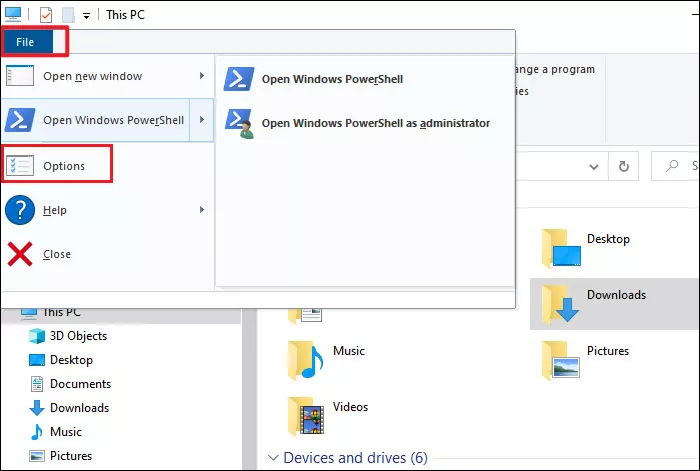
Step 3: In Folder Options window, choose View tab and check in the box of Always show icons, never thumbnails. Then click Apply and OK.
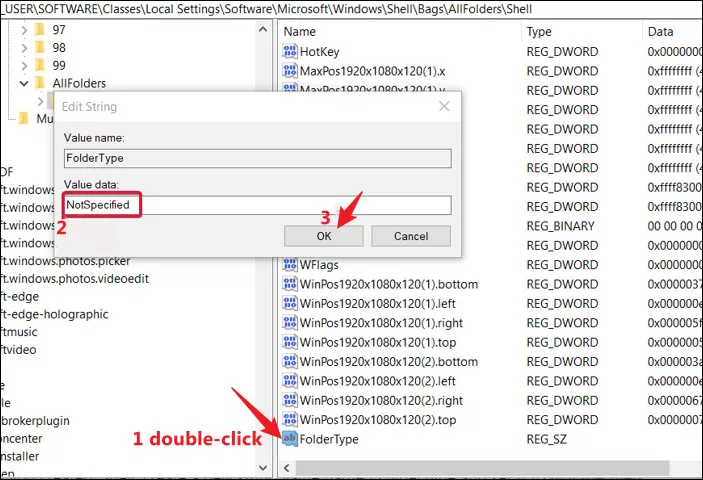
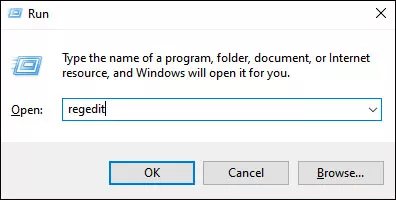
7. Disable automatic folder type discovery
Step 1: Press Windows + R to open run command, type regedit in the open box and hit Enter to open Registry Editor.
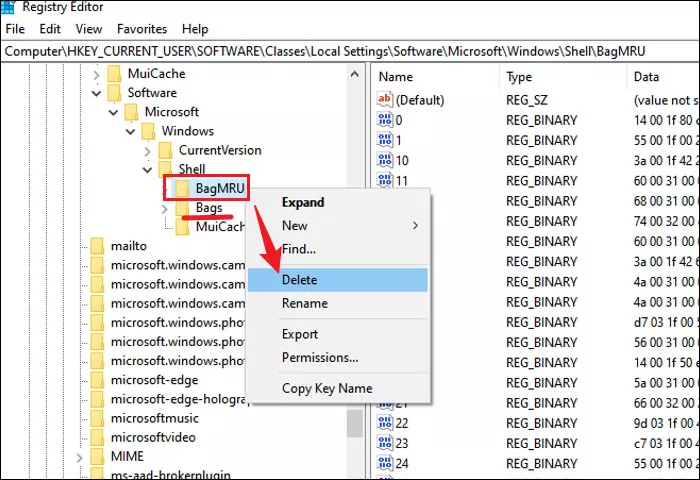
Step 2: Navigate to the following path:
HKEY_CURRENT_USER\SOFTWARE\Classes\Local Settings\Software\Microsoft\Windows\Shell
Step 3: Right-click on Bags and BagsMRU subkeys and select Delete. Delete them one by one.
Step 4: After deleting two subkeys, right-click on Shell and select New >Key. Then name the newly created key as Bags.
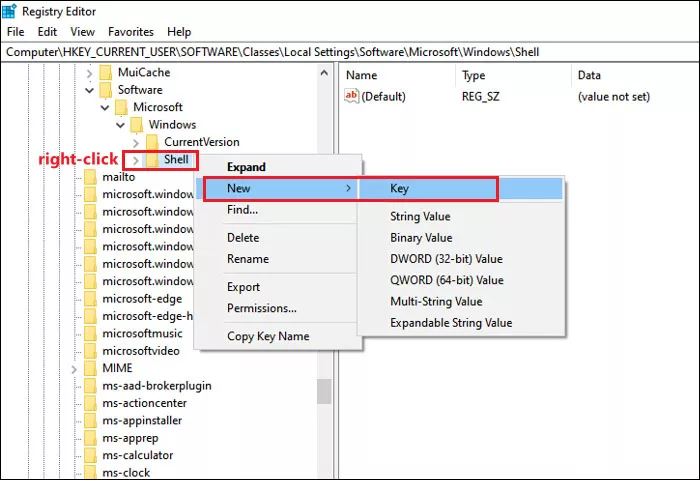
Step 5: Right-click on the newly recreated Bags, select New >Key and name it as AllFolders.
Step 6: Under AllFolders, create a new key and name it as Shell. If you followed every step, now you should have the path as below:
HKEY_CURRENT_USER\SOFTWARE\Classes\Local Settings\Software\Microsoft\Windows\Shell\Bags\AllFolders\Shell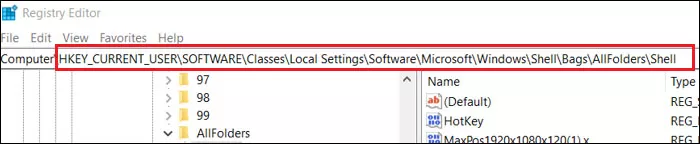
Step 7: Right-click on the right pane, select New >String Value and name it as FolderType.
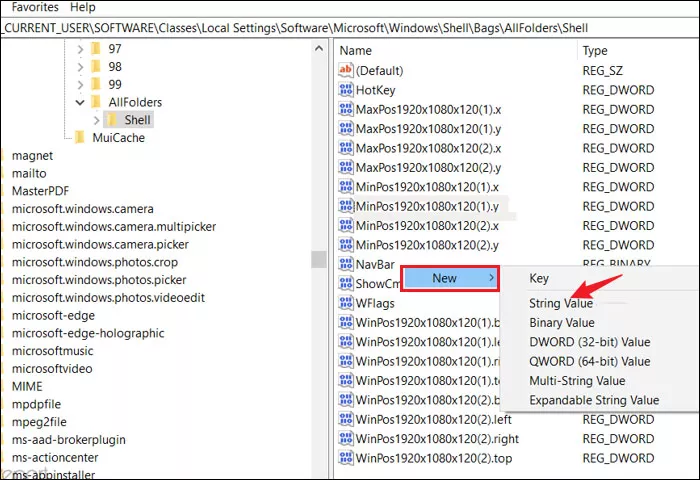
Step 8: Double-click FolderType and set its value data to NotSpecified. Then click OK.