How to Resolve Windows 10 and 11 File Explorer Keeps Opening by Itself?

May 24, 2022
It can be crushing if the File Explorer window and taskbar suddenly close when you try to open any folder, and then automatically reopen it after a few seconds. The causes of this error could be a recent software or hardware upgrade, corrupt Windows 10 or 11 settings, corrupt system files, Shell extension failure, etc. But don't worry too much, you can eliminate this error with this guide and follow these tips to resolve the windows 10/11 file explorer that keeps opening by itself.
- Part 1: What is Windows File Explorer?
- Part 2: How to resolve file explorer to keep opening by itself?
- Fix 1: Through command prompt
- Fix 2: Through restarting file explorer
- Fix 3: Through removing the autoplay
- Fix 4: Through scanning for viruses
- Fix 5: Through changing file explorer options settings
Part 1: What is Windows File Explorer?
File Explorer is a file management application used by the Windows operating system to browse folders and files. It provides users with a graphical interface to navigate and access the files stored on the computer. The main way to access Windows File Explorer is to click on the folder icon in the taskbar. When you click on the icon, the File Explorer window will open.
Part 2: How to resolve file explorer to keep opening by itself?
Fix 1: Through command prompt
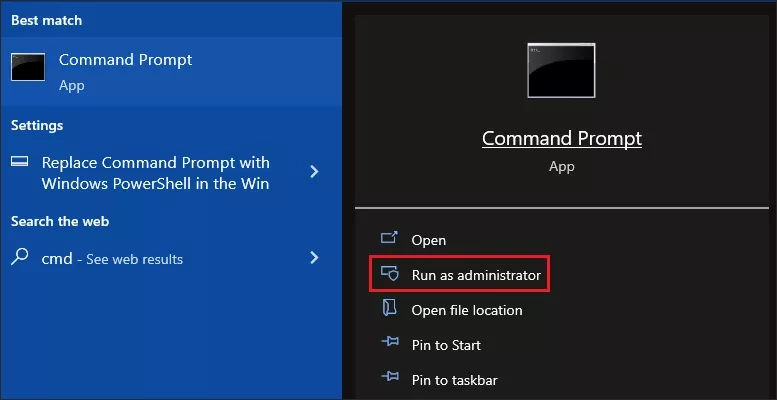
Step 1: Search for Command Prompt in the Start menu and right-click to run it as administrator.
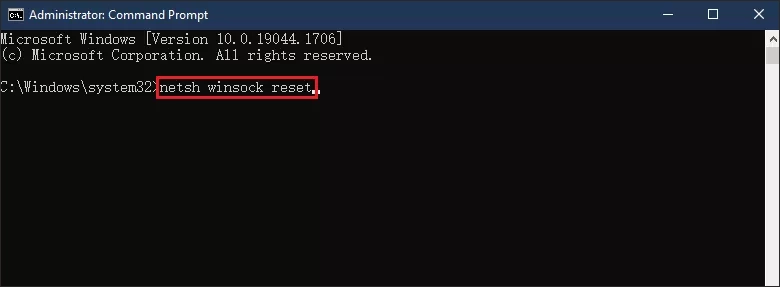
Step 2: Type "netsh winsock reset" in a command prompt window and press Enter to run the command.
Step 3: Reboot the system to save the changes and check if Windows File Explorer is normal.
Fix 2: Through restarting file explorer
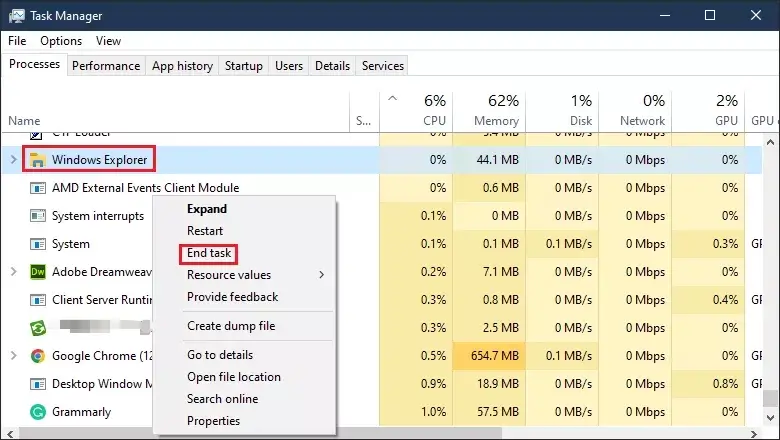
Step 1: Use the shortcut keys Ctrl+Shift+Esc to open Task Manager, find windows explorer, and right-click to "End task".
Step 2: When finished, click on the file and select " Run New Task ".

Step 3: Type "explorer.exe" in the pop-up dialog box and click "OK" to continue, and then restart your computer.

Fix 3: Through removing the autoplay
If you encounter the error that File Explorer keeps opening by itself when you plug in a peripheral device such as a USB flash device or USB external hard drive. In this case, the File Explorer keeps opening by itself error may be caused by a loose connection between your device and your computer. So if you want to fix the File Explorer keeps popping up error, you can try turning off the autoplay function.
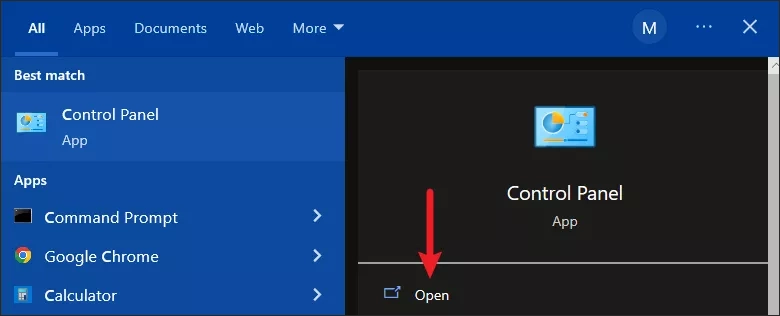
Step 1: Type Control Panel in the Windows search box and select to open it.
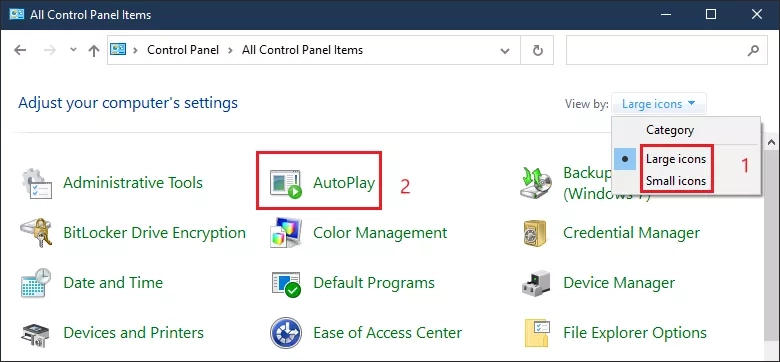
Step 2: Change the default viewing method to "large" or "small icons". In the Control Panel window, click on "Autoplay".
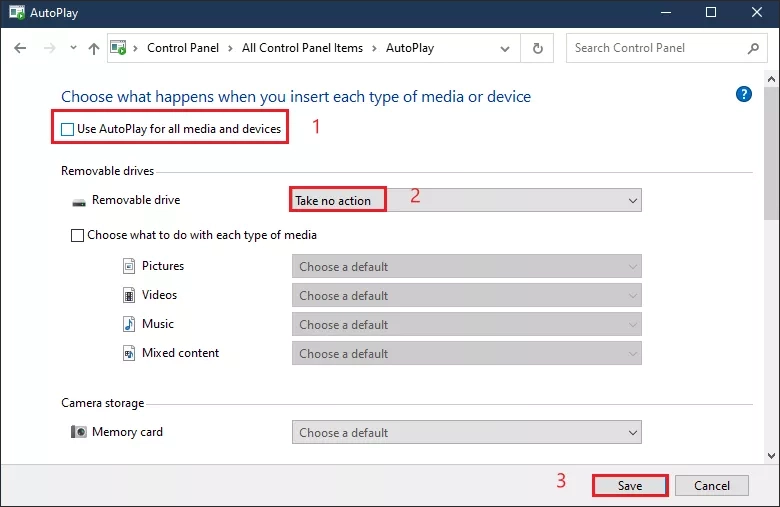
Step 3: In the pop-up window, uncheck the "Use AutoPlay for all media and devices" option. Alternatively, you can also change the setting for removable drives to "Take no action". Then click "Save" to confirm the changes.
Step 4: After completing the above steps, reboot your computer and check whether the issue that File Explorer keeps opening on by itself is solved.
Fix 4: Through scanning for viruses
If you encounter the error that File Explorer keeps opening by itself, it may be caused by a virus or malware on your computer. In this case, you need to scan your computer for viruses and remove them.
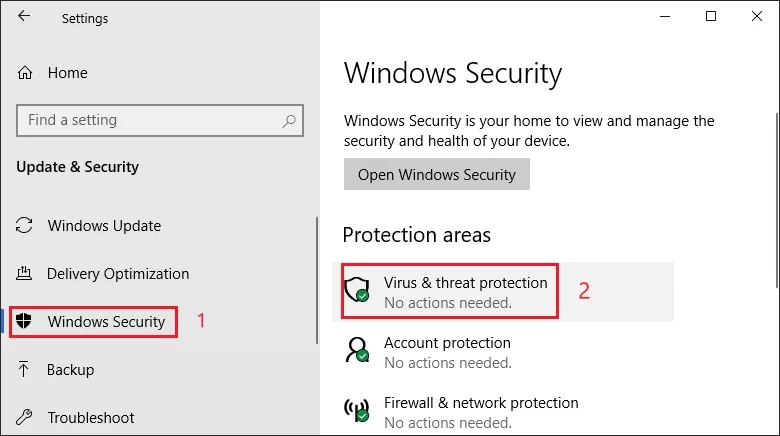
Step 1: Use the shortcut WIN+I to open Windows Settings and select Update & Security.

Step 2: In the left window click on "Windows Security", and in the right window choose "Virus & threat protection" to continue.
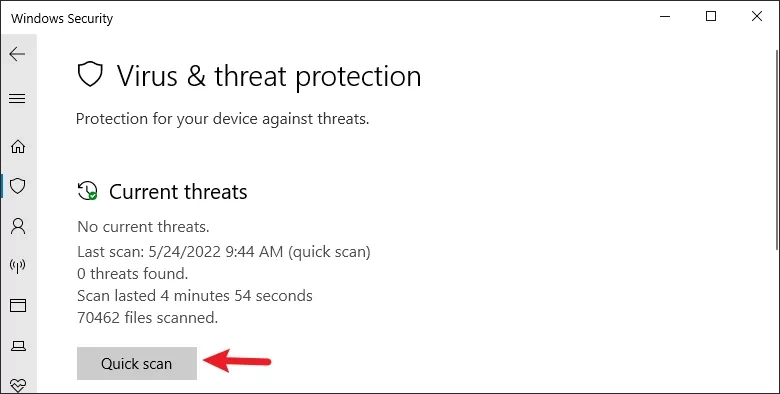
Step 3: Click on "Quick Scan" in the pop-up window. This action will start scanning your computer. If you have viruses on your computer, Windows Defender will remove them.
Step 4: Once done, restart your computer and check if the problem that File Explorer keeps opening by itself is solved.
Fix 5: Through changing file explorer options settings
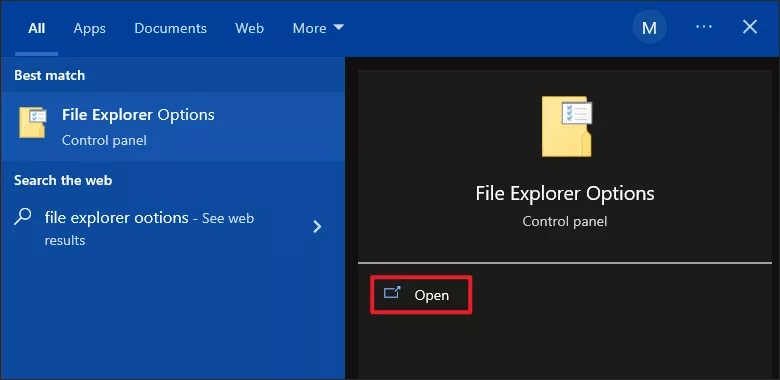
Step 1: Search for the "File Explorer option" in the Start menu and select "Open".
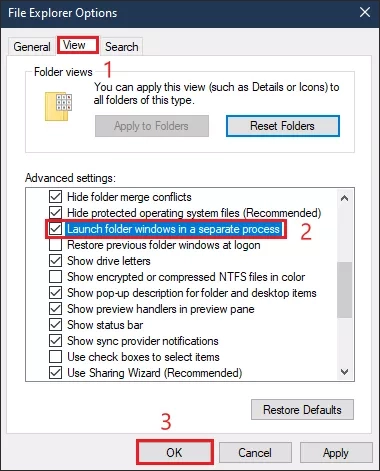
Step 2: Find the "View" tab, slide down and select the checkbox "Launch folder windows in a separate process", then press "OK" to save the changes.
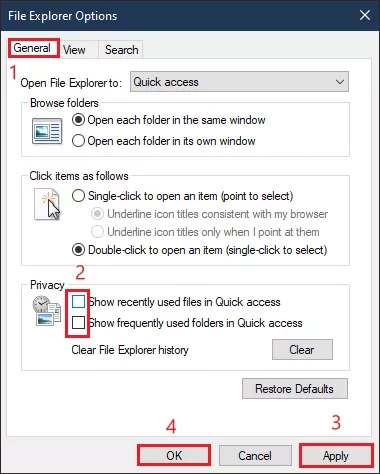
Step 3: In the "General" tab scroll down to the Privacy section and click the "Clear" button to clear your history. Click "ok" to complete the changes.
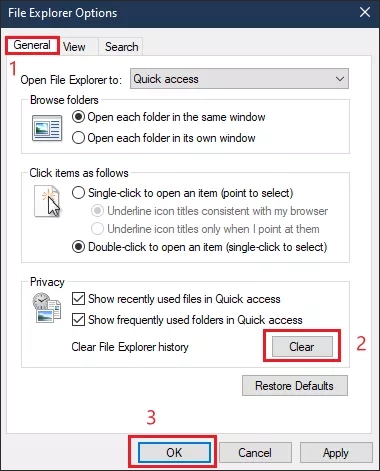
Step 4: Under the "General" tab, uncheck the boxes next to "Show recently used files in Quick access" and "Show frequently used folders in Quick access". Press the "OK" and "Apply" buttons to save the changes.