Fix: "Can't Connect to This Network" Error in Windows 10/11

June 1, 2022

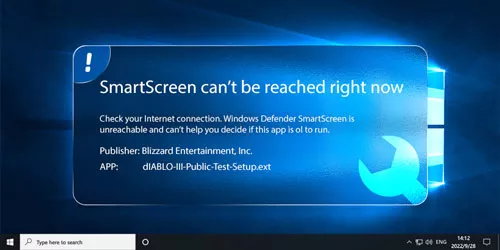
Whenever you turn on your computer, the first thing you should check is whether you are connected to the Internet. However, many users report experiencing the "Windows cannot connect to this network" error. This error prevents you from connecting to the network and accessing the Internet without providing any reason for the network. This is both frustrating and troublesome because you don't know how to proceed. However, the fix is as simple as the problem that caused it. Here are 6 solutions to fix the error of "Can't connect to this network" in Windows 10/11.
Solution 1: Run Network Troubleshooter
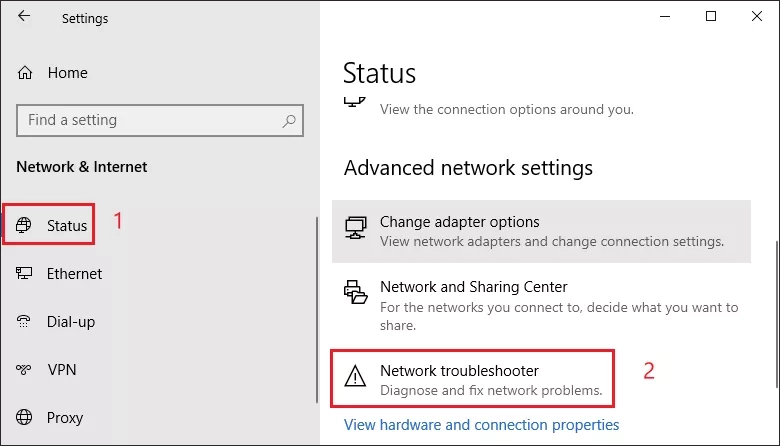
Step 1: Use the shortcut key WIN+I to open the settings. Click the “Network & Internet” option.
Step 2: Click on “Status”, and then click on “Network troubleshooter”. This operation will automatically diagnose and fix network problems.
Solution 2: Reset the Network
Windows 10/11 provides users with the feature to reset the network, enabling them to restore network settings to their default state.
Step 1: Use the shortcut key WIN+I to open the settings. Click the "Network & Internet" option.It is the same as Solution 1 Step 1.
Step 2: Click "Status" in the left window, slide to the bottom in the right window and select "Network Reset".
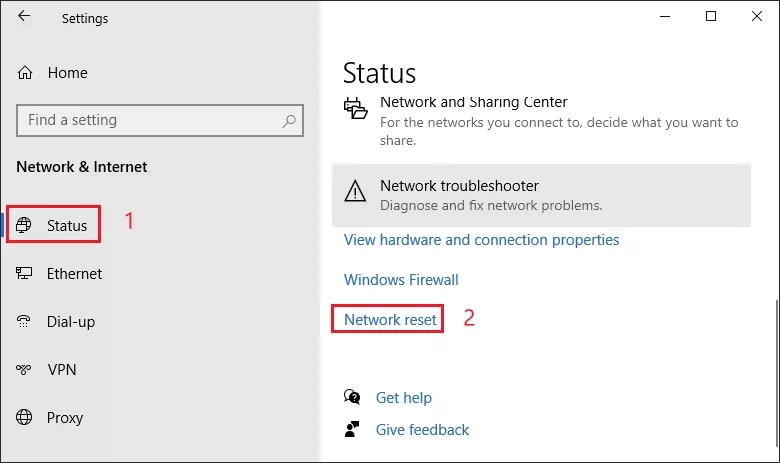
Step 3: Click on "Reset now". After performing this action, your PC will be restarted and this network error will be fixed.

Solution 3: Change Power Options
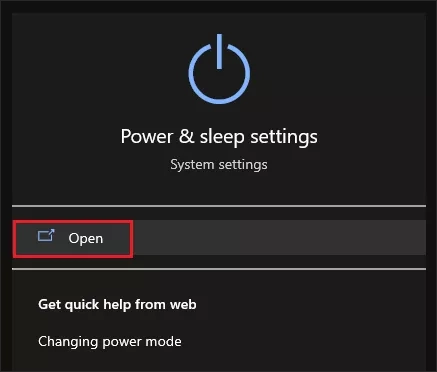
Step 1: Use the shortcut WIN+Q to search for "Power & Sleep settings" in the search bar and turn it on.
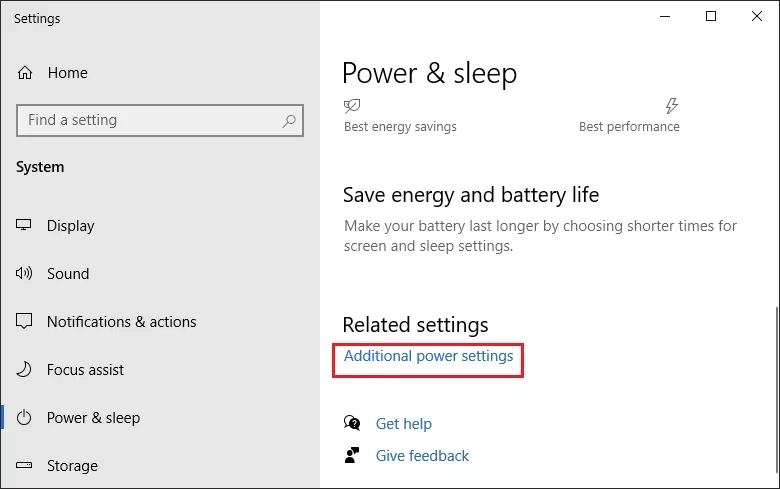
Step 2: In the right window slide to the bottom and select "Additional power settings".
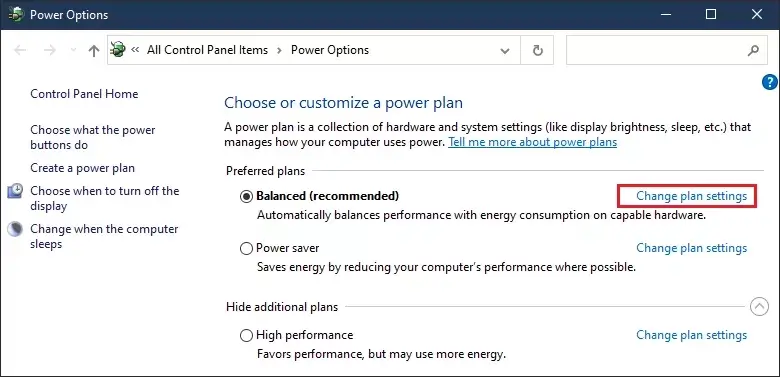
Step 3: Click on "Change plan settings".
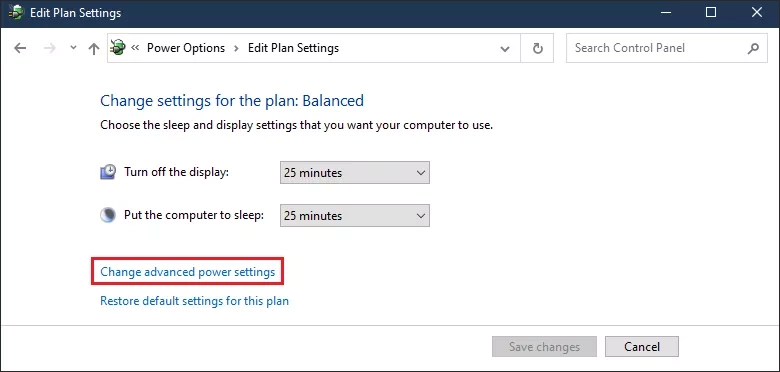
Step 4: A window will open, then click on "Change advanced power settings".
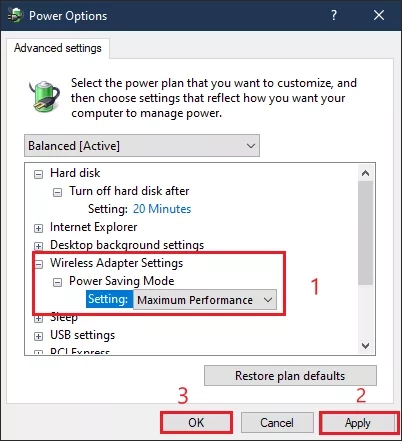
Step 5: In the power options, find the "Wireless Adapter Settings" option, click the + sign to expand the "Power Saving Mode" option, then click on the drop-down list. In the Setting, select "Maximum Performance". Finally, click on "OK" and "Apply". This will allow your PC to work on Maximum Performance and fix this error.
Solution 4: Disable IPv6
For the most part, the system uses IPv4, but there are some specific tasks that require the use of IPv6, so you can disable IPv6 on your system and enable it when needed.
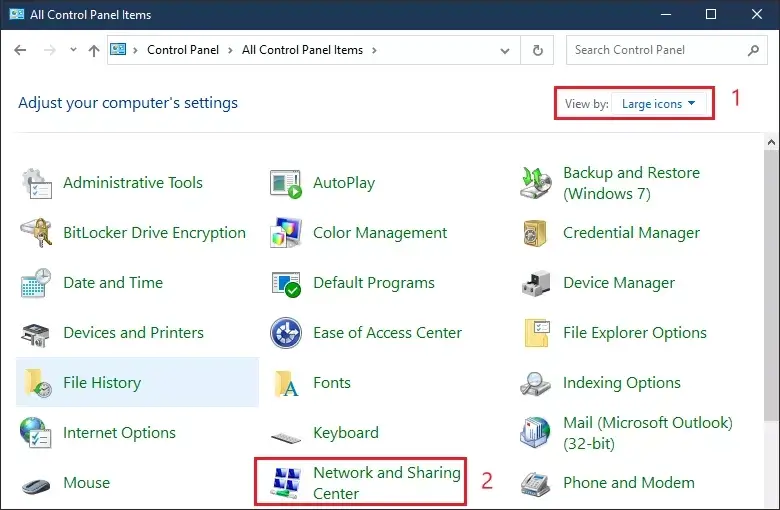
Step 1: Use the shortcut keys WIN+Q to search for the control panel in the search bar and open it, Select to view as "Large icons", and then click "Network and sharing center".
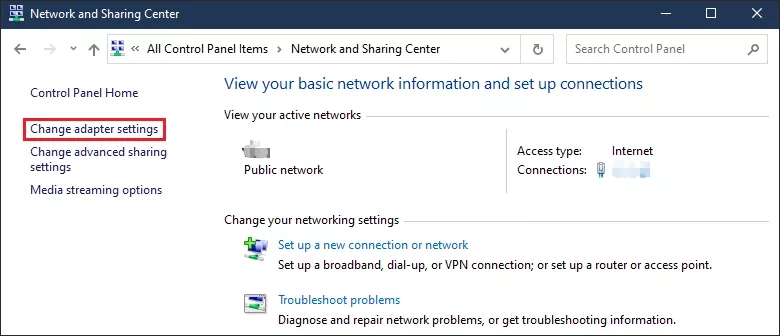
Step 2: Click on "Change adapter settings".
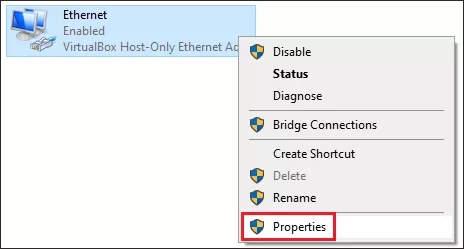
Step 3: Right-click your network and click "Properties".
Step 4: A dialog box will open, find and uncheck "Internet Protocol version 6 (TCP/IPv6)", then click "OK" to complete the change.
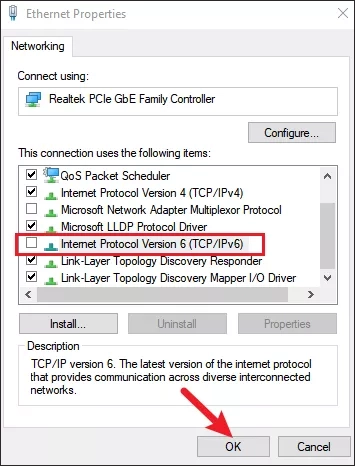
Step 5: Reboot your computer and attempt to connect to the network, as IPv6 is now disabled on your system.
Solution 5: Disable/Enable NIC
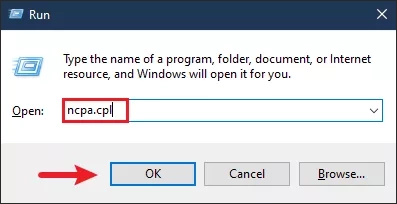
Step 1: Use WIN+R to open the Run dialog box, type "ncpa. cpl" and click "OK" to open Network Connections.
Step 2: Right-click on the Network option and select "Disable".
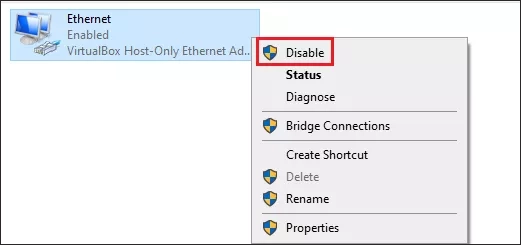
Step 3: Click "Enable" and restart your PC and see if the network can't connect error is resolved.

Solution 6: Release IP and refresh DNS Cashe
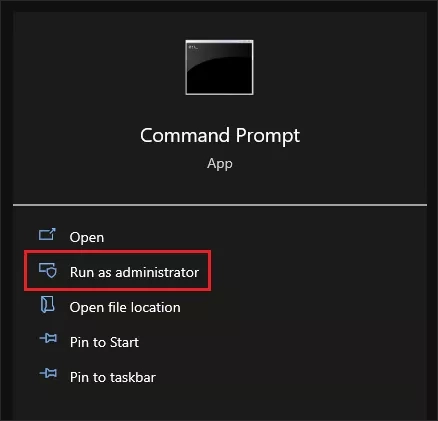
Step 1: Search for CMD in the search bar and click "Run as administrator".
Step 2: Run the following commands from the command prompt and press enter one by one.
netsh winsock resetnetsh int ip resetipconfig /releaseipconfig /renewipconfig /flushdns
Step 3: Close the Command Prompt window and restart the computer. Then see if you can connect to the internet.