Fix: Windows 11 Won't Go to Sleep Mode Issue

May 17, 2022

Sleep mode is an energy-saving mode in our Windows that turns off the screen and puts the computer into low-power mode. This short rest can save the power and life of the battery. However, some users complain that their Windows 11 computer cannot go to sleep mode.
Here we share 5 ways to solve the issue that Windows 11 not going to sleep mode. I do hope one of them can work on your issue.
If your computer goes to sleep mode but can't wake up from sleep, you can visit Why Can't Computer Wake Up from Sleep Windows 10; how to Fit It?
1. Manually enable sleep mode
Before trying other fixes, please make sure that sleep mode is enabled in your windows settings. Here's how you can do it.
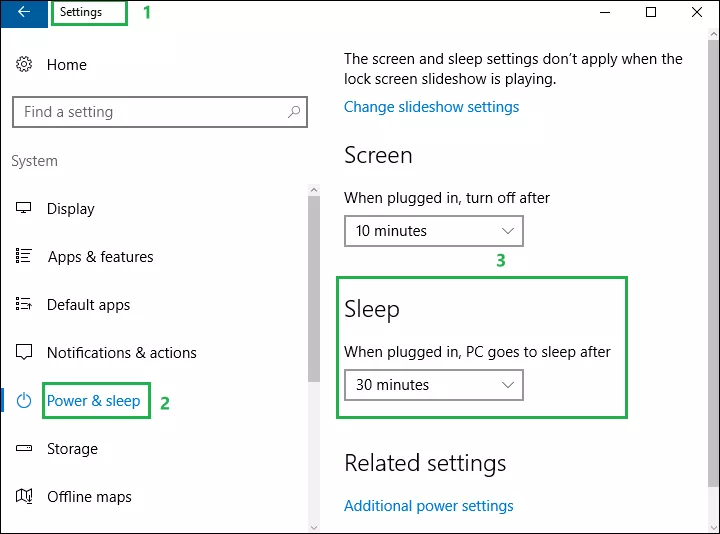
Step 1: Type settings in the search box in the Windows Taskbar and click Setting.
Step 2: Click System.
Step 3: Click Power & sleep.
Step 4: On the right pane, select the sleep time by picking options from When plugged in, PC goes to sleep after under Sleep.
2. Disable hybrid sleep
Hybrid sleep is the combination of sleep mode and hibernation. In some cases, this mode may disturb the sleep order of your computer, through disabling hybrid sleep mode, your computer can return to normal sleep.
Step 1: Right-click the Windows icon and select the Control Panel.
Step 2: Navigate to Hardware and Sound > Power Options.
Step 3: Click Change plan settings under Preferred plans.

Step 4: Select Change advanced power settings.
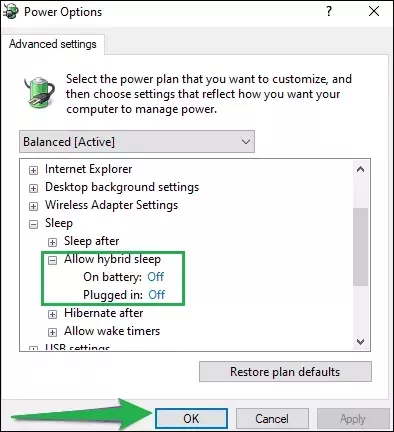
Step 5: Click the ( + ) plus icon beside the Sleep, and then click the ( + ) plus icon beside Allow hybrid sleep.
Step 6: Turn the On battery and Plugged in option off, then press OK and Apply.
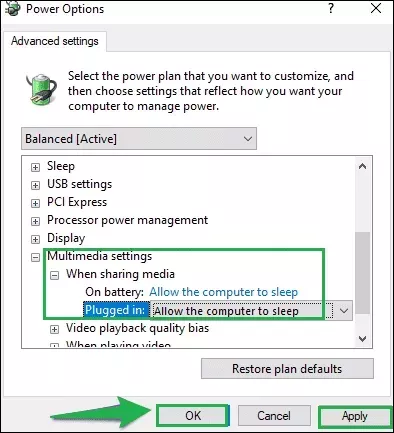
Step 7: Move down to Multimedia settings and click (+) plus icon to expand it. Click (+) plus icon again to expand When sharing media, and choose Allow the computer to sleep for both on battery and Plugged in.
3. Disable wake timers
The function of wake timers is to wake up your device regularly, you can disable this function by the control panel.
Step 1: Open Control Panel.
Step 2: Navigate to Hardware and Sound > Power options > Balanced(recommended) plan > Change plan settings.
Step 3: Click Change advanced power settings.
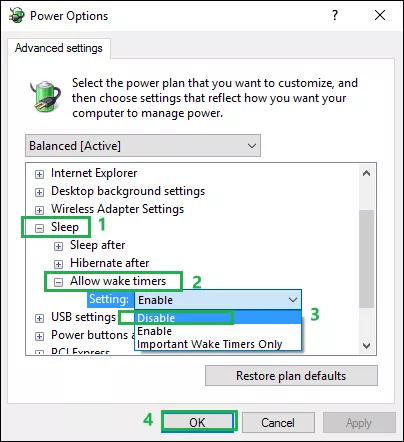
Step 4: Hit the plus( + ) icon beside the Sleep option, click Allow wake timers and set the option to Disable.
4. Prevent keyboard and mouse from waking the computer
Generally, pressing a button on your keyboard or moving your mouse can wake your PC from sleep mode. So, if you touch them by accident, your computer's sleep mode will be interrupted instantly.
Step 1: Right-click Windows Start button on the left corner of your computer, click the Device Manager.
Step 2: Locate the Keyboards and expand the list, right-click the keyboard you are using now and press Properties.

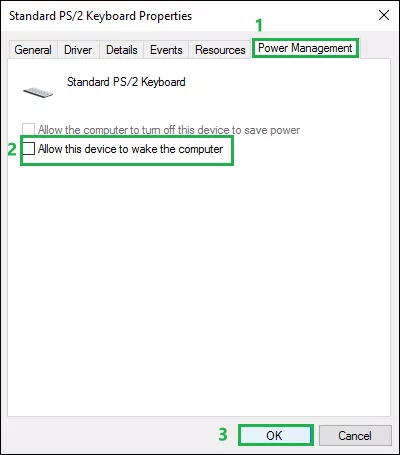
Step 3: Click the Power Management tab and uncheck Allow this device to wake the computer. Then click OK.
Step 4: Repeat the steps above on your mouse device. ( double-click the Mice and other pointing devices rather than Keyboards)

5. Edit power plan settings
You can customize the additional power plan by changing when the computer sleeps. Choosing a specific time scope helps your computer know when it should rest.
Step 1: Right-click the Windows icon and select the Control Panel.
Step 2: Navigate to Hardware and Sound > Power options.
Step 3: On the left side, click Change when the computer sleeps.

Step 4: Put the computer to sleep at your desired time.