Windows Stuck on Welcome Screen: Here's how to fix it!

May 25, 2022

There might be times when you start your PC and enter a password, but the Windows is stuck on the welcome screen spinning circle, making you inaccessible. Clicking the mouse doesn't play a part. So how to wake the system? In this post, we'll discuss how to get past a stuck welcome screen and get a smooth login.
In some cases, though the mouse couldn't wake the Windows, the keyboard could. You can firstly try to press Enter or Ctrl+Shift+Enter to see if you can sign in. If these shortcuts don't work, try the methods given below.
1. Disconnect internets
The root cause of Windows loading screen takes a long time might be its attempts to connect the Internet. You can temporarily unplug your router and check if the issue is resolved. If you are using Ethernet, disconnect Ethernet cable.
2. Disable Credential Manager in safe mode
To enter safe mode, you need to follow the below steps:
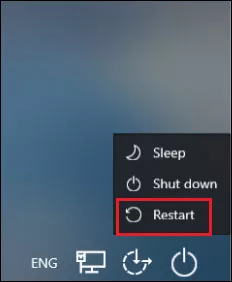
Step 1: When you're on the sign-in screen, click on the Power icon at the bottom right of the screen and click on Restart while pressing and holding Shift key at the same time. Make sure you hold Shift before clicking Restart.
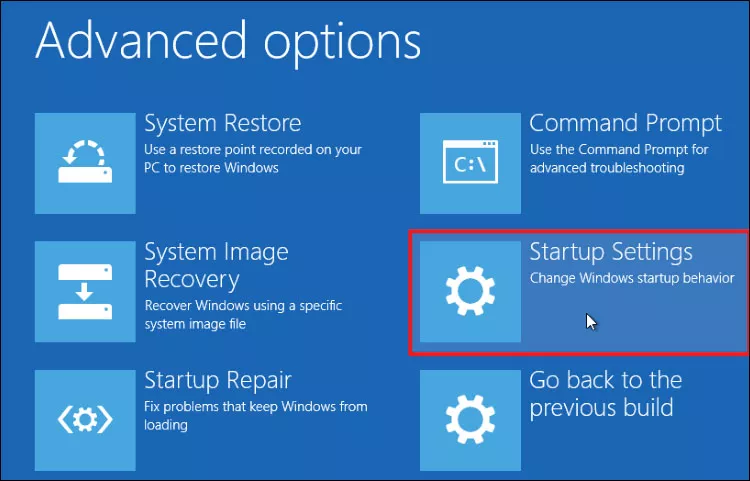
Step 2: Click on Troubleshoot from Choose an option screen.

Step 3: Click on Advanced options on Troubleshoot screen.

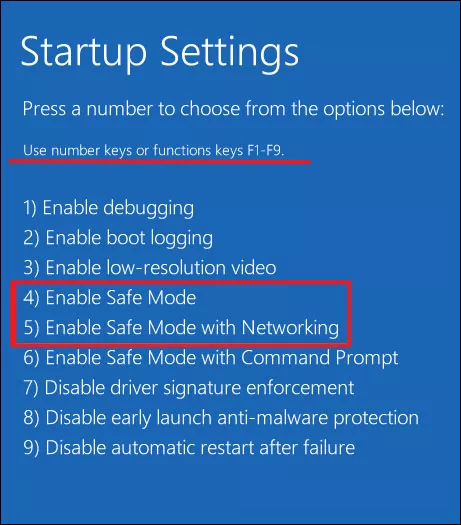
Step 4: Click on Startup Settings on Advanced options screen.
Step 5: Click on Restart button at the bottom right on the screen.
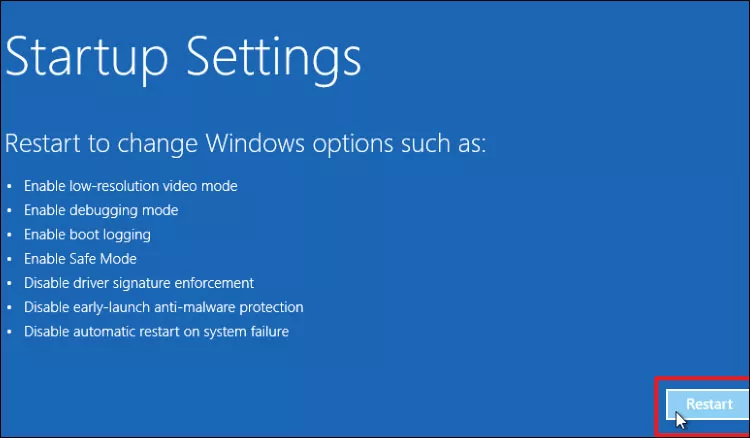
Step 6: Press F5 key to Enable Safe Mode with Networking.
Then, you need to disable Credential Manager:
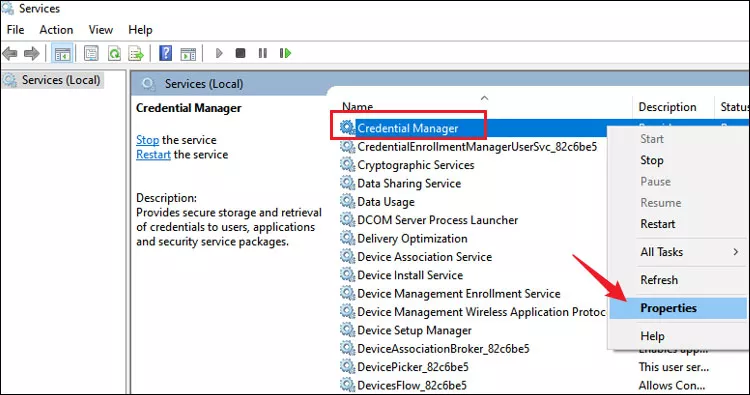
Step 7: Once you've started the PC in safe mode, press Windows+R to open run command and type services.msc in the open box. Click OK to open Services window.

Step 8: Scroll down to find Credential Manager service, right-click on it and select Properties.
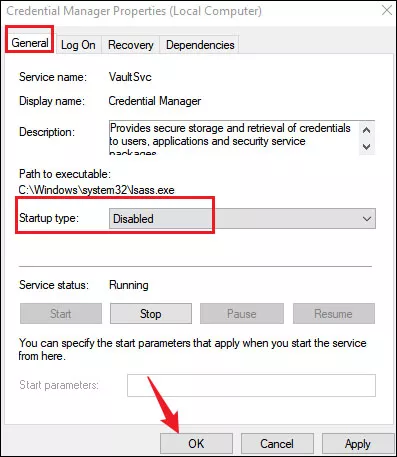
Step 9: Select Disabled after Startup type options and click OK to save changes.
After finishing all steps, restart the system and check if the problem still exists.
3. Disable fast startup in safe mode
Step 1: Enter safe mode as how you did in method 2.
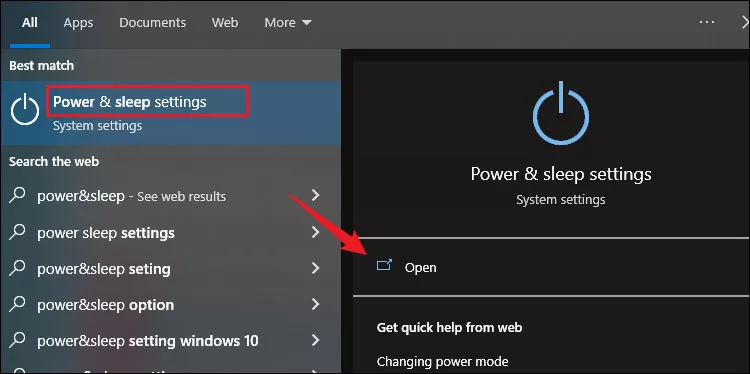
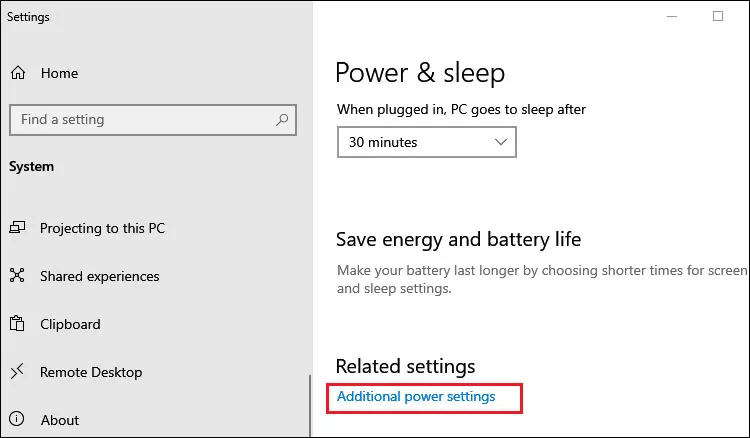
Step 2: Type and search power & sleep in the search bar and then click Open.
Step 3: Select Additional power settings in next window.
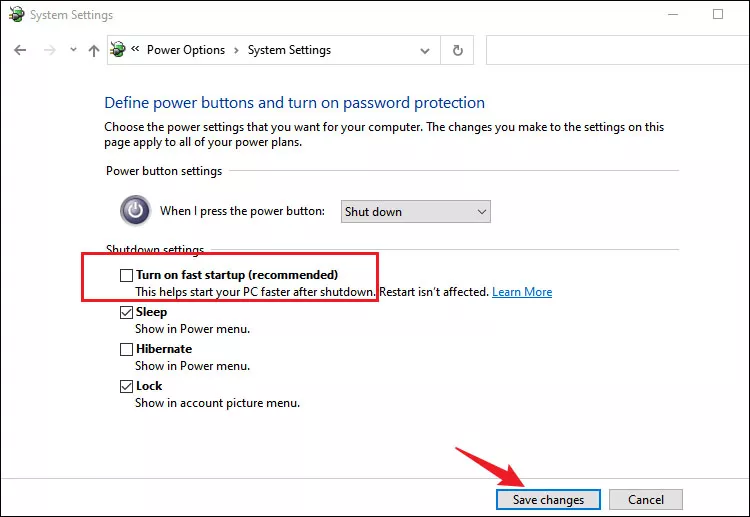
Step 4: Click on Choose what the power button does.

Step 5: Select Change settings that are currently unavailable if your power button option is Shut down.

Step 6: Uncheck Turn on fast startup and select Save changes.
4. Uninstall recently installed updates in safe mode
Step 1: Enter safe mode following step 1 to step 6 in method 2.
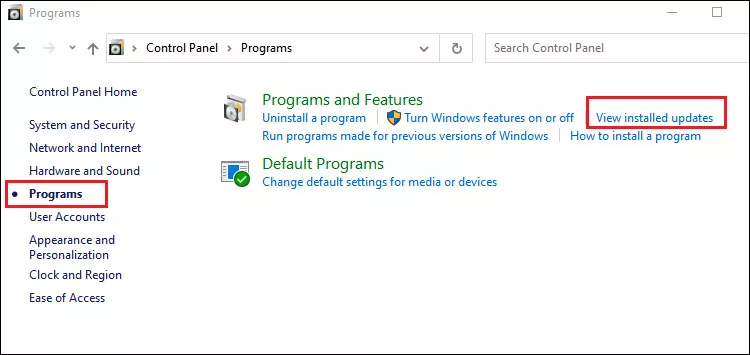
Step 2: Type and search Control Panel in the search bar and then click Open.

Step 3: Select Programs from the list and click on View installed updates under Programs and Features.
Step 4: A list of recently installed updates will display on the screen. Remove the one causing the issue.
5. Perform an automatic Startup Repair
Step 1: Repeat step 1 to step 3 in method 2.
Step 2: Select Startup Repair in Advanced options screen and wait until the process complete.
6. Run system checks
Step 1: Repeat step 1 to step 3 in method 2.
Step 2: Select Command Prompt from Advanced options.
Step 3: Copy and paste the following commands in Command Prompt. Execute one by one and press Enter after each:
sfc /scannow
chkdsk c: /f /r
bootrec /fixmbr
bootrec /fixboot
bootrec /scanos
bootrec /rebuildbcd
Wait until all the commands complete executed and reboot your PC.