Two Ways to Move Your Desktop Folder Location in Windows 10 & 11

May 13, 2022
Desktop is your PC's home interface to keep some items you need to quickly access, like files, folders, and shortcut, etc. By default, desktop is created in OS drive(C:\) and is unique for every user account in the computer. All the user files and folders are stored in the C:Users. In some case you would want to move the desktop out of your user account or change its default location to another non-system drive.
It is easy to do, in this article, you will know how to change the default location of your desktop folder.
Using desktop properties
Step 1: Press Windows + E to open File Explorer.
Step 2: Right-click Desktop and choose Properties.
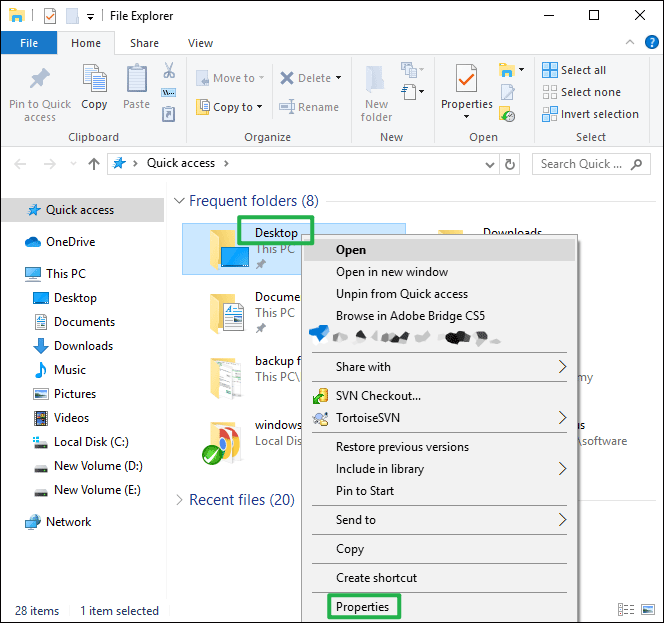
Step 3: In the Location tab, click Move.
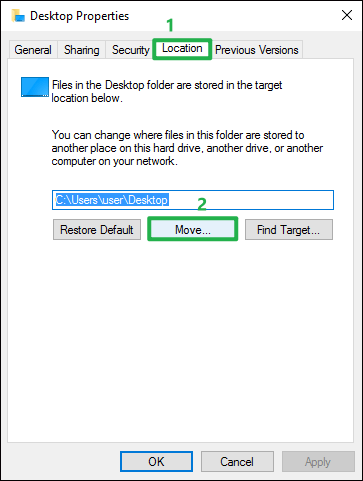
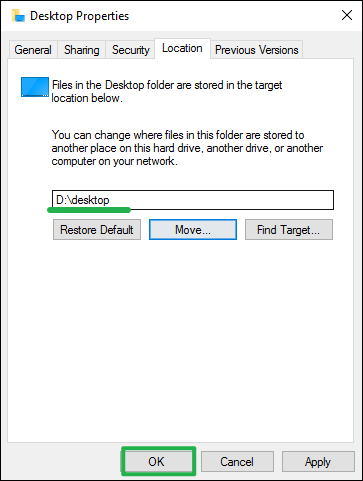
Step 4: Now a new windows will pop up, select your desired location here to move your desktop folder to(e.g. : D:\desktop). Then click Select folder.
Step 5: Click OK to save the change.
Using registry
Step 1: Press Windows + R to launch Run dialog, type regedit then click OK.
Step 2: Navigate to the following path:
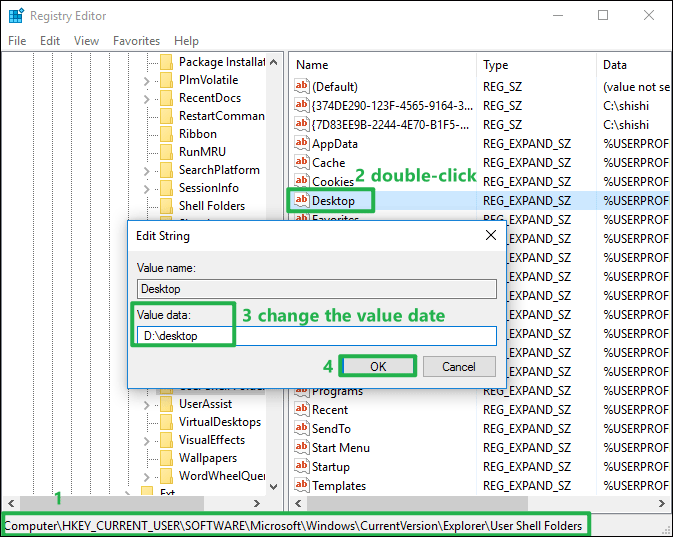
HKEY_CURRENT_USER > SOFTWARE > Microsoft > Windows > CurrentVersion > Explorer > User Shell FoldersStep 3: On the right side, find and double-click Desktop.
Step 4: Change the Value data to a new folder location you want. (eg: D:\desktop)
Step 5: Click OK.
Step 6: Restart explorer.exe for the change to take effect.
Watch the Video Tutorial
Learn how to change the default path for the desktop folder-Watch the video now!