How to Add Copilot to Windows 11 23H2 Context Menu

January 5, 2024
Microsoft Copilot is an AI-powered tool designed to enhance Windows 11 23H2 user experiences. With its powerful function, you can make Copilot do most things. To easily open Windows Copilot, adding a Copilot option to the desktop context menu is a good choice! So, how to do that? Here are the methods!
Part One: Add Copilot to Context Menu on Windows 11 23H2 Desktop
Step 1: Press the Win key and R button simultaneously; Type “regedit” and click OK.
Step 2: Navigate to the following path:
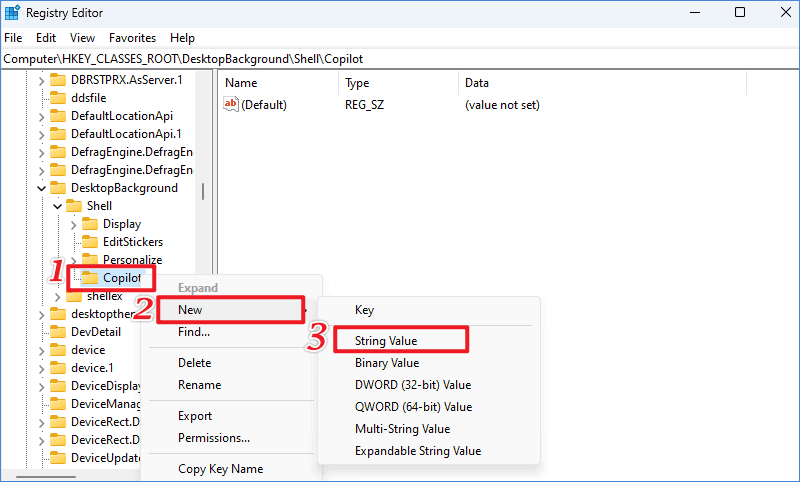
Computer\HKEY_CLASSES_ROOT\DesktopBackground\ShellStep 3: Right-click the Shell folder → New → Key → Name it “Copilot”.

Step 4: Right-click the Copilot folder → New → String Value → Name it “MUIVerb”.
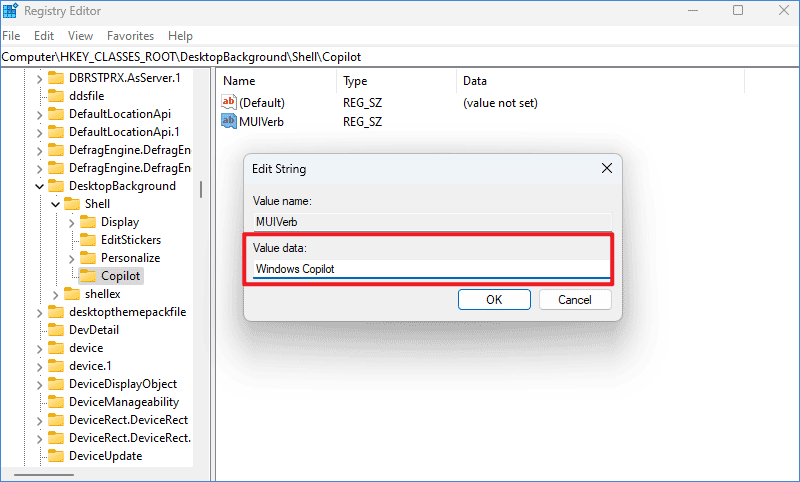
Step 5: Double-click MUIVerb → In the Value data blank, enter “Windows Copilot” → Click OK.
Step 6: Right-click the Copilot folder → New → String Value → Name it as “Icon”.
Step 7: Double-click Icon → In the Value data blank, enter the full path of Copilot.ico file.

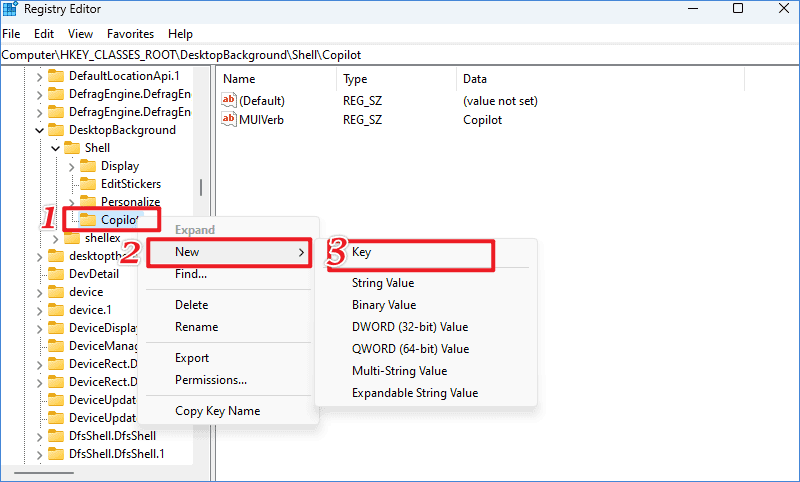
Step 8: Right-click the Copilot folder again → New → Key → Name it as “command”.
Step 9: In the command folder → Double-click Default → Copy the following data in the Value data blank.
rundll32.exe url.dll,FileProtocolHandler "microsoft-edge://?ux=copilot&tcp=1&source=taskbar"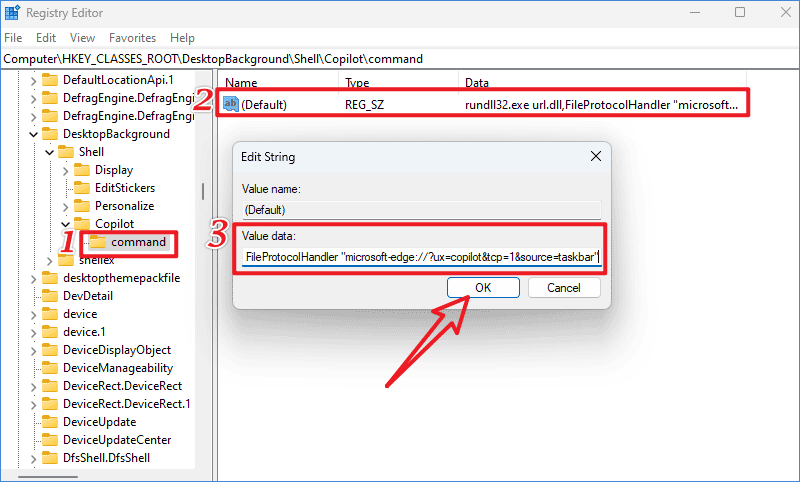
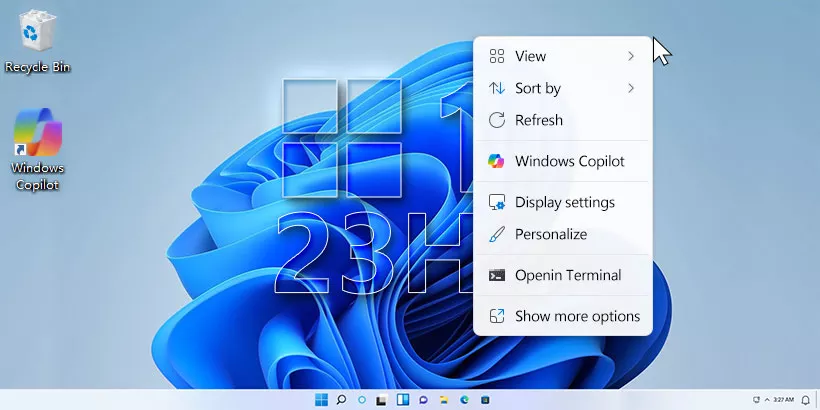
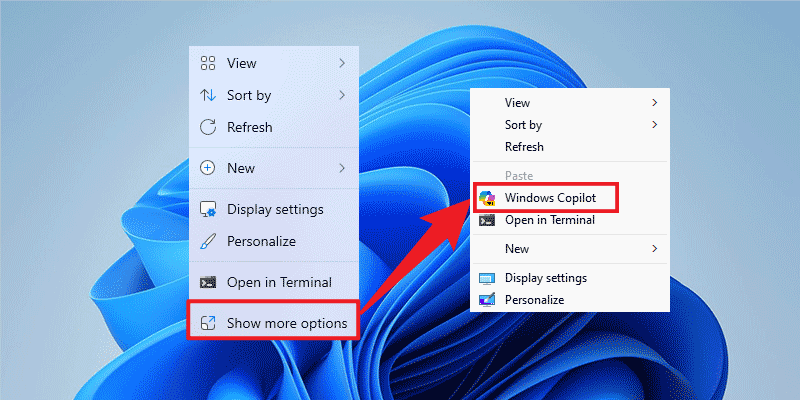
When you have completed the above steps, right-click on your desktop and click Show more options. You will be surprised to find a Copilot option. Click it to check if you can quickly open Windows Copilot.
Part Two: Enable or Disable Windows Copilot on Windows 11
You may not enable Windows Copilot yet if you cannot add a Copilot option to the desktop context menu. Try the following methods to enable/disable Microsoft Copilot.
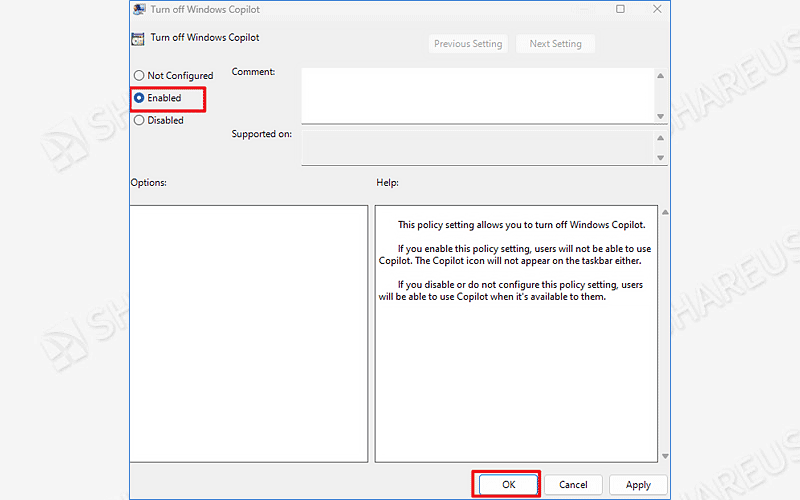
Step 1: Press Win + R and type “gpedit.msc” then click OK.
Step 2: Browse to the following path: User Configuration\Administrative Templates\Windows Components\Windows Copilot.
Step 3: Double-click Turn off Windows Copilot → Tick “Not Configured” and click OK to enable Copilot.
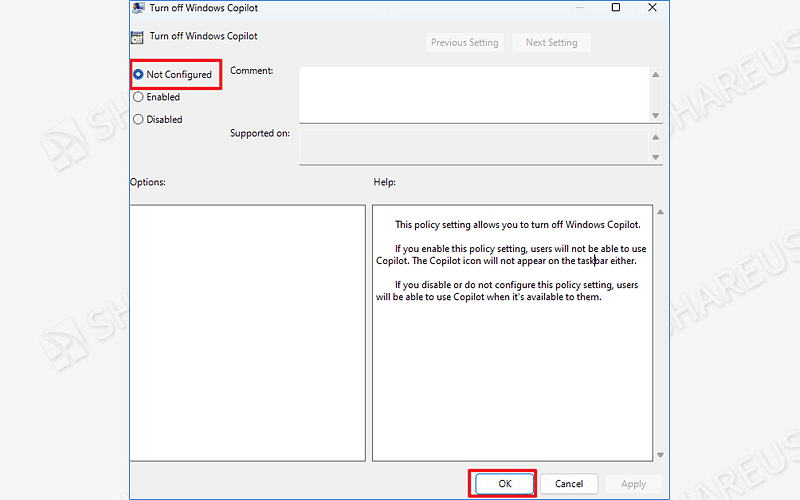
Step 4: If you want to disable Copilot, tick Enabled and click OK.