How to Fix 4K Video Lagging or Stuttering Issues on Windows 11/10

June 28, 2022
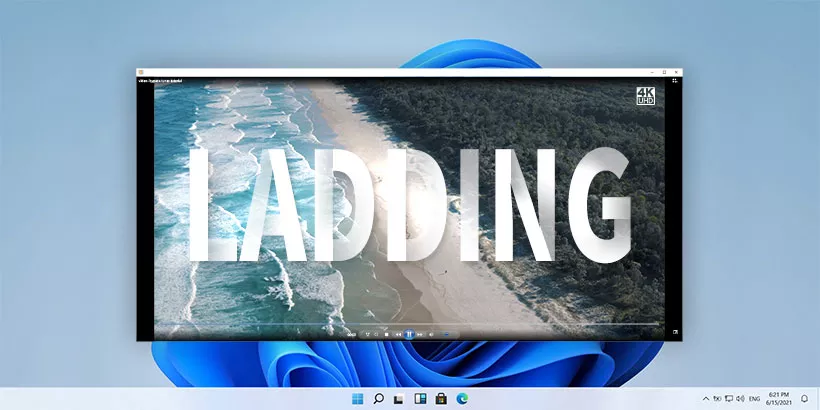
Running into a situation where the video lags or stutters doesn't sound like a particularly serious problem, but if you are a video enthusiast or your work involves a lot of video viewing, then lagging video can be irritating. You may experience video playback problems on the saved video in your PC or you encounter such issue when watching in the browser or on certain players. In order to improve your watching experience, here we will provide some fixes on how to restore smooth video playback.
1. Run video playback troubleshooter
Step 1: Press Windows+I to open Settings and select Update & Security>Troubleshoot. At the right pane, scroll down to locate Additional troubleshooters.
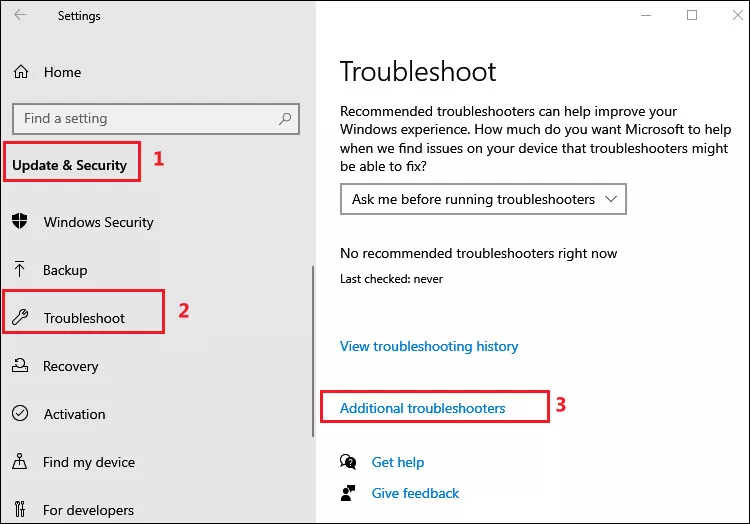
Step 2: Under Find and fix other problems list, select Video Playback and click to expand it. Then click Run the troubleshooter.

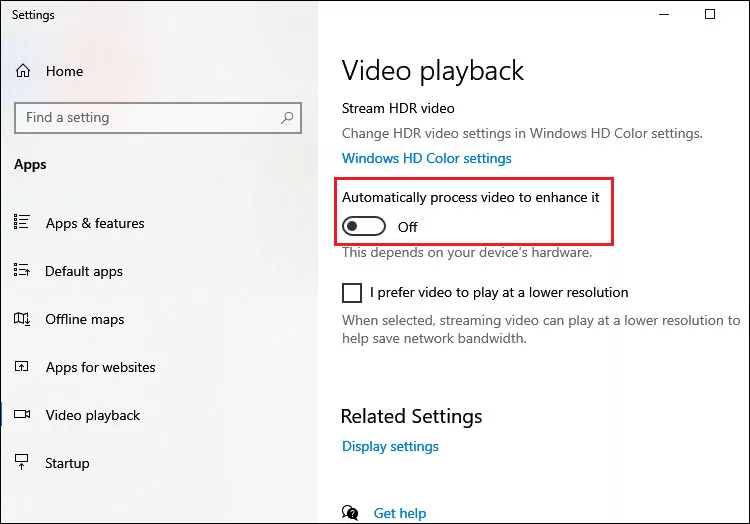
2. Disable video processing
Step 1: Type and search Video playback in the search bar and click Open.

Step 2: Turn off the toggle under Automatically process video to enhance it.
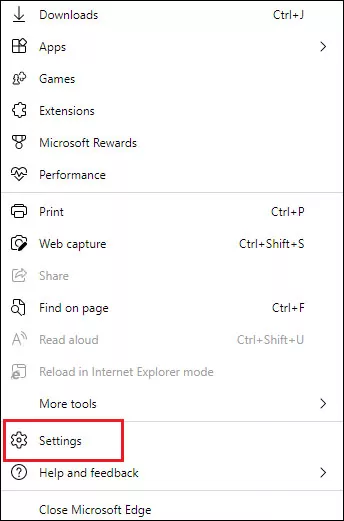
3. Disable hardware acceleration in browser
For Microsoft Edge:
Step 1: Open Microsoft Edge, click the three dots in the top-right corner and select Settings.
Step 2: In the next window, click the three parallels icon to expand Settings menu and select System and performance.
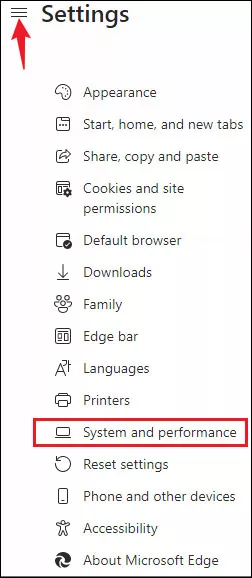
Step 3: Turn off the toggle next to Use hardware acceleration when available.
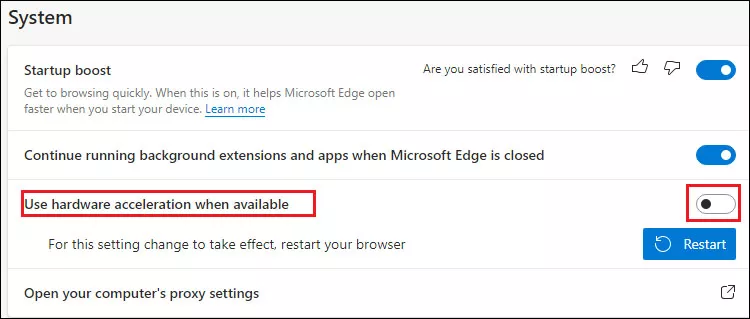
Step 4: Restart the browser.
For Google Chrome:
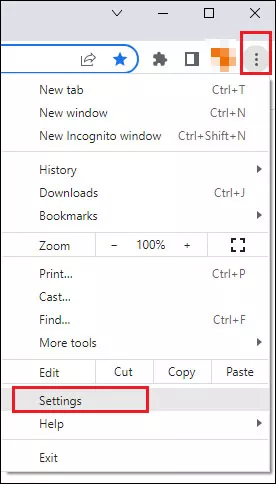
Step 1: Open Chrome, click the three vertical dots in the top-right corner and select Settings.
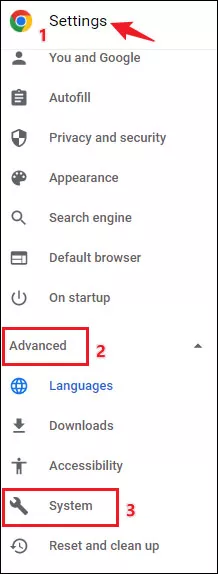
Step 2: Then click the three parallels icon to expand Settings menu, expand Advanced option and choose System.
Step 3: Turn off the toggle next to Use hardware acceleration when available.
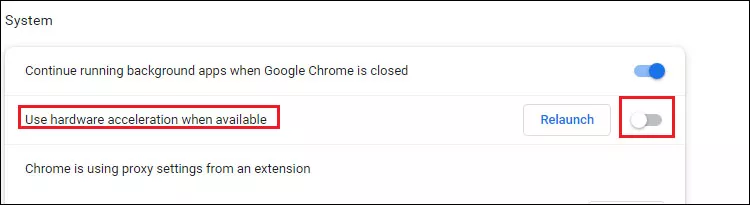
Step 4: Relaunch the browser.
4. Update graphics drivers
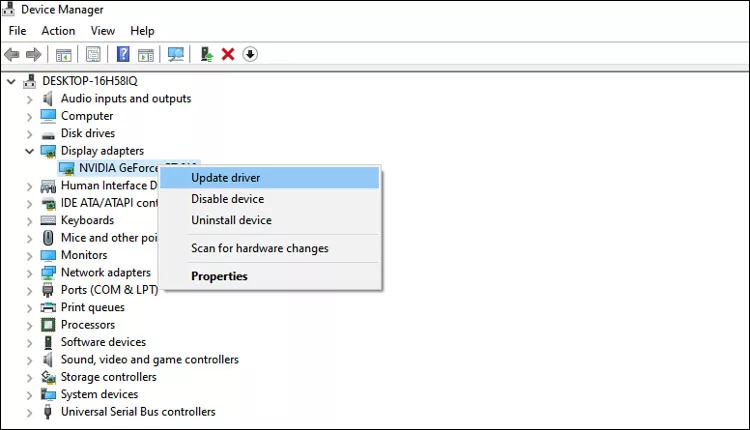
Step 1: Press Windows+X and select Device Manager from the context menu.

Step 2: Expand Display adapters, right-click on your graphics card and select Update driver.
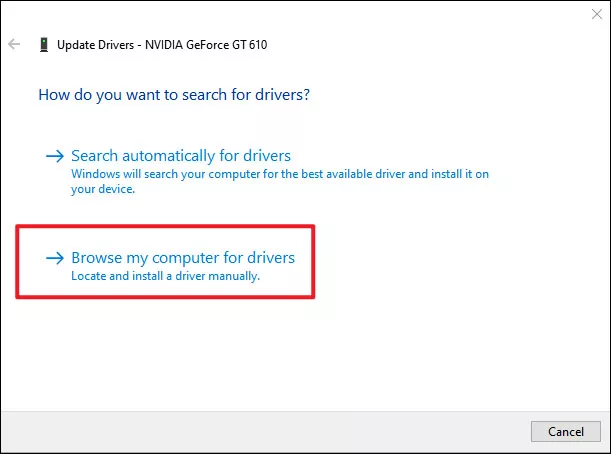
Step 3: In the next window, click Browse my computer for drivers.
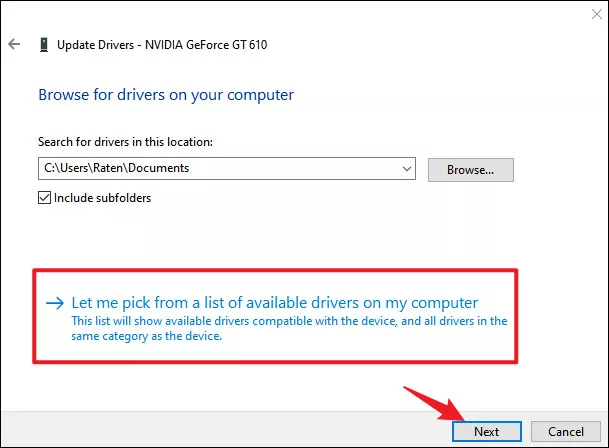
Step 4: Then select Let me pick from a list of available drivers on my computer and click Next.
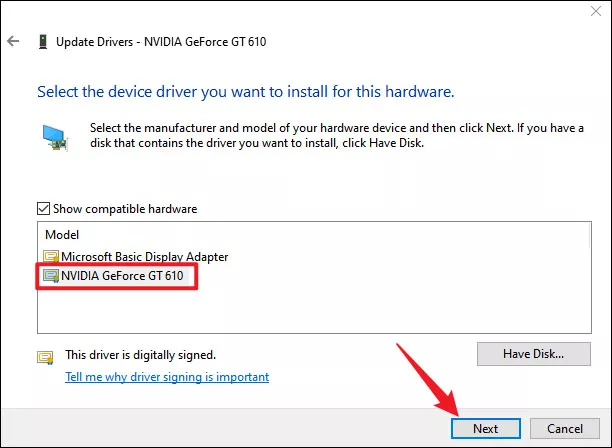
Step 5: Choose your graphics driver and click Next to continue.
Step 6: Reboot your device after finishing updating.
5. Enable accelerated graphics
This method applies to users who have the video problem on streaming.
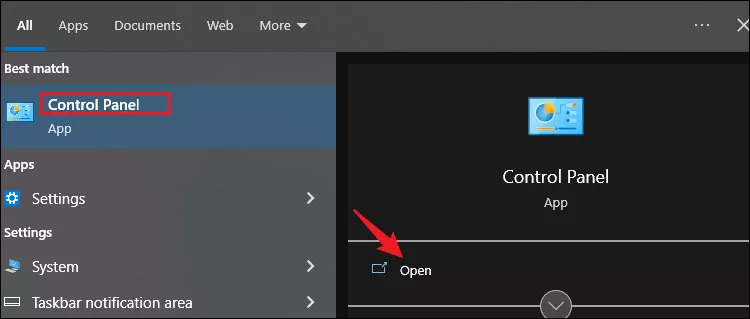
Step 1: Type and search control panel in the search bar and open it.
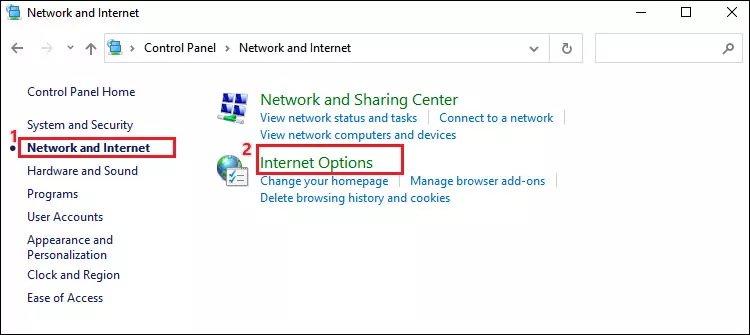
Step 2: Select Network and Internet > Internet Options.
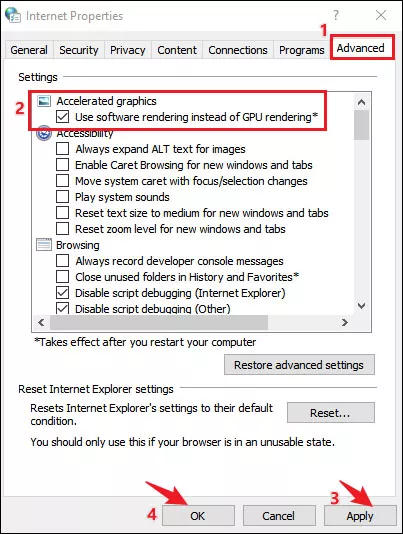
Step 3: In Internet Properties window, switch to Advanced tab and check Use software rendering instead of GPU rendering.
Step 4: Click Apply and then OK.
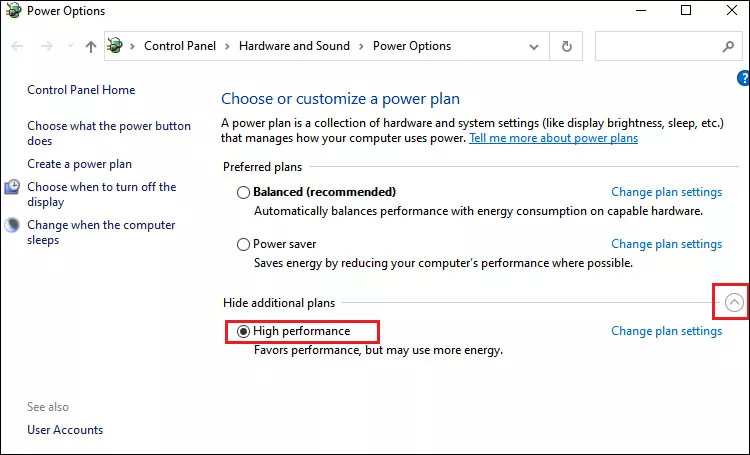
6. Change power plan settings
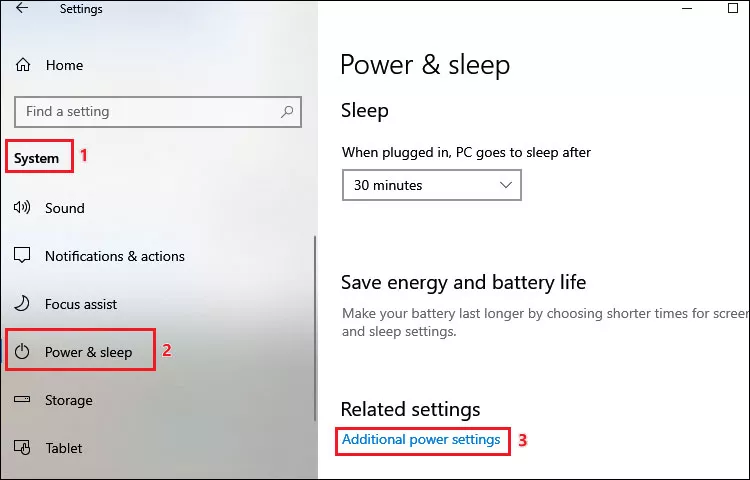
Step 1: Open Settings, select System > Power & sleep. In the right pane, scroll down to locate Additional power settings.
Step 2: In Power Options window, expand Hide additional plans and select High performance option.
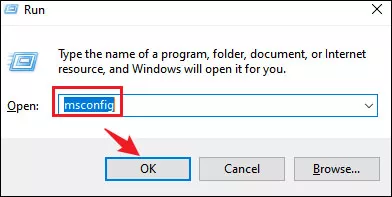
7. Change the number of processors
Step 1: Press Windows+R to open run command, type msconfig in the open box and click OK to open System Configuration.
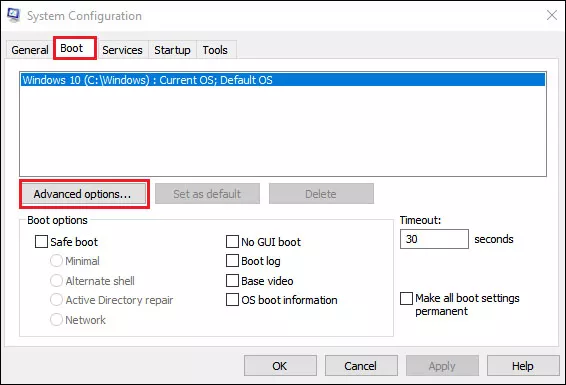
Step 2: Choose Boot tab and click on Advanced options.
Step 3: In the BOOT Advanced Options window, check Number of processors and change the number to 1 or 2 from the drop-down section. Then click OK.
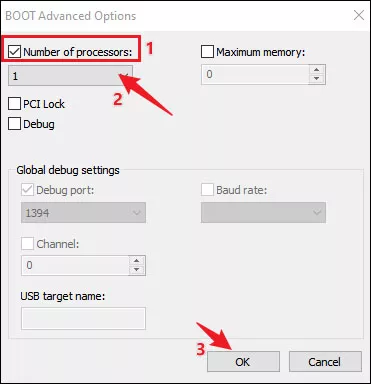
Step 4: Reboot your system.