How to Fix Cannot Open Windows Security on Windows 10/11

September 20, 2022
Windows Security is a built-in security application within Windows OS that help users to identify problems and take actions to ensure that their devices are protected. However, some users have found their Security program fail to open, or even on some occasions, not working at all. For those who don't have other antivirus software, they are then exposed to a number of unpredictable security issues. In this post, we will discuss how to resolve Windows Security not starting issue. To get your security application back to work, you can try the potential fixes highlighted below.
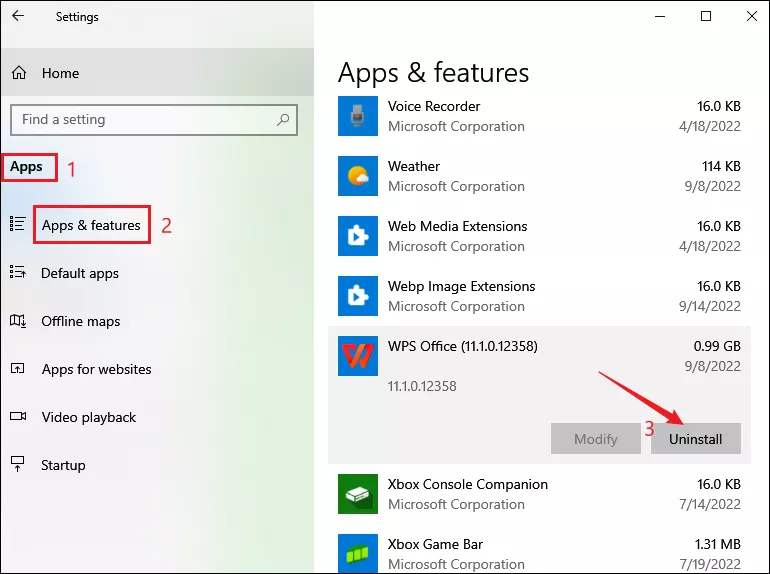
1. Uninstall third-party antivirus program
If you have any third-party antivirus programs installed on your computer, or if you run multiple antivirus programs on one computer simultaneously, it is likely that they will conflict with Windows Security. Therefore, you are advised to disable all of them to check if this can make things different.
Step 1: Press Windows+I to open Settings and select Apps > Apps & features.
Step 2: Choose the application from the list and click to expand, then click Uninstall.
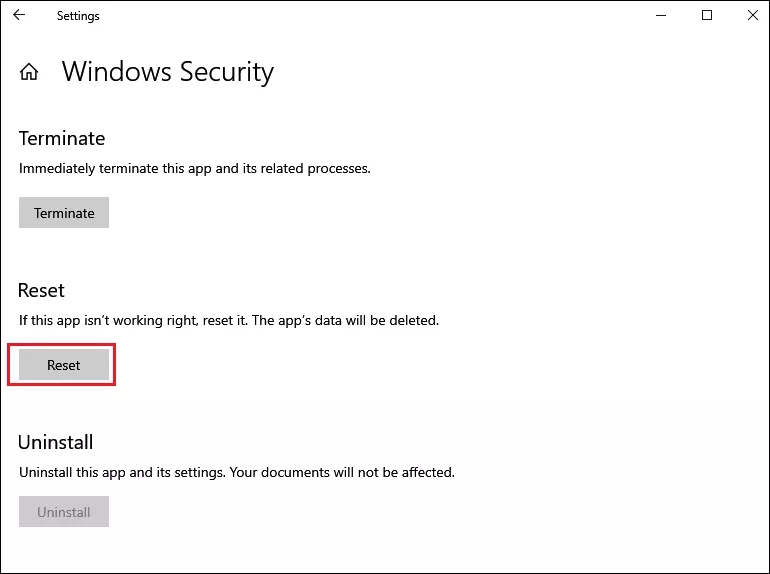
2. Reset Windows Security
Step 1: Search windows security in the search bar and select App settings from the result list.
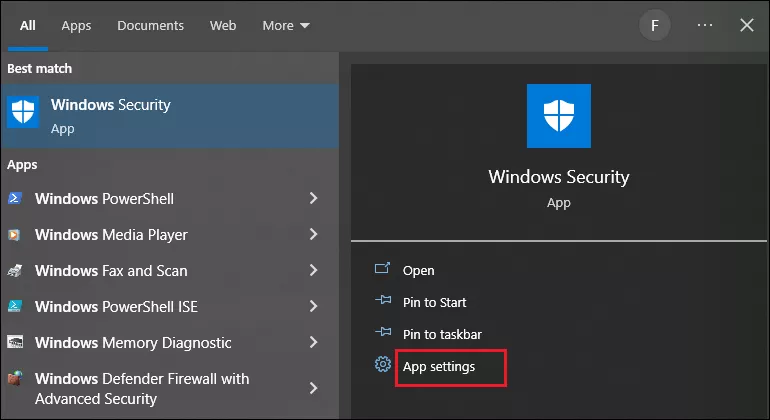
Step 2: Click on Reset to get it repaired.
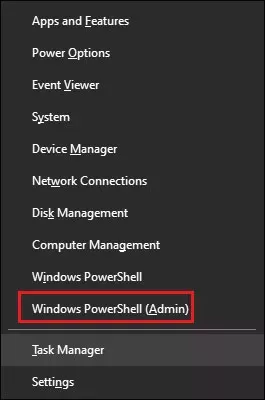
3. Reinstall Windows Security in PowerShell
Step 1: Press Windows+X and select PowerShell(Admin) from the context menu.
Step 2: Copy and paste the following command in the PowerShell, press Y and hit Enter to launch it.
Set-ExecutionPolicy UnrestrictedStep 3: Then Enter the second command:
Get-AppXPackage -AllUsers | Foreach {Add-AppxPackage -DisableDevelopmentMode -Register "$($_.InstallLocation)\AppXManifest.xml"}4. Restart the Windows Security Center Service
Step 1: Press Ctrl + Shift + Esc to open Task Manager.
Step 2: Select Services tab and locate wscsvc in the list. Right-click on it and choose Restart.
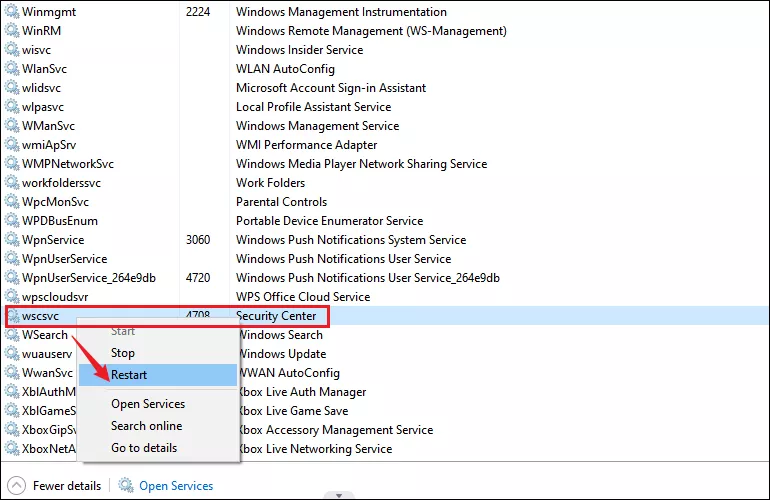
Try opening the Windows Security after restarting this services and check if you can start it as before.
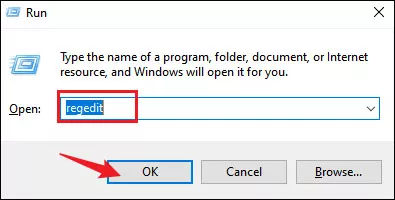
5. Tweak the registry
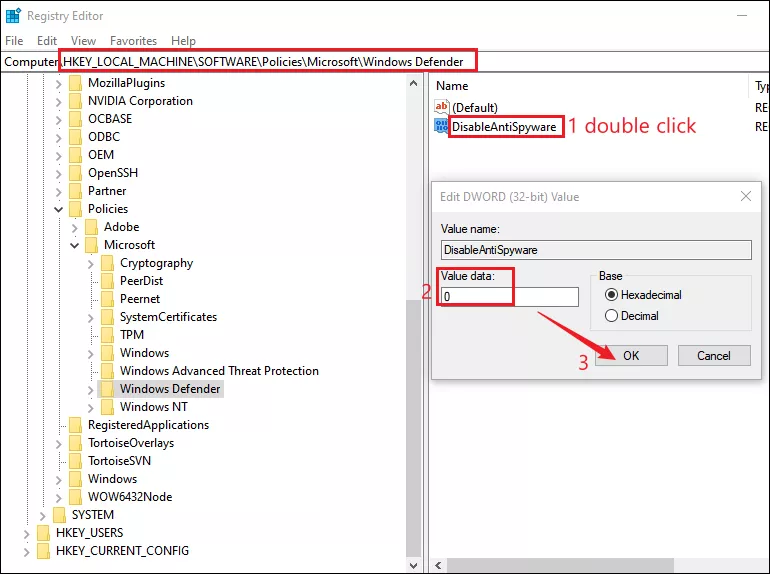
Step 1: Press Windows+R to open Run dialog and type regedit in the box. Then click OK to open Registry Editor.
Step 2: Navigate the the below path:
HKEY_LOCAL_MACHINE\SOFTWARE\Policies\Microsoft\Windows DefenderStep 3: Right-click on the Windows Defender key and select New > DWORD (32-bit) Value. Then name the new created key as DisableAntiSpyware.
Step 4: Double-click DisableAntiSpyware and enter 0 for its Value data. Then click OK to save the change.
6. Run an SFC and DISM scan
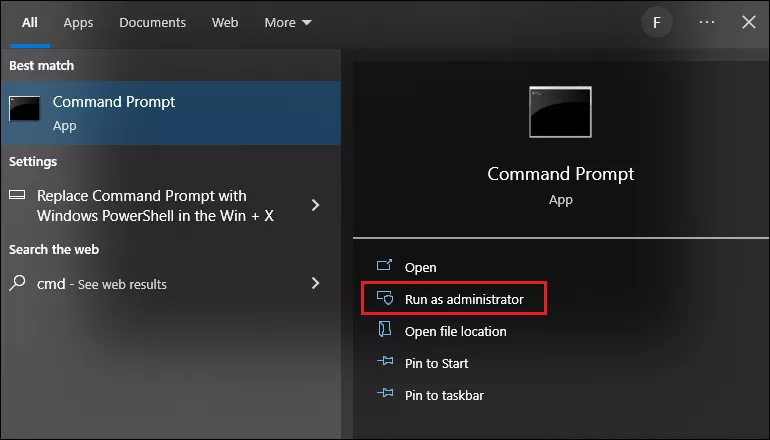
Step 1: Search cmd in the search bar and select Run as administrator.
Step 2: Type sfc /scannow in the Command Prompt and press Enter to execute it.
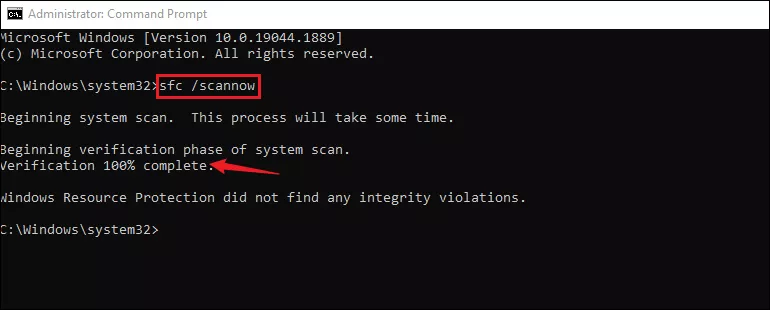
Once it done, you will see an message telling you the verification is 100% complete as well as whether there exists any violations. If nothing wrong has been detected after the scan, you can then try the DISM scan.
Step 3: To perform a DISM scan, run the following commands one by one:
DISM /Online /Cleanup-Image /CheckHealth
DISM /Online /Cleanup-Image /ScanHealth
DISM /Online /Cleanup-Image /RestoreHealth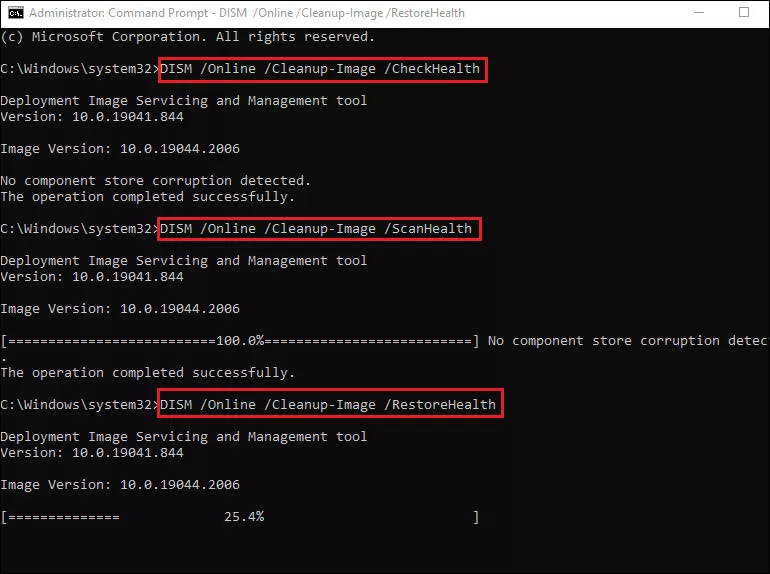
When it finishes, restart your PC and check if your issue is resolved.
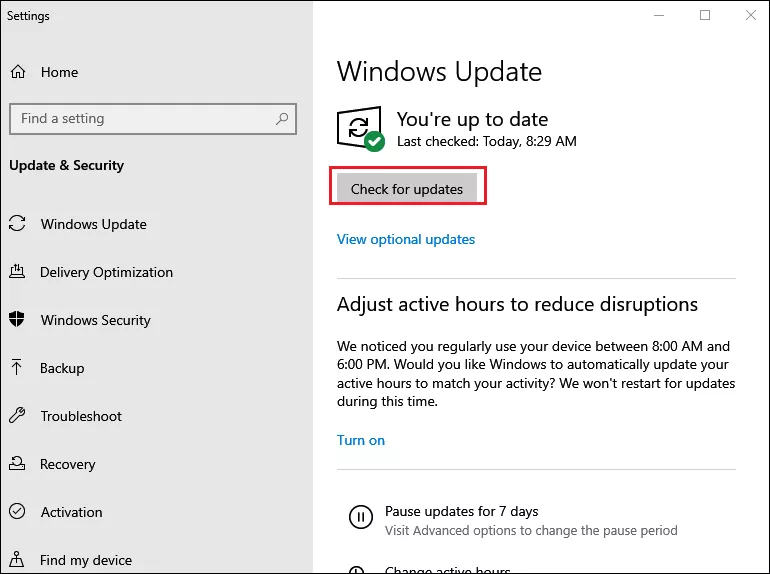
7. Update Windows to the latest version
Step 1: Press Windows+I to open Settings and select Windows Update.
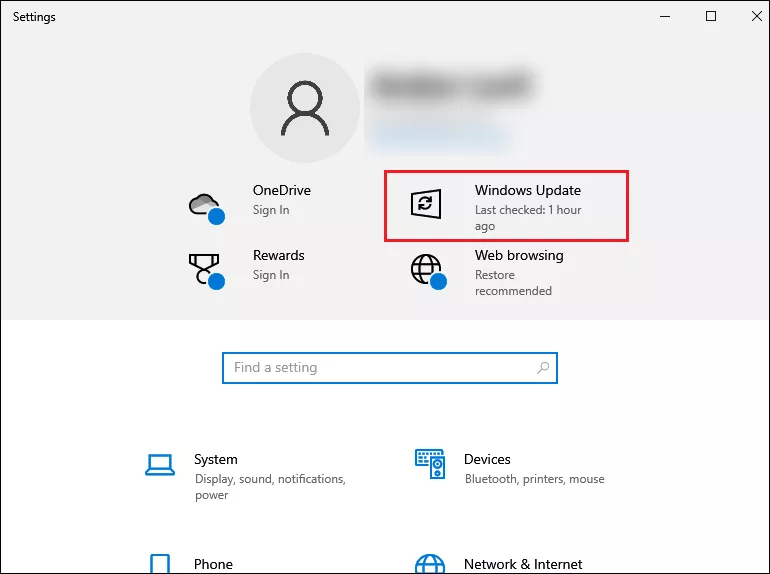
Step 2: Click on Check for updates. Follow the on-screen instructions and any pending updates will be installed automatically after that.