Windows Disk Cleanup Taking a Long Time: How to Fix It ?

July 15, 2022
The disk cleanup is a Windows maintenance utility that is used to scan your computer's hard drive for the files you no longer need, including temporary files, items in recycle bin and etc. With this useful tool, users can easily free up their hard drive space. However, it can be such a hassle and annoyance if it takes a long time to finish. Why does this problem occur and what are the solutions? This post will share five simple ways to troubleshoot disk cleanup freezing issue.
Why does disk cleanup take forever?
The time needed for the disk cleanup varies from different devices but it usually takes about 1 and half hours to finish. If this process is taking longer than normal, the following problems may be encountered:
- Some system files are corrupted. Disk cleanup requires access to your system files, however, if there are corrupted files, this tool would encounter errors, slowing down the whole process.
- It gets stuck on the Windows update files. If there are some problems with Windows update temporary files, disk cleanup is unable to remove them and thus gets stuck.
- There exist conflicting files within third-party software.
How to fix
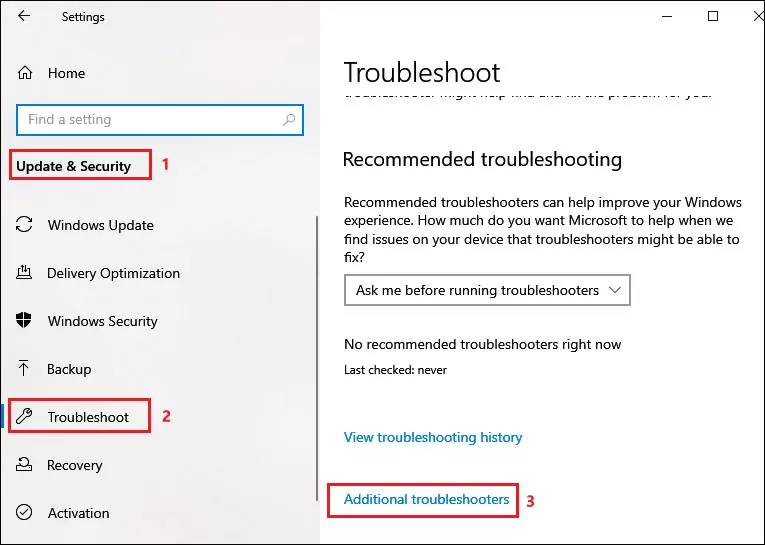
1. Run the Windows update troubleshooter
Step 1: Press Windows+I to open Settings and select Update & Security>Troubleshoot.
Step 2: Then scroll down on the right pane to find Additional troubleshooters and click on it.
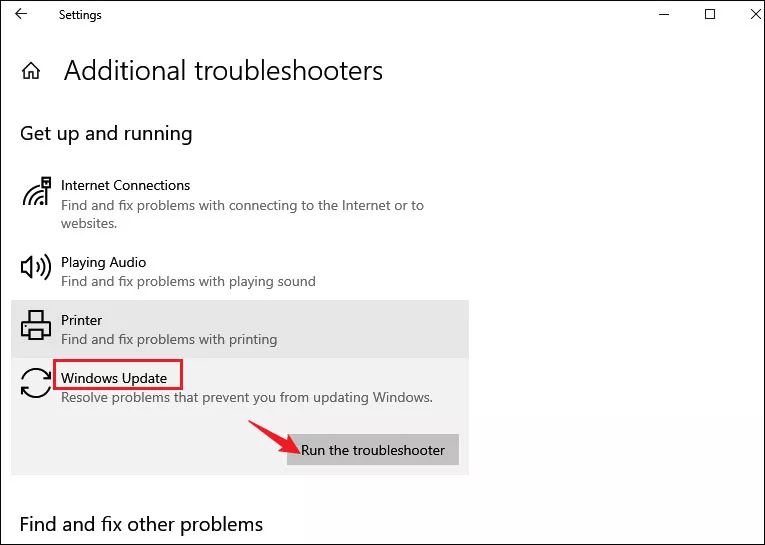
Step 3: Under Get up and running list, click to expand Windows Update and click Run the troubleshooter.
2. Delete Windows.old folder
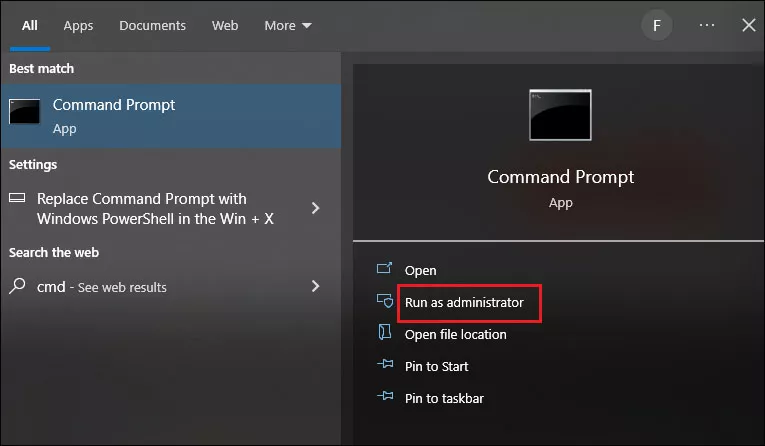
Step 1: Type and search cmd in the search bar and select Run as administrator.
Step 2: Type and paste the following commands one by one. Press Enter after each to launch the command line.
takeown /F C:Windows.old* /R /A
cacls C:Windows.old*.* /T /grant administrators:F
rmdir /S /Q C:Windows.old*.*
3. Delete Software Distribution folder
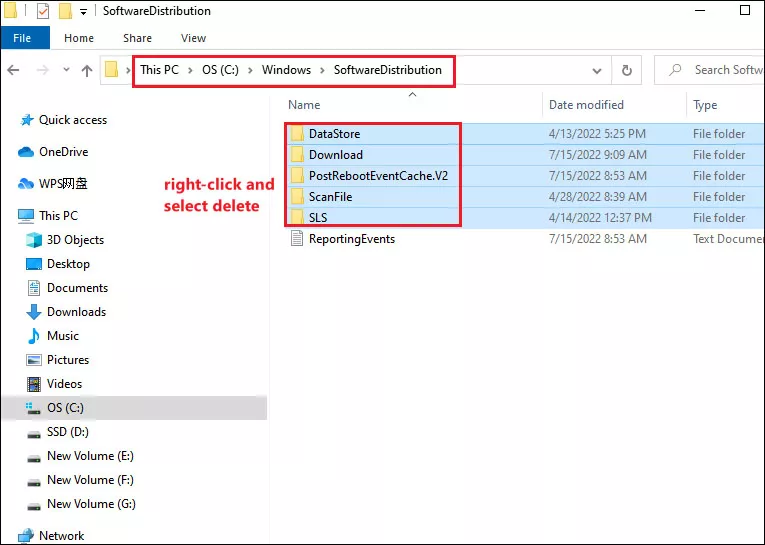
Step 1: Press Windows+E to start File Explorer and navigate to the following directory:
C:\Windows\SoftwareDistributionStep 2: Click to open SoftwareDistribution folder and delete all the sub-folders.
4. Run SFC and DISM scan
Step 1: Open Command Prompt as administrator.
Step 2: To run a SFC scan, enter sfc /scannow in Command Prompt window and press Enter key.
If your system files are all in order, there will be a message "Windows Resource Protection did not find any integrity violations". But if there exists problematic files, you will see "Windows Resource Protection found corrupt files and successfully repaired them. Details are included in the CBS.Log %WinDir%LogsCBSCBS.log".
Step 3: To run DISM scan, enter Dism /Online /Cleanup-Image /ScanHealth in Command Prompt window and press Enter key.
5. Run disk cleanup in clean boot
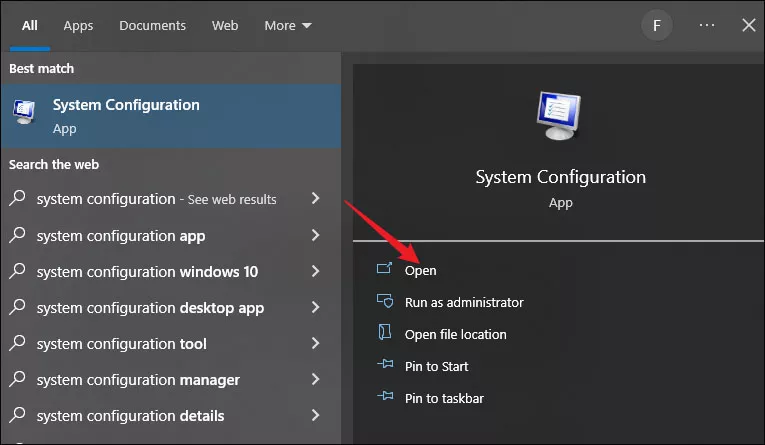
Step 1: Search system configuration in the search bar and open it.
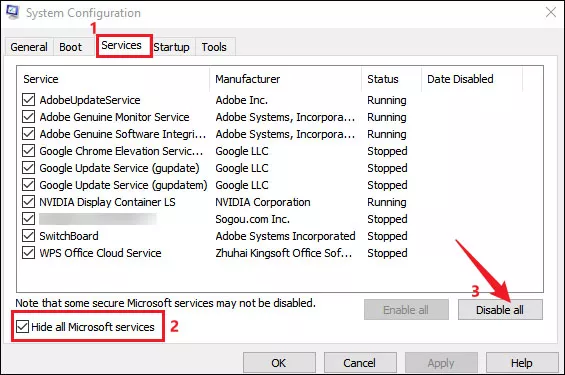
Step 2: Choose Services tab and check Hide all Microsoft services. Then click Disable all.
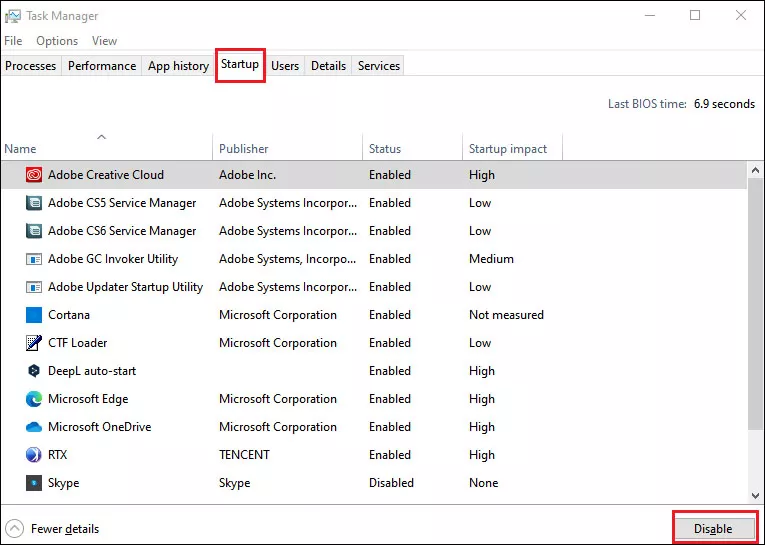
Step 3: Press Crtl+Shift+Esc to open Task Manager. Then select Startup tab, select each startup item and click Disable.
Step 4: Close Task Manager and System Configuration window. Then restart your computer and perform a disk cleanup again. It would run in a clean boot environment.