How to Change Network Profile Type in Windows 10/11

July 19, 2022

There are three types of network profiles on computers: private, public and domain. With private networks, Windows matches the network discovery feature so that other devices can see your computer device on the network, making file sharing easy and simple. Thus the private profile is usually used for a home or work network. With a public network, your device is invisible to other computers since the network discovery feature is turned off, so this type of network is commonly found in public places such as libraries, cafes and shops. Domain is only available when a device is added to a domain, which is a type not normally used by computer users. In this article, we will discuss how to change network profile to public or private in Windows 10/11.
1. Through Windows Settings
On Windows 10
Step 1: Press Windows+I to open Settings and select Network & Internet. Then select WIFI or Ethernet and click on the network icon.
Step 2: Under the Network profile section, select either Public or Private.
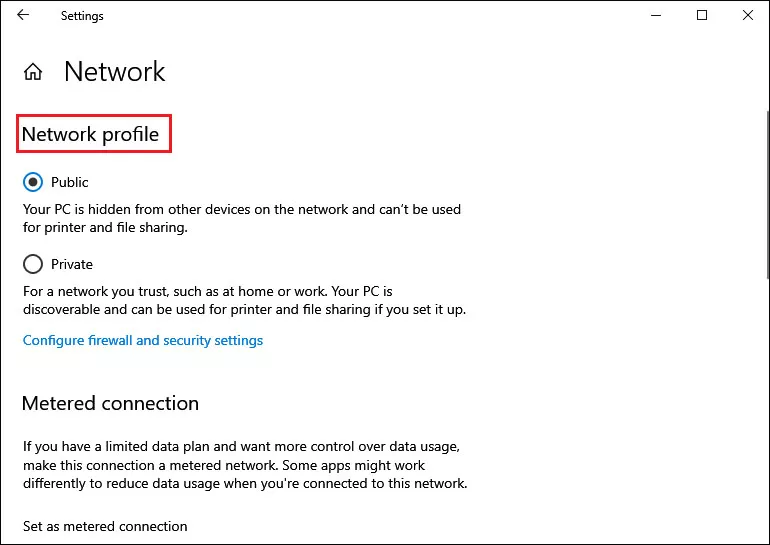
On Windows 11
Open Settings and choose Network & Internet option on the left side. Then select WIFI or Ethernet categories on the right side and click on a connection. Under the Network profile type, you can select Public or Private.
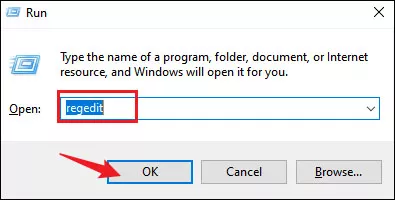
2. Through Registry Editor
Step 1: Press Windows+R to launch the Run command, type regedit in the box and press OK to open Registry Editor.
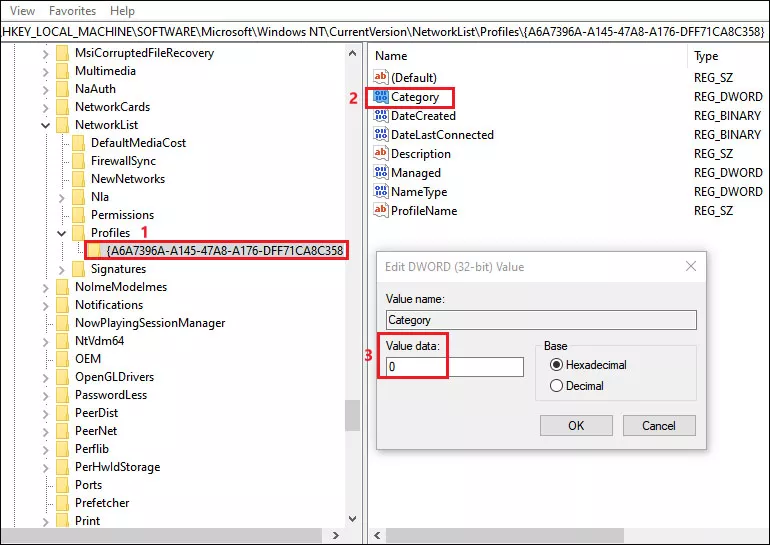
Step 2: Navigate to the following path:
HKEY_LOCAL_MACHINE\SOFTWARE\Microsoft\WindowsNT\CurrentVersion\NetworkList\ProfilesStep 3: Expand the Profiles folder and click on its subfolder. Then select a REG_DWORD value named Category and double-click on it.
Step 4: Change its Value data to one of the following numbers:
- 0= Public
- 1= Private
- 2= Domain
3. Through Windows PowerShell
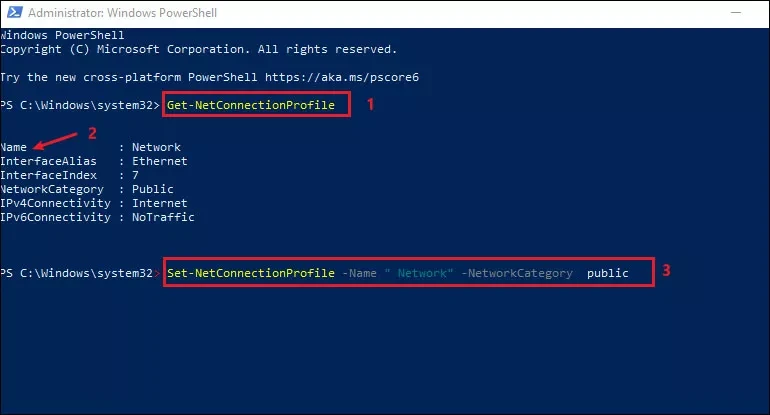
Step 1: Enter powershell in the search bar and select Run as Administrator.

Step 2: Copy and paste the Get-NetConnectionProfile command and press Enter. This command line will show you the list of network profiles on your PC.
Step 3: Then enter a command line following the below syntax:
Set-NetConnectionProfile -Name "network name" -NetworkCategory type Note: Replace "network name" with the name of your network.
Replace "type" with Private, Public, or DomainAuthenticated
.
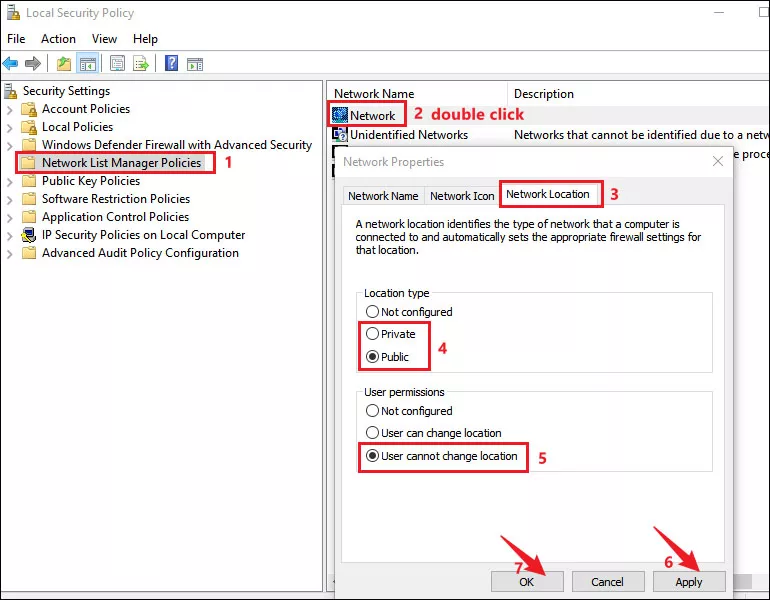
4. Through Local Security Policy
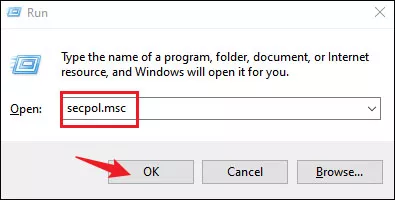
Step 1: Press Windows+R to launch the Run dialog, type secpol.msc in the box and press OK to open Local Security Policy.
Step 2: Select Network List Manager Policies on the left side and double-click the network you want to make changes.
Step 3: In the Properties window, choose Network Location tab. Then you can select Private or Public under Location type section. Choose the User cannot change location option in User permissions section.
Step 4: Click Apply and then OK.