How to Restore A Bootable USB Drive to Normal With Full Capacity

November 4, 2022
A bootable USB is useful in various ways. In addition to assisting with system installation, it can also be used for system repair by accessing the Windows or Linux PE environment for more operations. However, if you make a pen drive bootable, you can no longer use it to store files and videos as before. Is it possible to turn a bootable USB back to normal state? The answer is a definitely yes. In this article, we will discuss how to convert bootable USB back to normal with full capacity. You need to complete two steps: formatting the flash drive to its original state and restoring the drive letter. Let's see how to accomplish these two things.
- Part 1: How to format bootable USB drive to normal state?
- 1. Format bootable USB drive to normal in File Explorer
- 2. Format bootable USB drive to normal via Disk Management
- 3. Format bootable USB drive to normal via Command Prompt
- Part 2: How to change the USB drive letter?
- 1. Change a drive letter in Disk Management
- 2. Change a drive letter via Command Prompt
How to format bootable USB drive to normal state?
1. Format bootable USB drive to normal in File Explorer
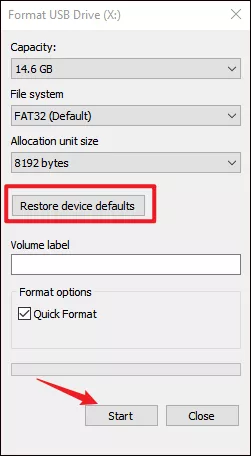
Step 1: Press Windows+E to open File Explorer and head to This PC > Devices and drives. Then right click on the bootable USB drive and select Format.
Step 2: Select the File system as NTFS or FAT32 as what you need.
Step 3: Click on Restore device defaults and also click Start, then OK and Close.
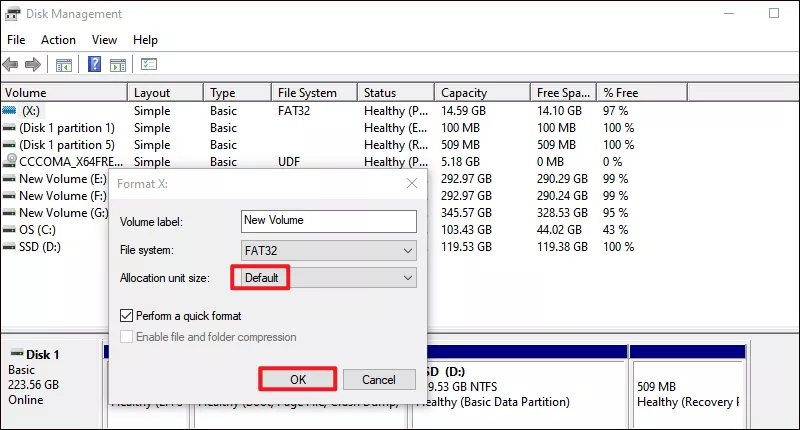
2. Format bootable USB drive to normal via Disk Management
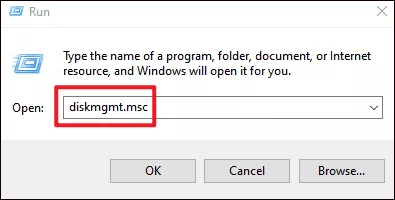
Step 1: Press Windows+R to open Run command, type diskmgmt.msc in the box and hit Enter to open Disk Management.
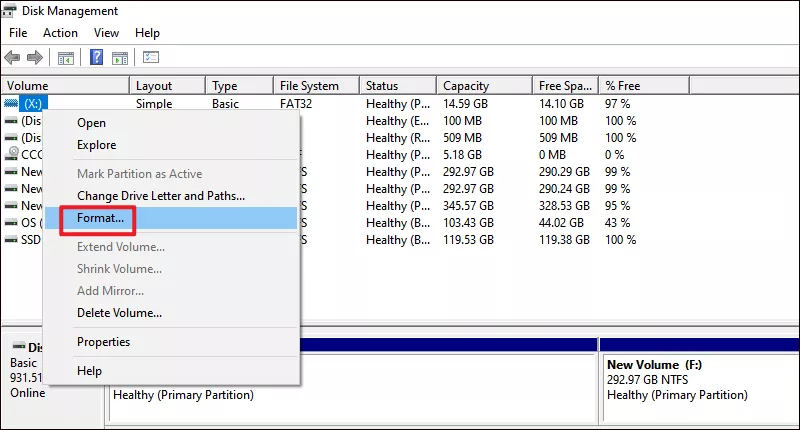
Step 2: Locate the bootable USB drive in the volume list, right-click it and select Format.
Step 3: Select Default as the Allocation unit size and click OK.
3. Format bootable USB drive to normal via Command Prompt
Step 1: Search cmd in the search box and select Run as administrator.

Step 2: In Command Prompt window, enter the below command to enable Windows Diskpart utility:
diskpartStep 3: Next, enter the below command to display all the disks on your computer:
list diskStep 4: Then find your disk from the Size column and enter the following command to select your bootable USB drive:
select disk 2Note: Replace the number "2" with the disk number of your flash drive.
Step 5: Enter the following command to erase all the installation files on the bootable USB:
clean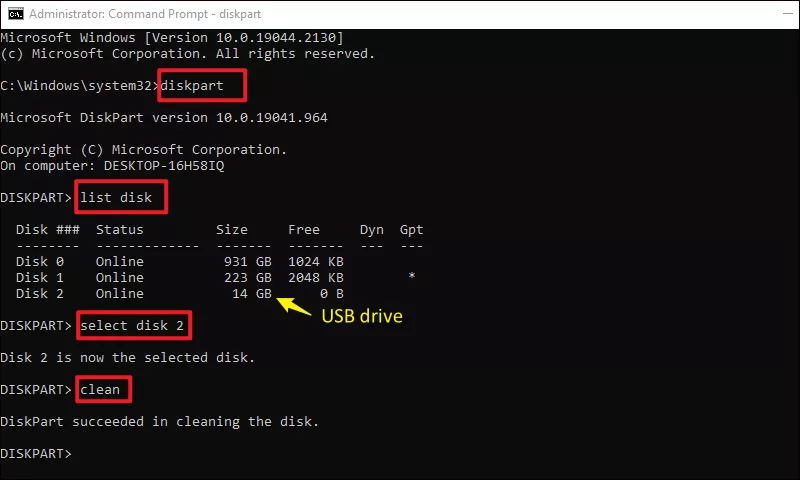
Step 6: Finally, execute these two commands one by one:
create partition primary
format fs=fat32 quick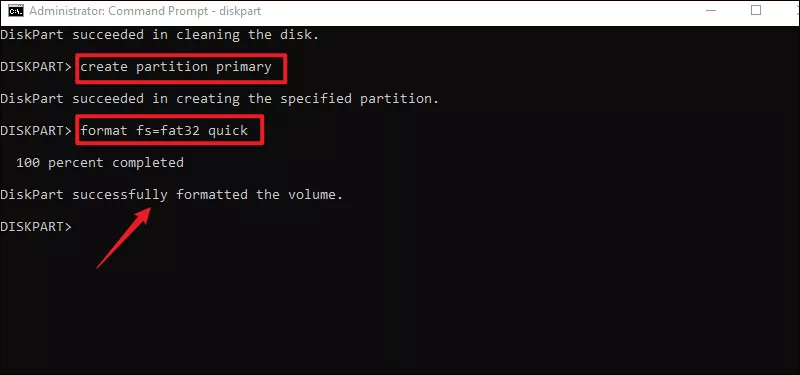
Note: "format fs=fat32 quick" can be replaced by "format fs=ntfs quick" (select one file system based on your preference).
Step 7: Exit the Command Prompt after you complete these steps.
Without tedious steps or long pauses, any of the three methods above can help you efficiently format the flash drive to restore it to its original capacity.
How to change the USB drive letter?
You might assign a different drive letter for the USB drive during creating a bootable USB, and in case you want to restore the drive letter as the previous one, here are two ways to change a drive letter.
1. Change a drive letter in Disk Management
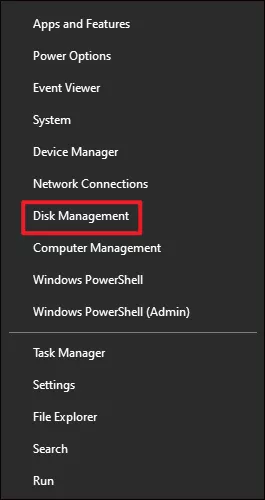
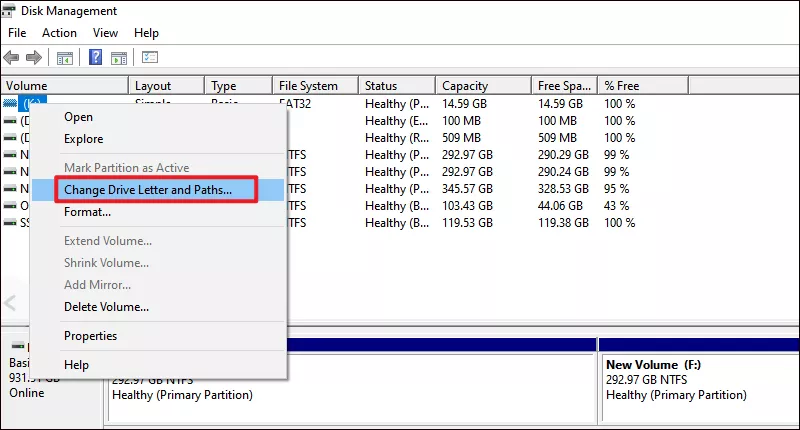
Step 1: Press Windows+X and select Disk Management from the menu.
Step 2: Right-click on you removable hard drive and choose Change Drive Letter and Paths.
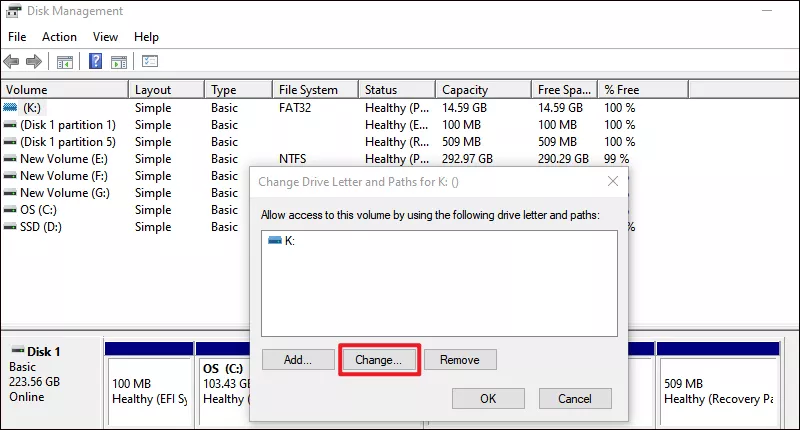
Step 3: Click on Change.
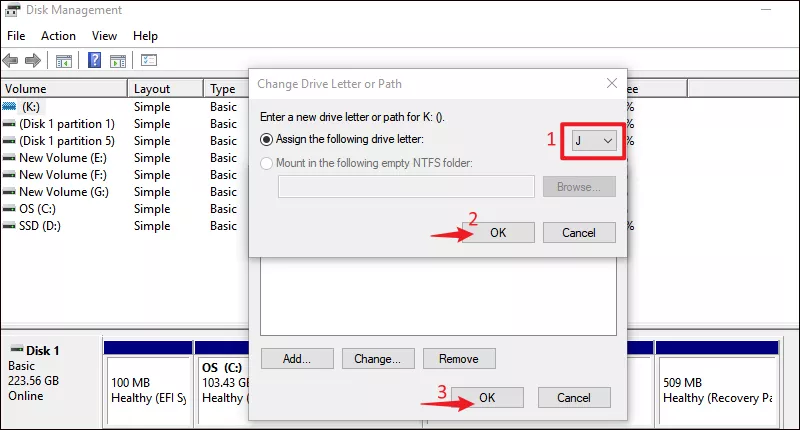
Step 4: Choose a letter you want to apply and click OK in the two prompts.
2. Change a drive letter via Command Prompt
The Diskpart utility is very helpful in managing drives on your computer. With this command interpreter, you can immediately change the drive letter.
Step 1: Open Command Prompt as administrator.
Step 2: Launch the following commands one by one:
diskpart
list volume
select volume 7
assign letter=K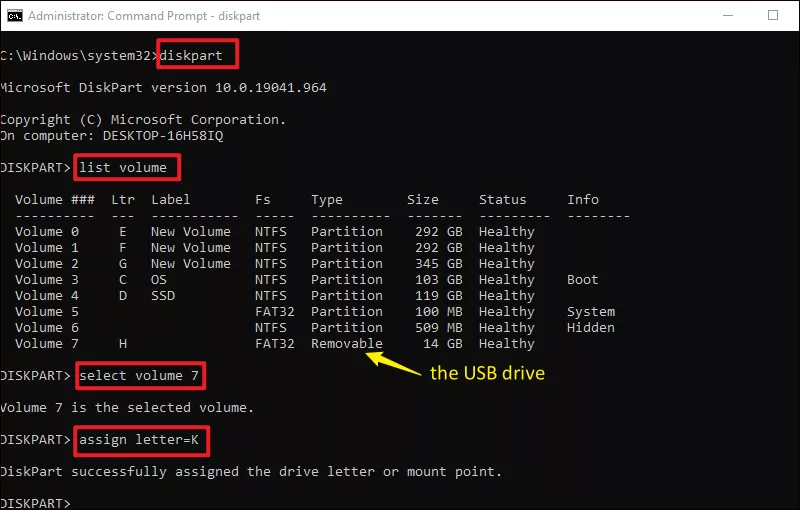
Note: Substitute volume number "7" with the number of your USB pen drive. Also, you can change the letter "K" to any letter you want to use.