How to Turn on Sync and Encrypt Synced Data in Chrome on Windows

March 9, 2022
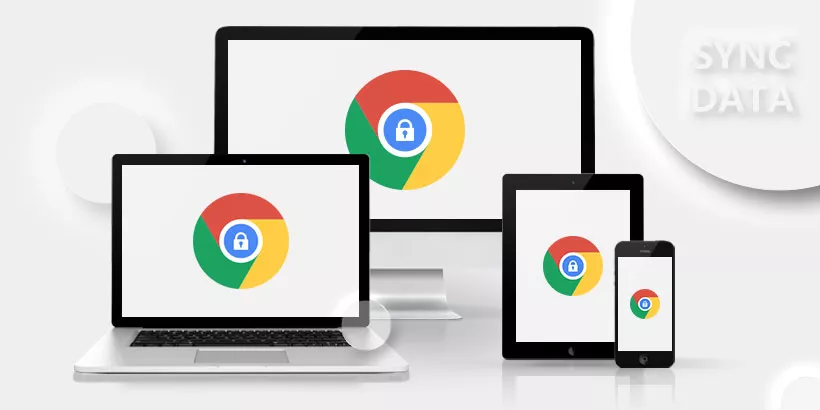
Google‘s Sync feature will sync all your bookmarks, extensions, saved passwords, themes and more to any device. You can also customize which data you want to sync and which you don't. In this way, you can continue your online experience seamlessly across different devices.
The following is how to set up Chrome sync in Windows. If you want to know how to customize the sync data and encrypt the sync data information, please read on.
1. Set up chrome sync
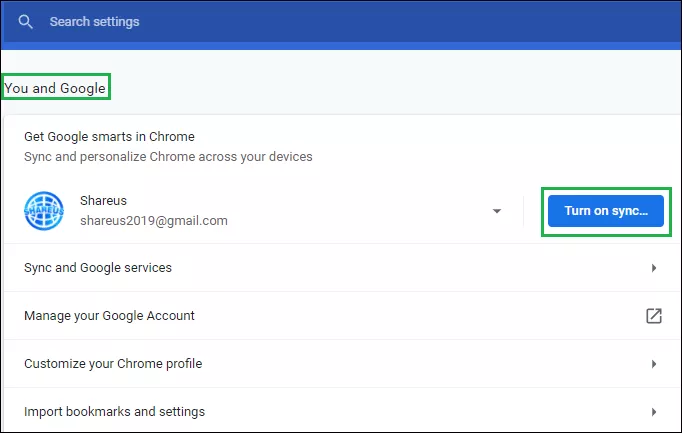
Step 1: Open the Chrome web browser. Click the three dots in the top-right corner.
Step 2: Under You and Google option, click the blue option Turn on sycn.
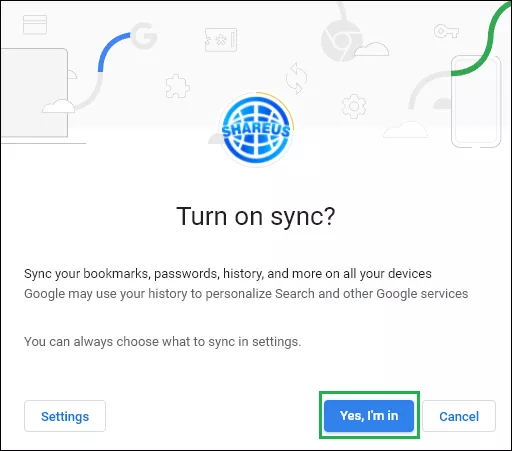
Step 2: In the pop-up box, click Yes, I'm in.
2. Choose what to sync
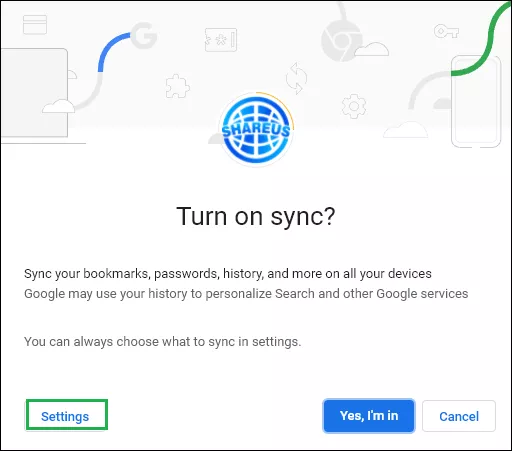
Step 1: In the pop-up box, click the Settings button.
Step 2: Then click Manage what you sync.
Step 3: By default, everything is synced. But you can choose what you want to sync and what you don't want to sync. Click the Customize sync slider button to turn it on. (it turns blue)
Step 4: Turn off the items you don't want to sync.
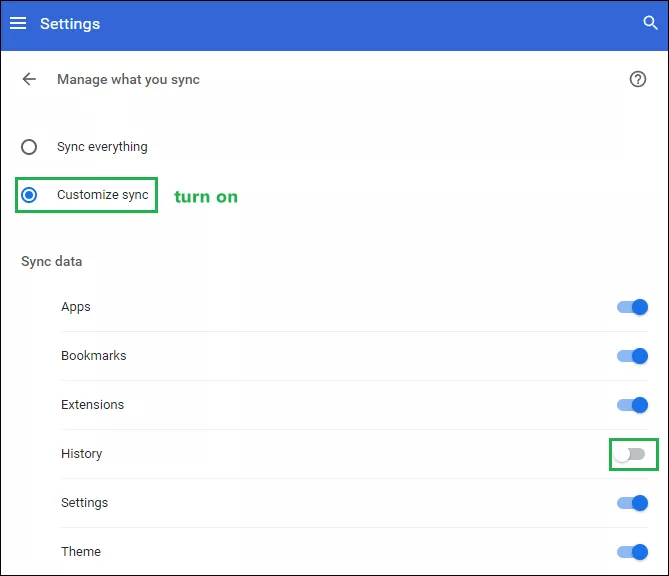
Note: If you want to sync everything, what you need to do is just to turn on the Sync everything slider button again.
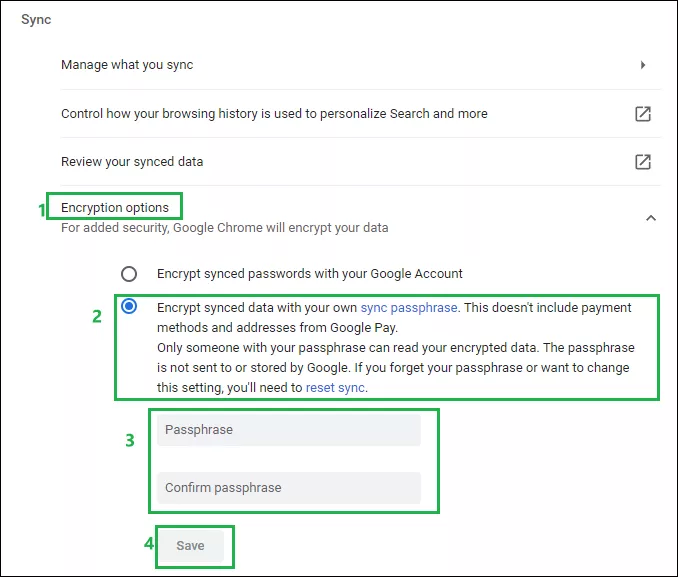
3. Encrypt your synced data
Step 1: Go back to the Settings page, and click Encryption options section.
Step 2: Click the second option, so that all the data and settings are encrypted(the first option only encrypts passwords).
Step 3: Set your passphrase, and enter it again to confirm your passphrase, then click Save.