Use Rufus Install Windows 11 without TPM 2.0/Secure Boot

November 11, 2021
Are you eager to update Windows 10 to the brand new Windows 11, but your PC or laptop can not meet the minimum requirement from Microsoft? Don't worry! This article is going to tell you how to create a bootable USB, download and install Windows 11 without secure boot, TPM 2.0, or losing any data from a USB drive using a utility named Rufus for free.
This post is the first one in a series of them.
Here is a full list (updating) and you may be interested in some of them.
Use Rufus Install Windows 11 without TPM 2.0/Secure Boot.
Use Ventoy2Disk Install Windows 11 without TPM 2.0/Secure Boot.
Use ventoy.json Install Windows 11 without TPM 2.0/Secure Boot.
1. Download Windows 11 ISO file.
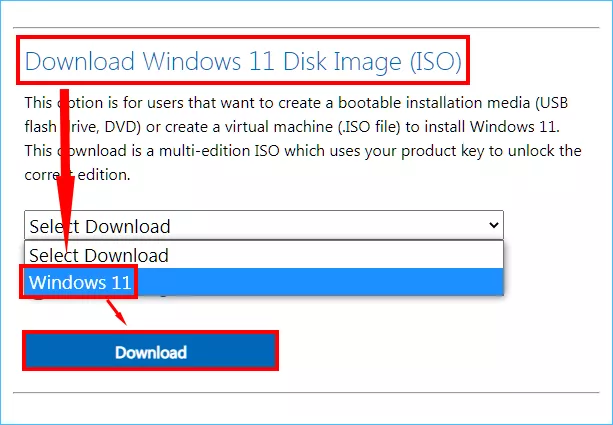
Step 1: Go to Microsoft's official website - Download Windows 11.
Step 2: Scroll down to the 3rd option: Download Windows 11 Disk Image (ISO), and then click the dropdown menu and select Windows 11. After that, select Download below.
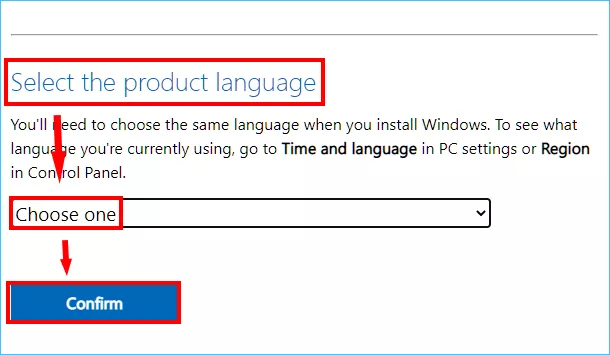
Step 3: When Select-the-product-language appears below, click the dropdown menu again and select the language you want. Then click Confirm.
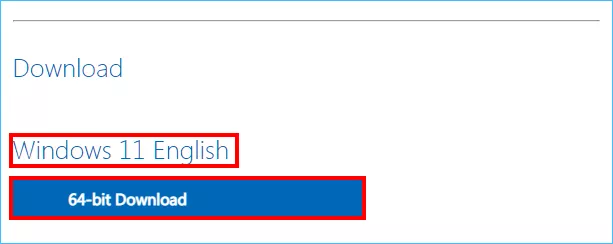
Step 4: Now Windows-11-English appears so click 64-bit Download next to it, and the download will begin.
2. Create a bootable USB.
Step 1: Download Rufus (1.3MB only), a utility to create a bootable USB.
Download: RufusStep 2: Insert your USB flash drive (more than 8GB), and then back up your data inside.
If you don't back up, all the files on the USB will be deleted. Don't know how to do? You can copy all of the files on that USB and paste them to another drive, or you can take advantage of the Windows official Backup feature.
But if you want to do this easily and fast, try the tool CloneGo.
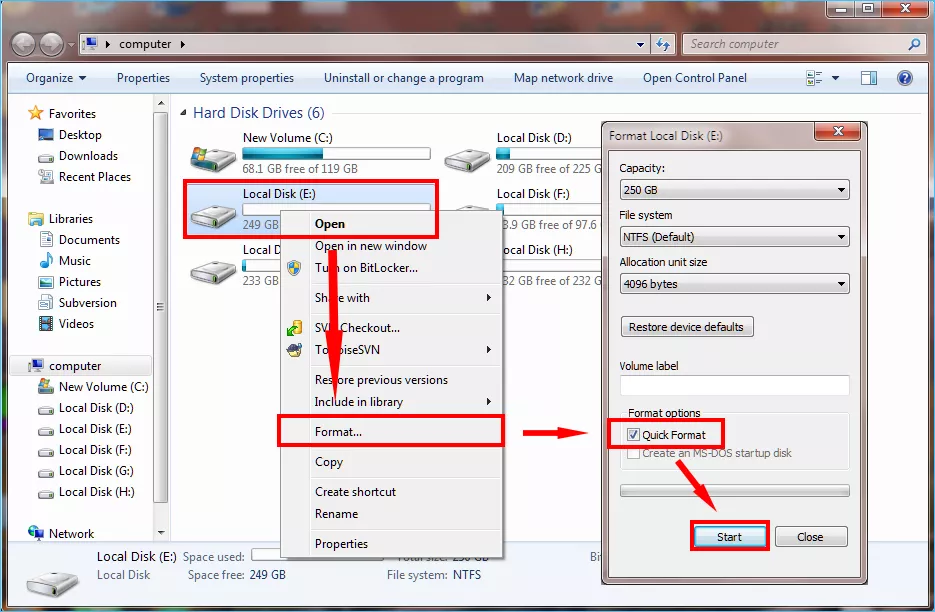
Download: CloneGoStep 3: A Quick Format (will delete all data) to your USB is strongly recommended.
Open This PC, Right-click your USB drive, and then click Format. Make sure that Quick Format is checked, and click Start.
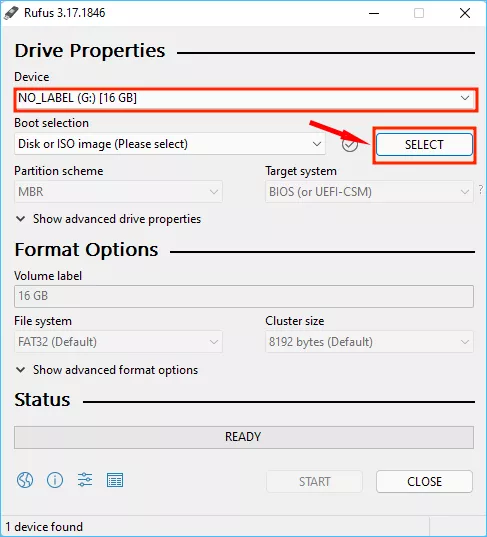
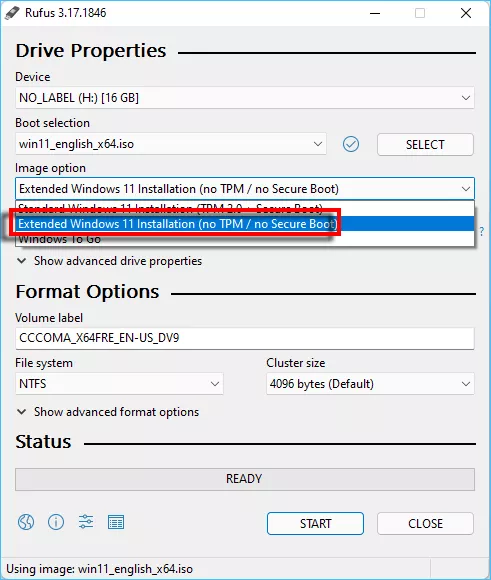
Step 4: Run Rufus, click the USB you inserted in the dropdown menu, and then SELECT the Windows 11 ISO file (win11_english_x64.iso) you just downloaded.
Step 5: In the Image option dropdown, please select Extended Windows 11 Installation (no TPM / no Secure Boot).
Step 6:Check the partition style of the hard disk where your System Drive is located, and then select the corresponding one in the dropdown menu. Click START!
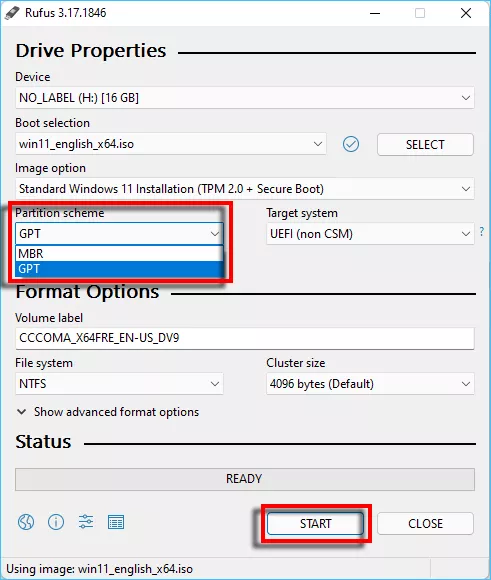
Note: If you select the wrong partition style, that hard disk may be formatted and all the data on it will be completely erased.
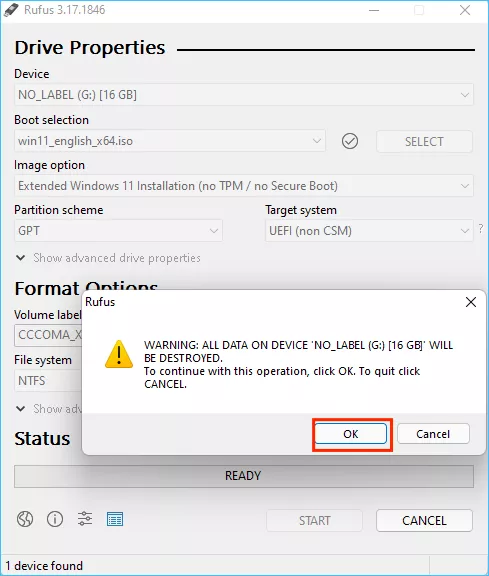
Step 7: If prompted, select OK to start burning (This will last about 15 minutes).
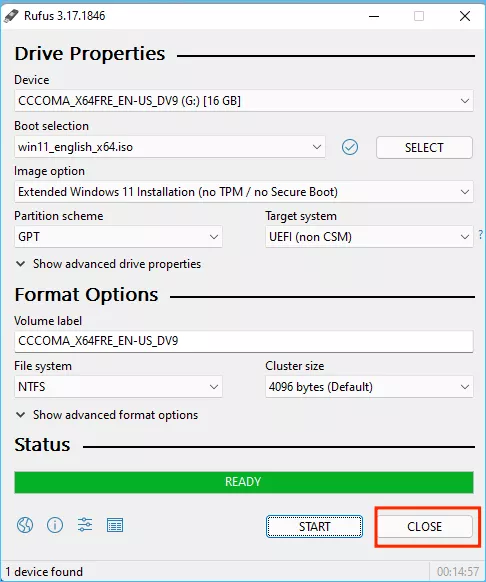
Step 8: When the burning is finished, click CLOSE.
3. Install Windows 11.
Before the following steps, I recommend that you back up your System Drive (usually C: drive) to prevent potential data loss.
You can use CloneGO to easily back up your whole C drive in one single click. More importantly, you can use the backup file to go back to the system you have right now in case you don't like Windows 11. Read the article below to know how to use it.

How to Downgrade Windows 11 to 10 - Clone C Drive
Some people want to try upgrading their Windows 10 to Windows 11 but they are afraid that they can't downgrade it to the original one if they don't like the brand new Windows 11...
https://www.shareus.com/windows/how-to-downgrade-windows-11-to-windows-10-clone-c-drive.htmlStep 1: Restart your computer and press the Boot Menu Key to change your boot device. About which one is your Boot Menu Key, see List of PC Brands with Their Corresponding Hot-Keys.

Step 2: Use the Up and Down Arrow Keys of the keyboard to select your USB drive as the boot device, and then press Enter.
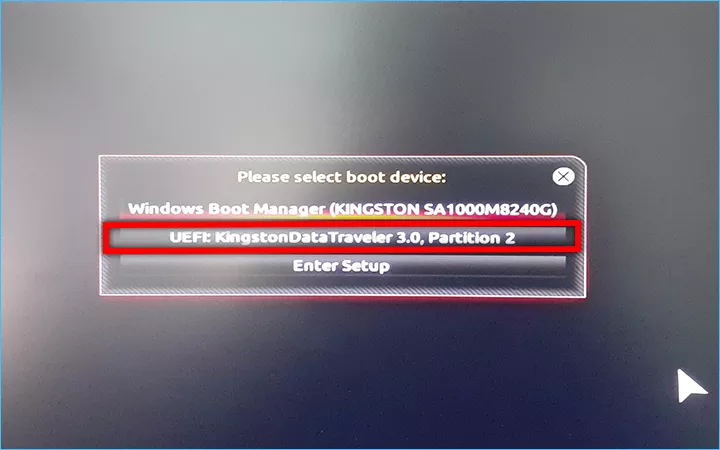
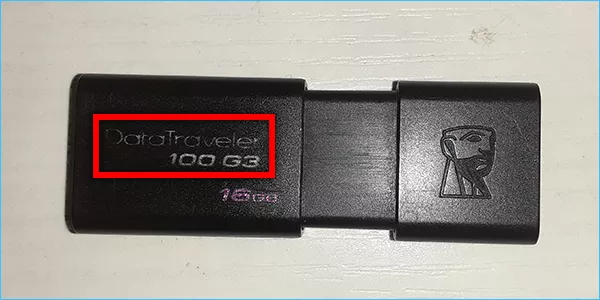
Tips: If you don’t know which one is your USB drive, take a look at it.
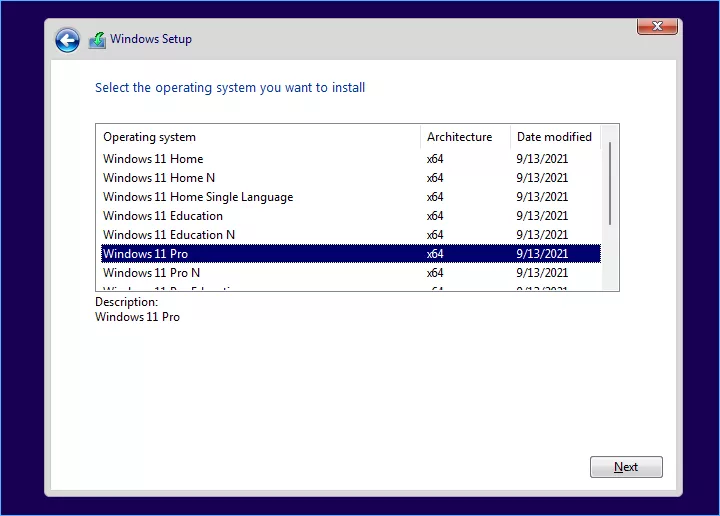
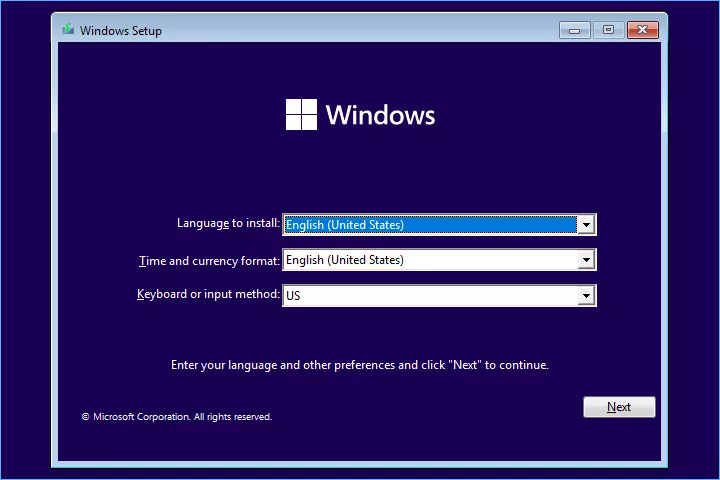
Step 3: A Windows Setup window pops up automatically, select the Language to install, and then click Next.
Step 4: Select the OS you want to install, and then you just need to follow its instructions to finish.