Use ventoy.json Install Windows 11 without TPM 2.0/Secure Boot

November 24, 2021
Considering you're here, you must want to try installing the brand new Windows 11 & using the fresh features as well as the fresh user interface. However, with the new functions it gives, new hardware requirements are coming. Two of them are TPM 2.0 and Secure Boot, which lots of computers do not have.
But these two requirements can be bypassed easily. In this article, I'm going to let you know how to install Windows 11 without TPM 2.0 and Secure Boot as well from a USB drive with the ventoy.json plugin.
This post is the third one in a series of them.
If you wanna try other ways with other utilities, read:
Use Rufus Install Windows 11 without TPM 2.0/Secure Boot.
Use Ventoy2Disk Install Windows 11 without TPM 2.0/Secure Boot.
Use ventoy.json Install Windows 11 without TPM 2.0/Secure Boot.
1. Tools
- • Flash drive (8GB or more)
- • Ventoy2Disk.exe
- • win11_english_x64.iso
Note: Please back up your Flash drive & C: drive (system drive) both to prevent potential data loss. You can just copy all the important data and paste them to another drive. Or you can use CloneGo to back up data within clicks.
Download: CloneGo2. Make Boot Device
Step 1: Download and unzip ventoy-1.0.58-windows.zip, and then open Ventoy2Disk.exe in the folder.
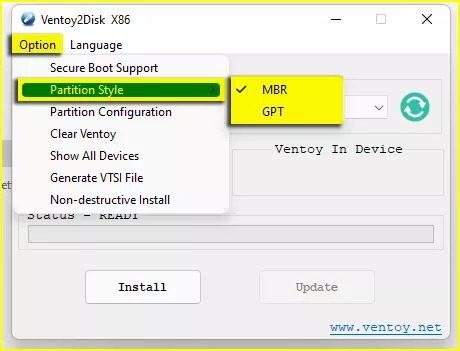
Download: ventoy-1.0.58-windows.zipStep 2: Check if your computer’s partition style is MBR or GPT. Here is how.
Note: You should check it carefully, or there may be a data loss to your hard drive.
Step 3: Click Option > Partition Style, and choose MBR or GPT.
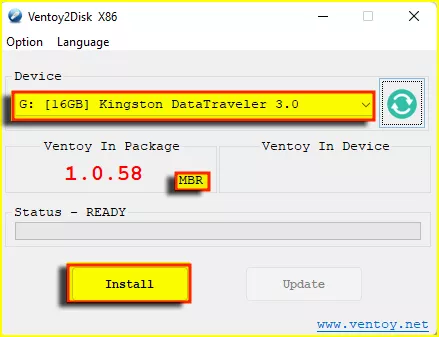
Step 4: In Device dropdown menu, select a USB drive to make it bootable, and click Install.
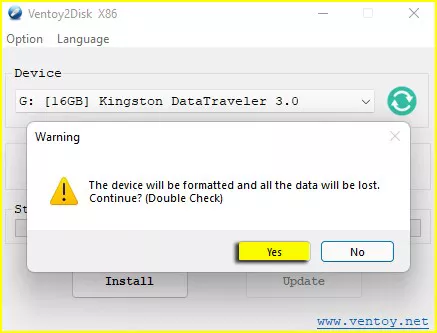
Step 5: A format Warning will pop up twice, so click Yes twice to confirm.
Step 6: Wait for 2 to 3 minutes to finish the installation. Click OK and close the window.

3. Bypass TPM 2.0 & Secure Boot
Step 1: Open This PC, double-click your USB flash drive and right-click to create a New Folder named ventoy.
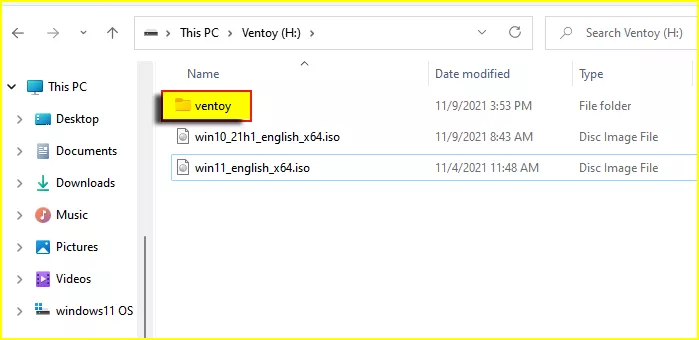
Note: The name must be in lowercase letters.
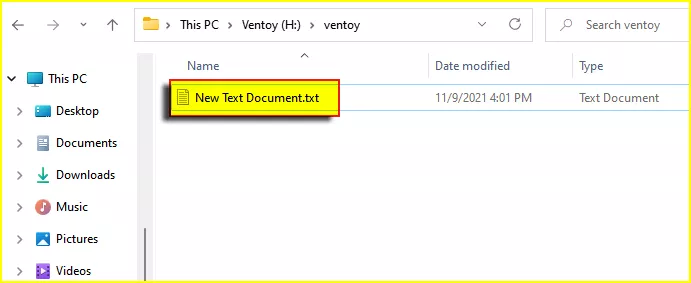
Step 2: Inside the ventoy folder, right-click to create a New Text Document, and then open it.
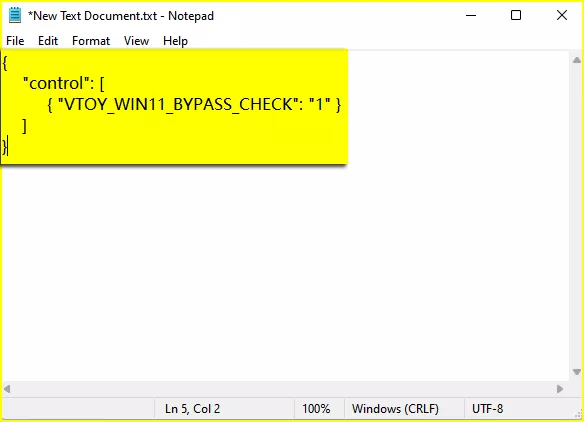
Step 3: Copy the following code and paste it to the Text Document.
{
    "control": [
         { "VTOY_WIN11_BYPASS_CHECK": "1" }
    ]
}
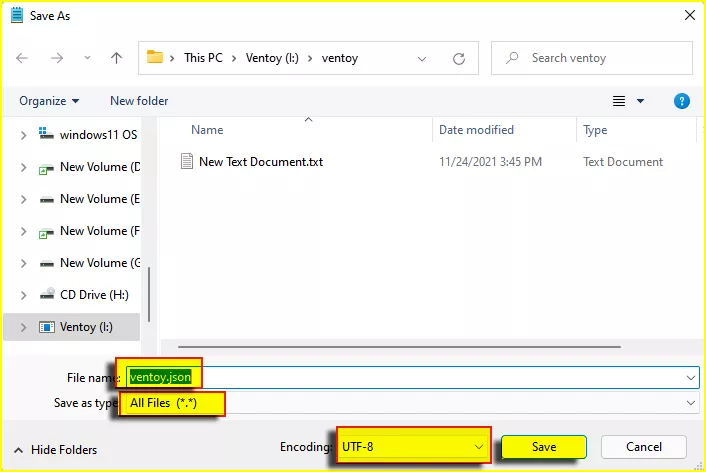
Step 4: Click File > Save As.

Step 5: Type ventoy.json in the File name box, select All Files in the Save as type dropdown menu, select UTF-8 in the Encoding, and then click Save.
4. Install Windows 11
Remember that always back up your drive with the system, as this can prevent any unexpected data loss and get you back to the original Windows version. If you want, use CloneGO and click once to get it done.

How to Downgrade Windows 11 to 10 - Clone C Drive
Some people want to try upgrading their Windows 10 to Windows 11 but they are afraid that they can't downgrade it to the original one if they don't like the brand new Windows 11...
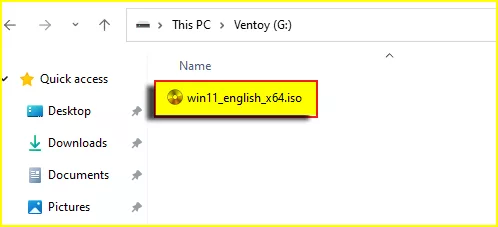
https://www.shareus.com/windows/how-to-downgrade-windows-11-to-windows-10-clone-c-drive.htmlStep 1: Download Windows 11 ISO file. Here is how.
Step 2: Copy that file and paste it to the USB drive.
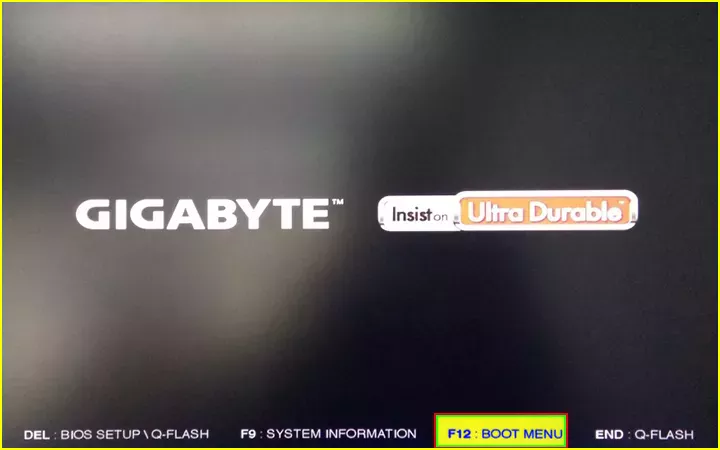
Step 3: Restart your computer and set the USB as the bootable device by pressing Boot Menu Key. This is a List of PC Brands with Their Corresponding Hot-Keys.
Step 4: Use Arrow Keys to select your USB and press Enter.

Step 5: Use Arrow Keys again to select win11_english_x64.iso and press Enter.

Step 6: The following Registry Values will be created automatically when installing Windows 11 to bypass the checks (for Windows 11 ISO files only).
HKEY_LOCAL_MACHINE\SYSTEM\Setup\LabConfig\BypassRAMCheck HKEY_LOCAL_MACHINE\SYSTEM\Setup\LabConfig\BypassTPMCheck HKEY_LOCAL_MACHINE\SYSTEM\Setup\LabConfig\BypassSecureBootCheck HKEY_LOCAL_MACHINE\SYSTEM\Setup\LabConfig\BypassCPUCheck HKEY_LOCAL_MACHINE\SYSTEM\Setup\LabConfig\BypassStorageCheck
Step 7: Follow the rest of instructions until the installation is complete.