Use Ventoy2Disk Install Windows 11 without TPM 2.0/Secure Boot

November 16, 2021
Do you desire to upgrade Windows 10 to the new Windows 11, but you fail because your personal computer or laptop cannot meet the minimum requirements of Microsoft? Don't be afraid! This post will show you how to build a bootable USB, download and install Windows 11 from a USB drive without secure boot, TPM 2.0, or losing any data using a utility named Ventoy2Disk for completely free.
This post is the second one in a series of them.
If you wanna try other ways with other utilities, read:
Use Rufus Install Windows 11 without TPM 2.0/Secure Boot.
Use Ventoy2Disk Install Windows 11 without TPM 2.0/Secure Boot.
Use ventoy.json Install Windows 11 without TPM 2.0/Secure Boot.
1. Tools to prepare.
- A USB drive with more than 8GB storage. Remember to back up your files and data.
- Ventoy2Disk, a small but nifty utility. Download: Ventoy2Disk
- Windows 11 ISO file. About how to download this ISO file, click to read this article.
2. Build bootable USB.
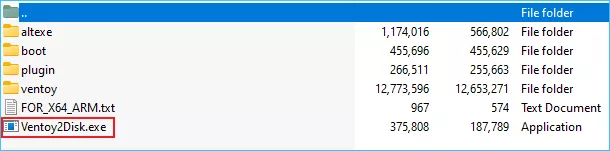
Step 1: Double-click ventoy-1.0.58-windows.zip you just downloaded, and then run Ventoy2Disk.exe.
Step 2: Check the partition style of the hard drive containing system disk, and select Option > Partition Style > MBR / GPT.
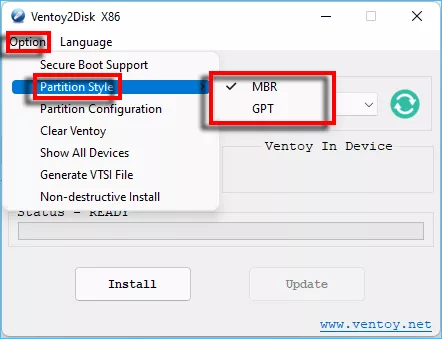
Note: You should check it carefully, or there will be a data loss to your hard drive.

MBR/GPT - How to check partition style in Windows?
I don't even know what partition style is, how would I know whether it's MBR or GPT? Don't you worry! This post is going to teach you how to check the partition scheme...
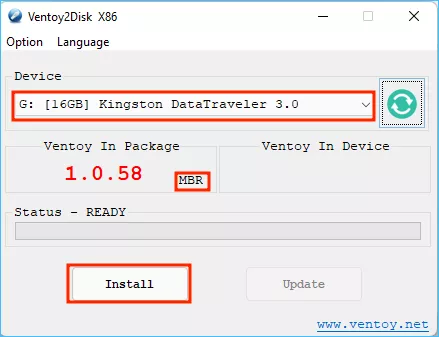
https://www.shareus.com/computer/mbr-or-gpt-how-to-check-partition-style-in-windows-10-11-7.htmlStep 3: Select the USB drive you want to burn in the dropdown menu, and then click Install.
Step 4: Read the Warning carefully and select Yes.
If you haven't backed up yet, you should do it first. Copy and move all files to somewhere else, or you can let CloneGo help you do this.
Download: CloneGo
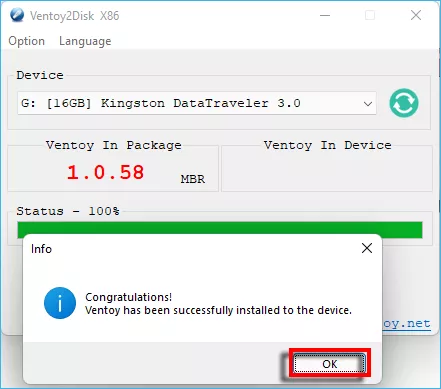
Step 5: It’ll be finished after waiting for about 2 minutes, so click OK and exit.
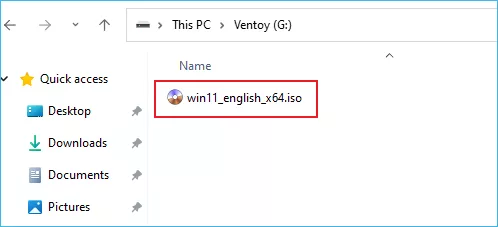
Step 6: Copy the downloaded Windows 11 ISO file, and paste it to your USB drive.
3. Install Windows 11.
Backup of your system disk before installing is always highly recommended. CloneGO is one of the utilities you can use to back up & restore the entire old system (Windows 7 or 10) with ONE click. For more information, see How to Downgrade Windows 11 to Windows 10 - Clone C Drive.
Download: CloneGOStep 1: Restart your PC or laptop, and then hit the Boot Menu Key to change your computer’s boot device. For more details about which one is your Boot Menu Key, read: List of PC Brands with Their Corresponding Hot-Keys.
Step 2: Use your up/down arrow buttons to choose your flash drive as the boot device, and then hit Enter.
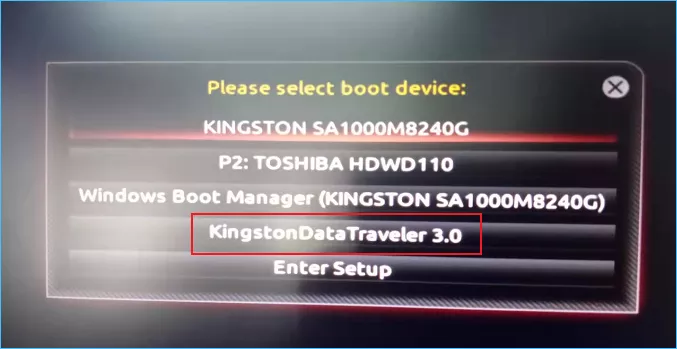
Then use your up/down arrow buttons again to select win11_english_x64.iso and press Enter.

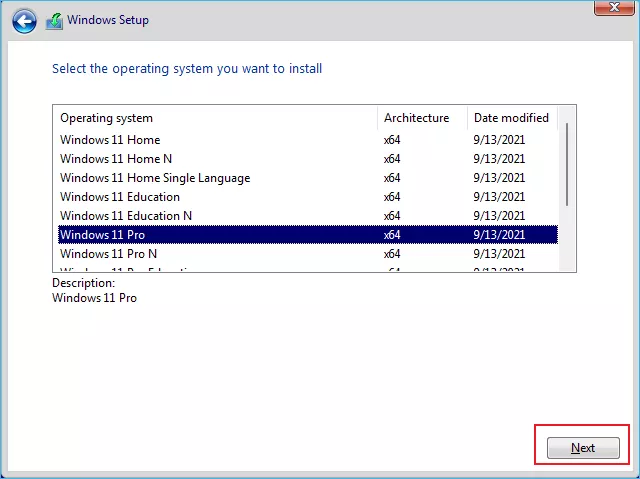
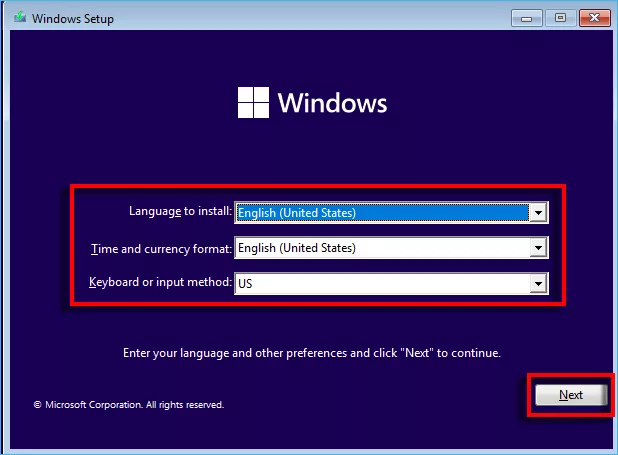
Step 3: Enter your language and other options and select Next to continue.
Step 4: Follow the upcoming instructions.
4. Bypass TPM 2.0 & Secure Boot.
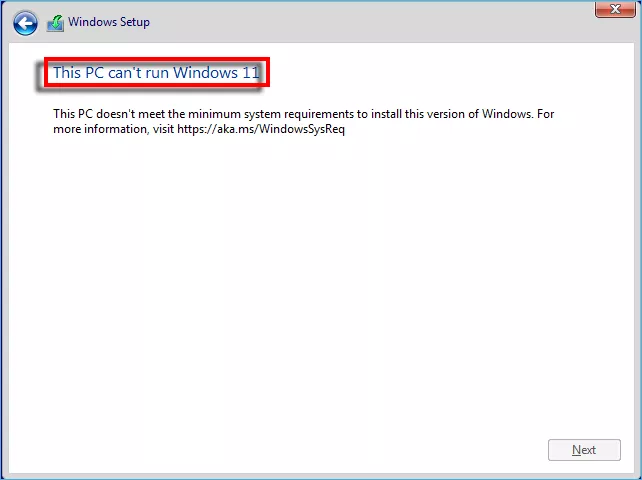
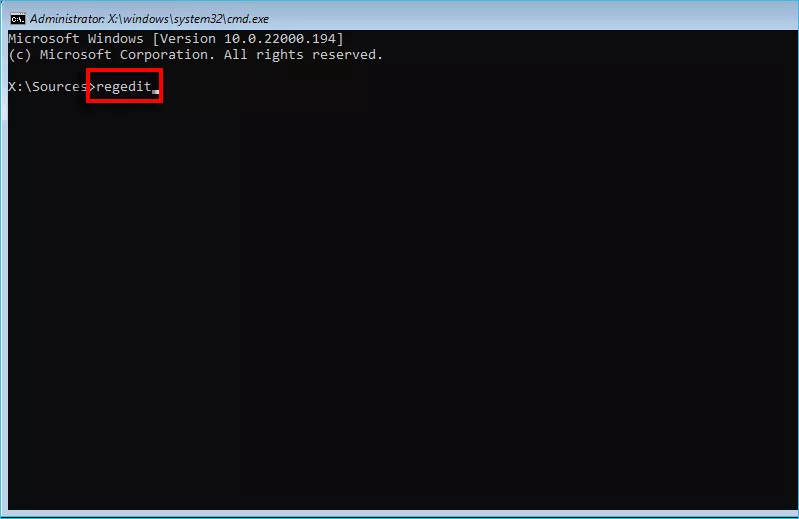
Step 1: If This-PC-can’t-run-Windows-11 window pops up, please press Shift + F10 to run Command Prompt.
Next, type regedit to open Registry Editor.
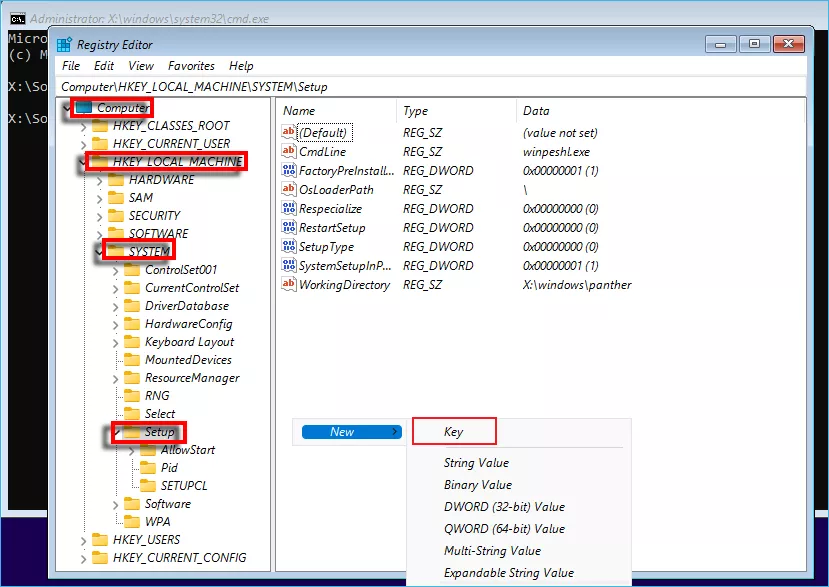
Step 2: Double-click Computer > HKEY_LOCAL_MACHINE > SYSTEM > Setup. Right-click on the right panel’s blanks and click New > Key.
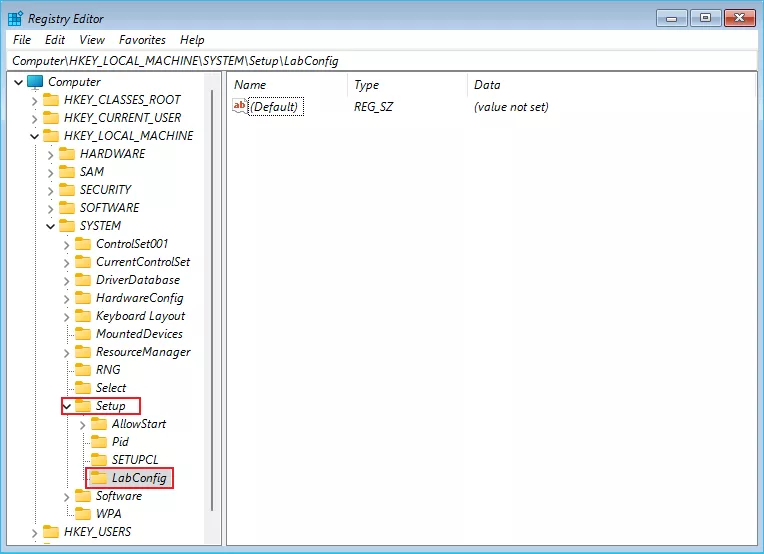
Step 3: Type LabConfig and then press Enter.
Step 4: Copy BypassTPMCheck. Right-click on the blanks of the right panel, and then click New > DWORD (32-bit) Value. Paste to it, press Enter twice. Copy 00000001, and then paste to it.
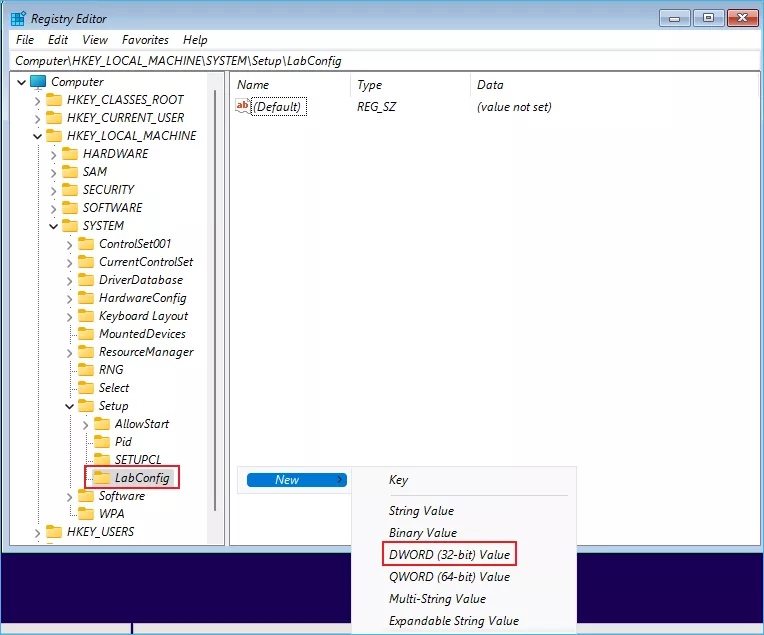
Step 5: Copy BypassSecureBootCheck. Right-click on the blanks of the right panel, and then click New > DWORD (32-bit) Value. Paste to it, press Enter twice. Copy 00000001, and then paste to it.
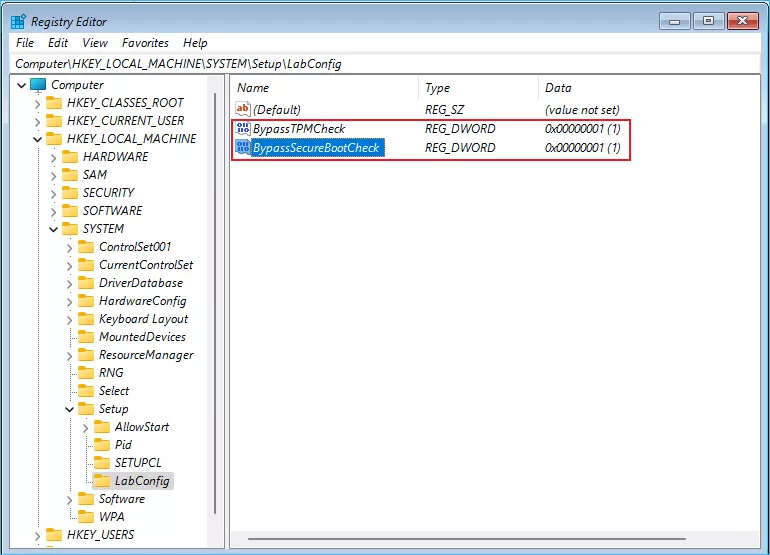
Step 6: Then you should see the two Values shown below.
Step 7: Close the window and click the left arrow on Windows Setup to go back.
Step 8: Click Next again, so you can bypass TPM 2.0 & Secure Boot and finish the upgrade.