Top Ways to View Wi-Fi Password on Windows 11 Guide

User Author

Achilles.H

June 21, 2023

Top Ways to View Wi-Fi Password on Windows 11 Guide

When your friends come to your house for a visit and want to connect to your Wi-Fi network, you find that you have forgotten your Wi-Fi password, even though you were connected to your Wi-Fi all along. Don’t worry, this article will show you three ways to view Wi-Fi password on Windows 11. It is worth noting that, the above three methods must ensure that your computer is connected to Wi-Fi first.

Way 1: View Wi-Fi Password by Control Panel

Using the Control Panel to view the Wi-Fi password on Windows 11, you can follow these steps:

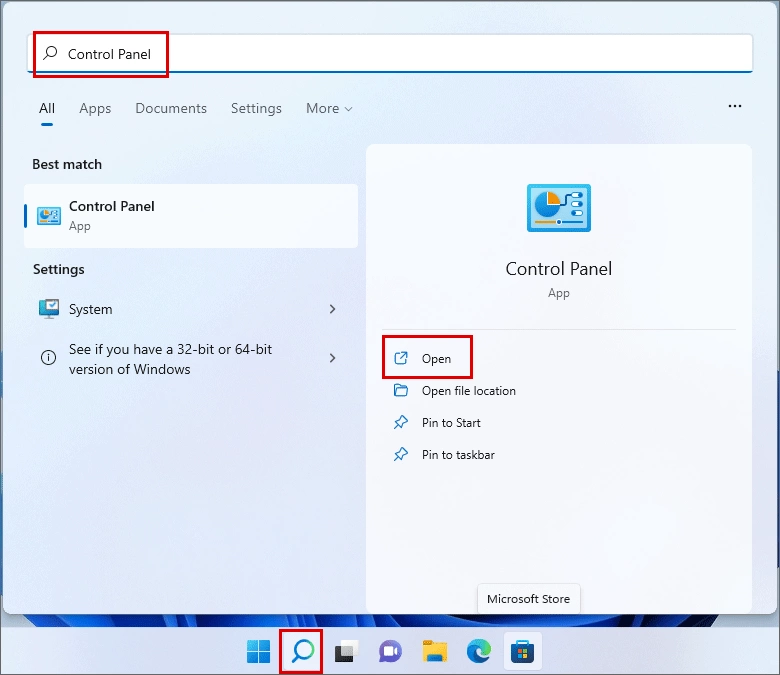
Step 1: Open Control Panel. Click on the Search icon on the taskbar, then type Control Panel in the search box and click Open.

open control panel

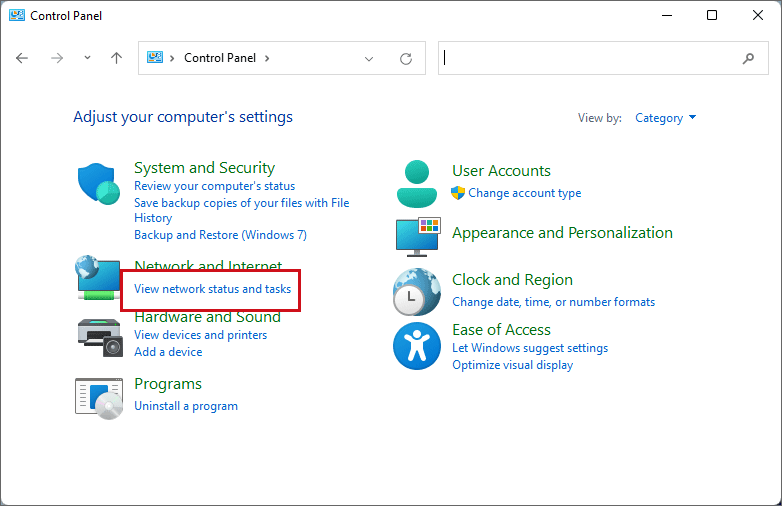
Step 2: In the Control Panel window, find the item View network status and tasks and click to open it.

view network status and tasks

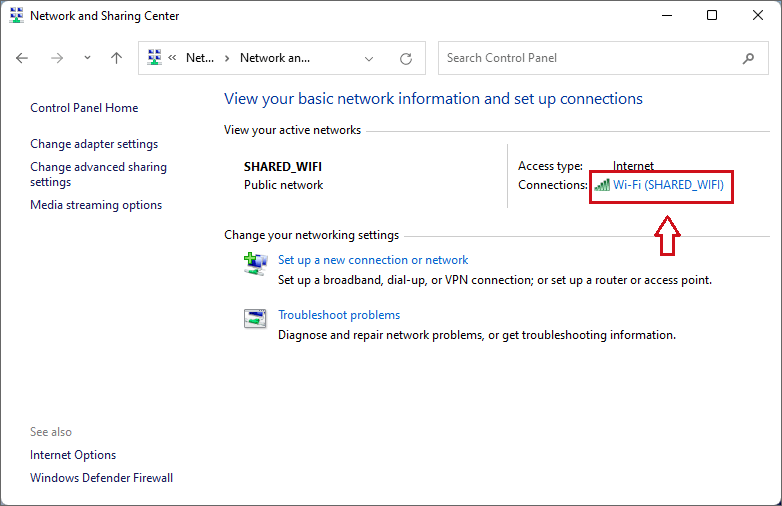
Step 3: The Network and Sharing Center window opens, find the WIFI your computer is connected to and click on “Wi-Fi (your Wi-Fi name)” under Connections.

wifi shared wifi

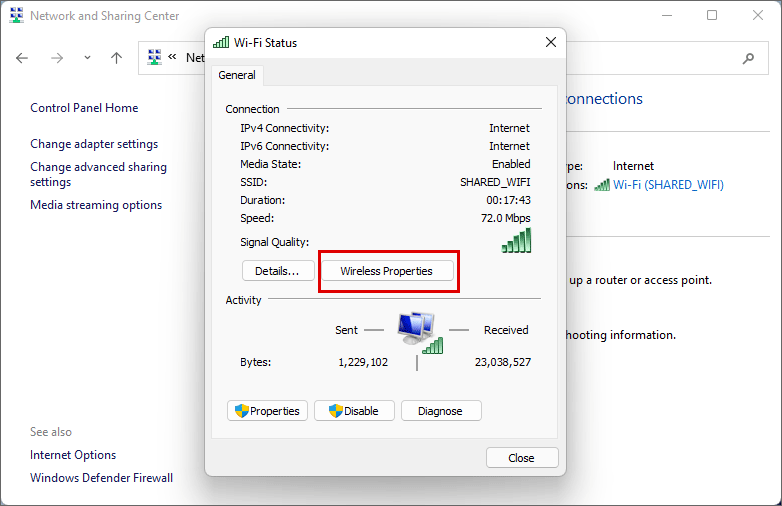
Step 4: Once you click on it, the Wi-Fi Status window opens, then click on the Wireless Properties button.

wireless properties

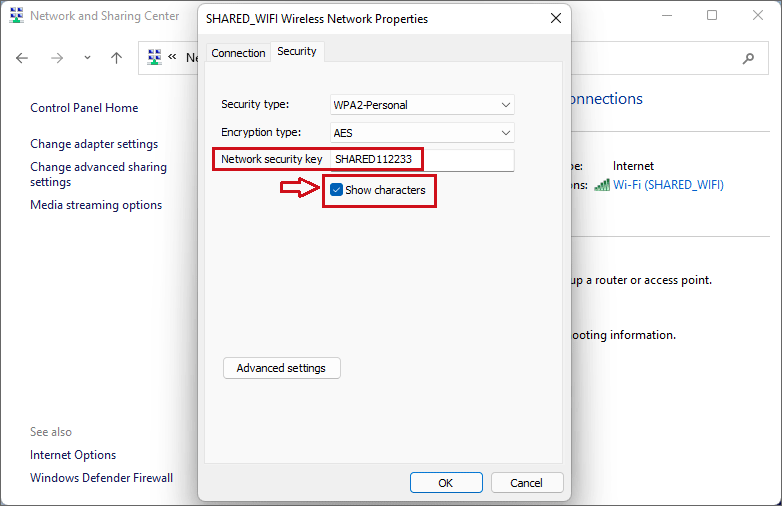
Step 5: On the Wireless Network Properties window, click on Security in the column.

click security

Step 6: Click on the Show characters checkbox and then you can view the WIFI password in the Network security key section.

show characters

Way 2: View Wi-Fi Password from the Command Line

Following these steps view the Wi-Fi password from the command line. Note: On Windows, you may need to run the Command Prompt as an administrator to view the Wi-Fi password.

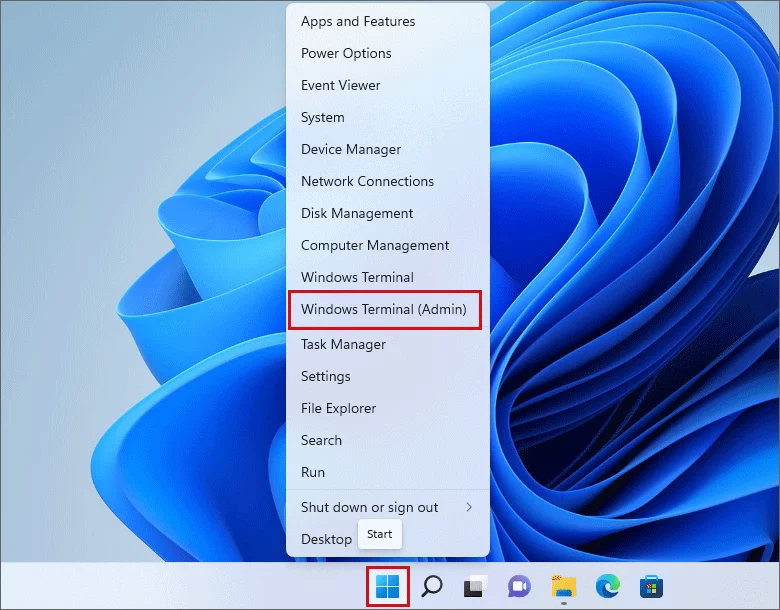
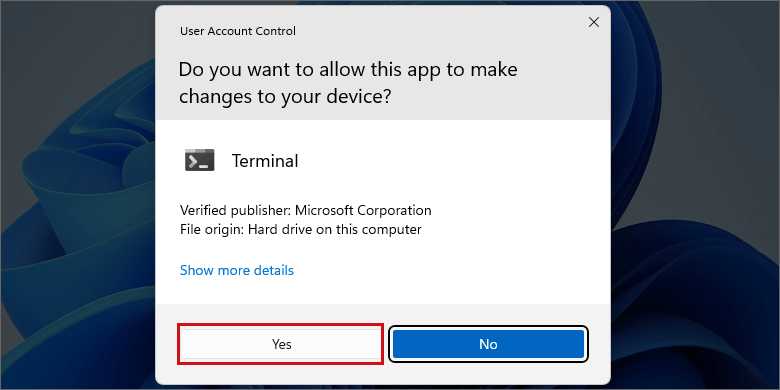
Step 1: Right-click the Start icon on the taskbar to open the menu, then click Windows Terminal (Admin).

windows terminal admin

Step 2: Click Yes, allow to make changes to your device by the program.

click yes

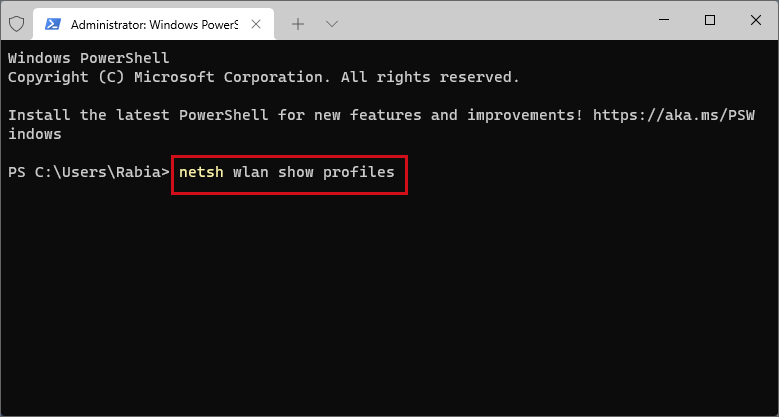
Step 3: The Windows Terminal window opens. Type the command: “netsh wlan show profiles” and press Enter to see the names of the connected Wi-Fi.

show profiles

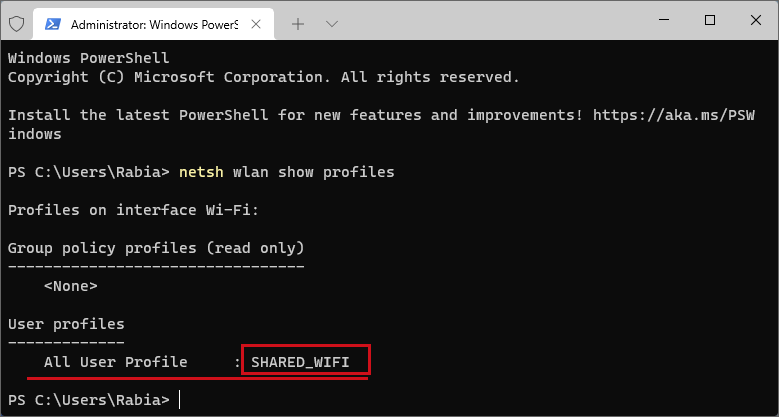
Step 4: The Wi-Fi name is displayed in the ALL User Profile: SHARED_WIFI.

all user profile

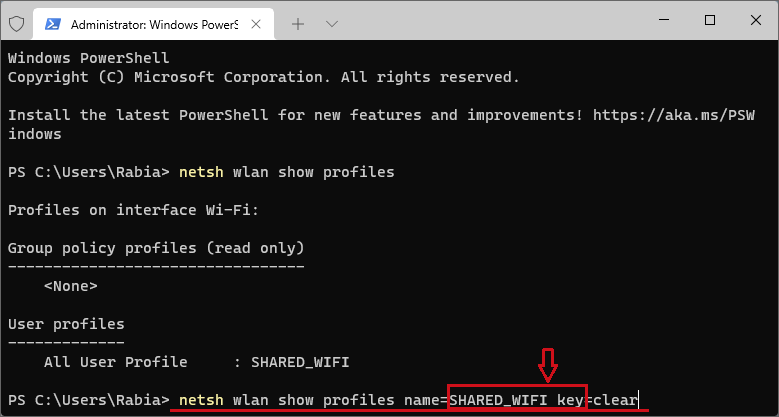
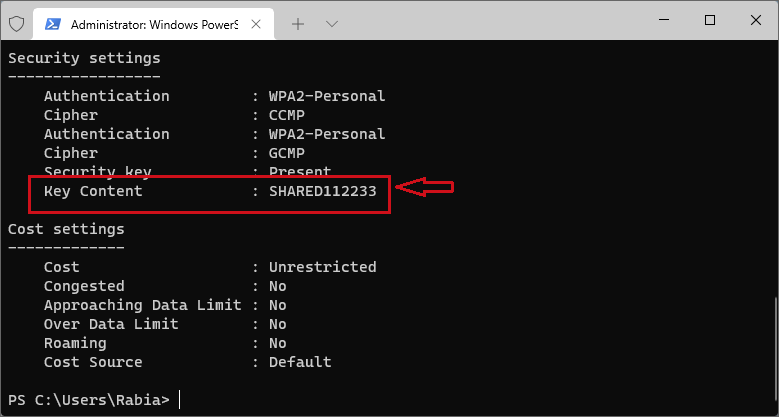
Step 5: Type the command: “netsh wlan show profiles name=SHARED_WIFI key=clear” then press Enter to view the WIFI password. Note: you should enter the name of the Wi-Fi you are connected to here.

show profiles name

Step 6: You can view Wi-Fi password under the Key Content item.

key content

Way 3: View Wi-Fi Password by Third-party Tool

WiFi Password Genius is a reliable software designed to help users to view Wi-Fi passwords saved on their Windows. The software scans your computer for saved Wi-Fi profiles and displays a list of network names and passwords, which can be helpful in case you want to share the password with others or reconnect the Wi-Fi network to a new device. It offers a user-friendly interface that can be used even by users with limited technical knowledge. Following these steps to view Wi-Fi password on Windows 11:

Download: WiFi Password Genius

Step 1: Download and install the software on your computer.

download and install

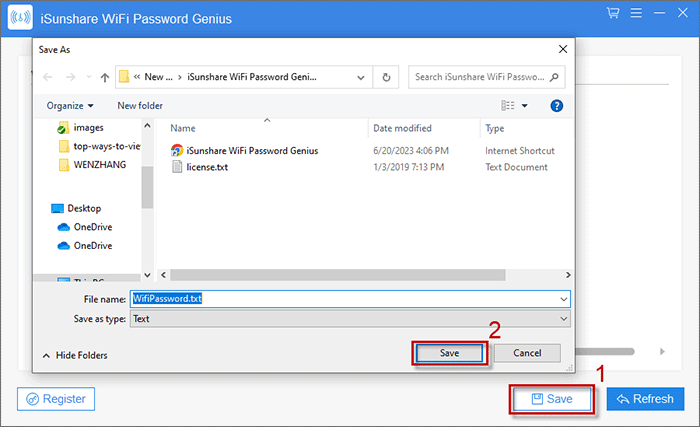
Step 2: Once you install the software, you will be able to view Wi-Fi names and passwords. You can click the Refresh button to ensure that all relevant accounts and passwords are listed.

refresh wifi acount and password

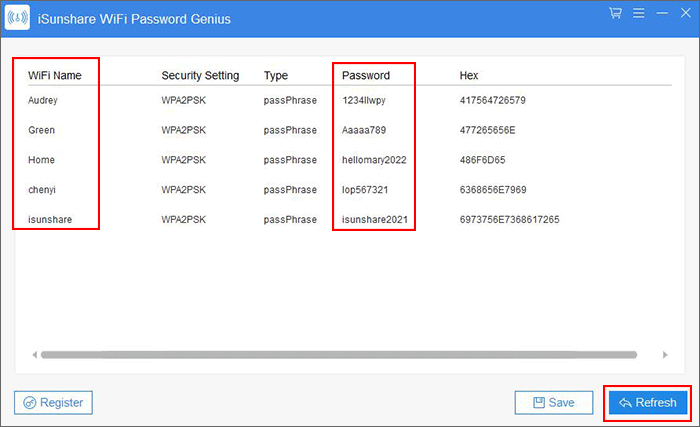
Step 3: Click the Save button to save all the scanned Wi-Fi account names and passwords. You can view your Wi-Fi names and passwords at any time.

save wifi password
t="logo">
BZ9�R' How to Check NIC (Ethernet & WIFI) Speed in Windows 10

How to Check NIC (Ethernet & WIFI) Speed in Windows 10

Uswe Author

Achilles.H

November 22,2019

how to check nic ethernet wifi speed in windows 10

Network Interface Card (NIC) aka network adapter, is the component of a computer's internal hardware that provides the interface between a computer and a network connection. It can be used over a wired (Ethernet) or wireless (WIFI) network. Whatever the network card you're using, it is necessary for you to check network card speed. In this post, we will show you how to check network card (Ethernet and WIFI) speed in Windows 10.

1. Check network card speed by Windows Settings

Step 1: Press Windows key + I shortcut and click Network & Internet option in Windows Settings window.

open windows network settings

Step 2: Click Status option on the left panel and then click View your network properties on the right panel.

view network properties

Step 3: Then you can view the properties of your network which includes the link speed of network card.

check ethernet speed by windows settings

2. Check network card speed by Device Manager

Step 1: Press Windows key + X shortcut and select Device Manager option in the context menu.

open device manager window

Step 2: Double-click Network adapters to open a collapse menu. Then double-click the network adapter (Ethernet or WIFI). On the popup window, click Link Speed tab. Finally, you can check your network card speed including Ethernet and WIFI.

check network card speed by device manager

3. Check network card speed by Control Panel

Step 1: Press Windows Key + R to open a run window. Then type control panel and press Enter.

open network and sharing center window

Step 2: Select Network and Sharing Center.

open network and sharing center window

Step 3: Click Ethernet or WIFI and a new window will pop up. Then you can find out the ethernet or WIFI speed on the new window.

check ethernet speed by control panel

4. Check network card speed by CMD

Step 1: Press Windows Key + R to open a run window. Then type cmd and press Enter.

open cmd window

Step 2: In Command Prompt window, type wmic nic get name, speed and then press Enter. Then you can find out the name and speed of every network card including wired (Ethernet) and wireless (WIFI).

check network card speed by cmd

5. Check network card speed by PowerShell

In the matter of checking system specifications including network adapter speed, PowerShell offers the same function as Command Prompt does. Here are the detailed steps of how to check Ethernet and WIFI speed in Windows 10.

Step 1: Press Windows Key + R to open a run window. Then type powershell and press Enter.

open powershell window

Step 2: In PowerShell window, type get-netadapter | select name, linkspeed and press Enter. Then you can find out your network card speed in Windows 10.

check network card speed by powershell

Summary

It is not hard to check your network card (Ethernet & WIFI) speed in Windows 10 by the methods above. It is worth mentioning that the speed displayed on the screen is the theoretical speed of your network card and there is always a bit of overhead on a network.

$