Full Guide: How to Fix Enter Network Credentials Access Error in Windows 10/11

July 21, 2022
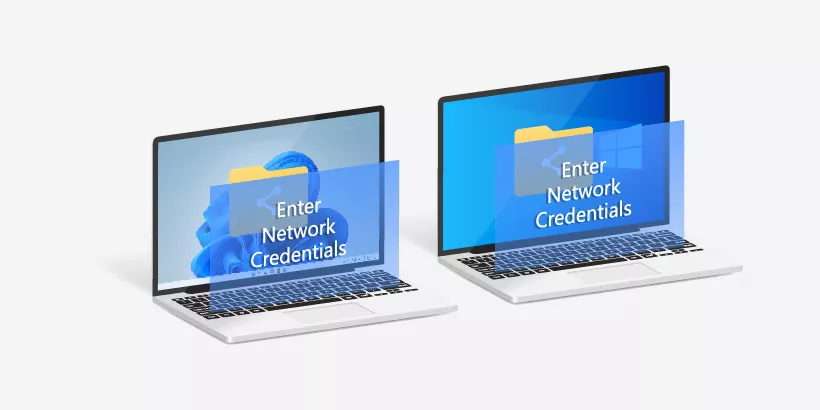
If you have more than one Windows devices connected to the same network, you are able to share files across different computers or connect to a remote desktop. To verify that the right people and services are sending data to the correct device while accessing network resources, network credentials are required. However, some users have the trouble getting stuck with "Enter network credentials" error message. It's very frustrating if accessing other Windows computer becomes difficult. Puzzling over how to solve this problem? In this post, we will share some useful fixes on how to get rid of Enter network credentials on Windows.
- 1. Turn off password protected sharing
- 2. Change network profile to private
- 3. Clear all credentials from Credential Manager
- 4. Disable Credential Manager service automatic startup
- 5. Add credentials in Credential Manager
- 6. Change the Username
- 7. Change Security Policies
- 8. Create a new user account
1. Close background processes
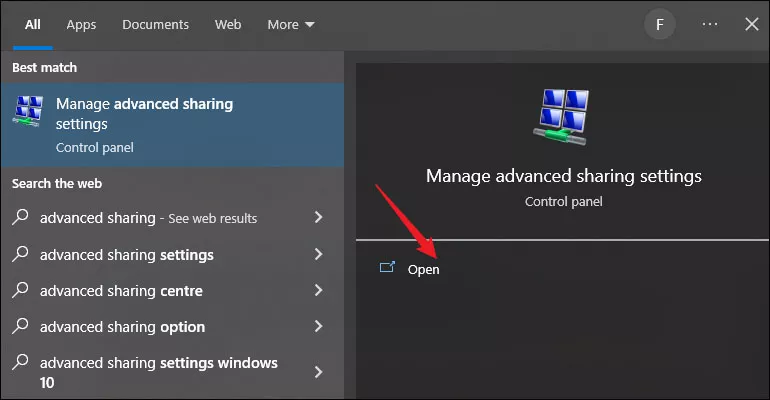
Step 1: Search advanced sharing settings in the search bar and open it from the result list.
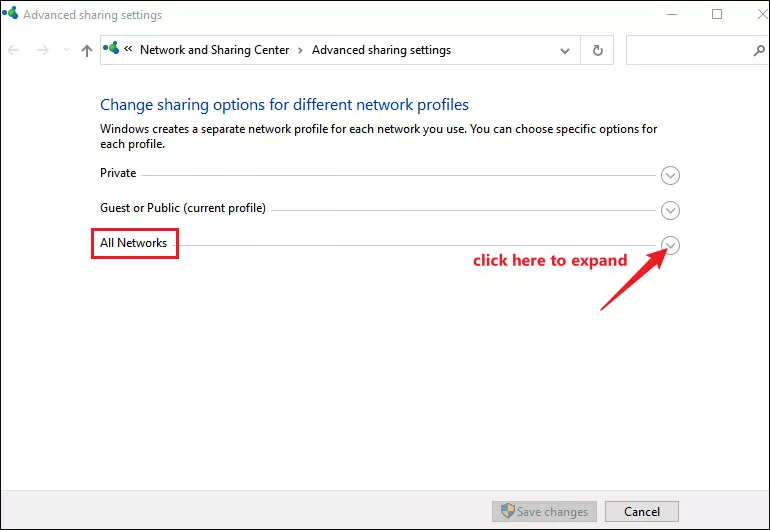
Step 2: In the next window, click to expand All Networks.
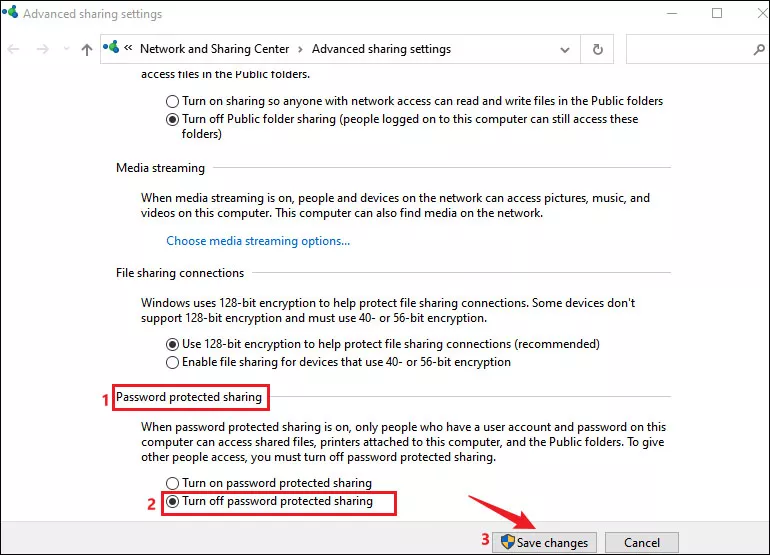
Step 3: In Password protected sharing section, select Turn off password protected sharing and click Save changes.
Step 4: Close the window and reboot your PC.
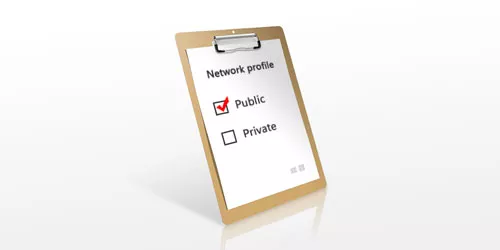
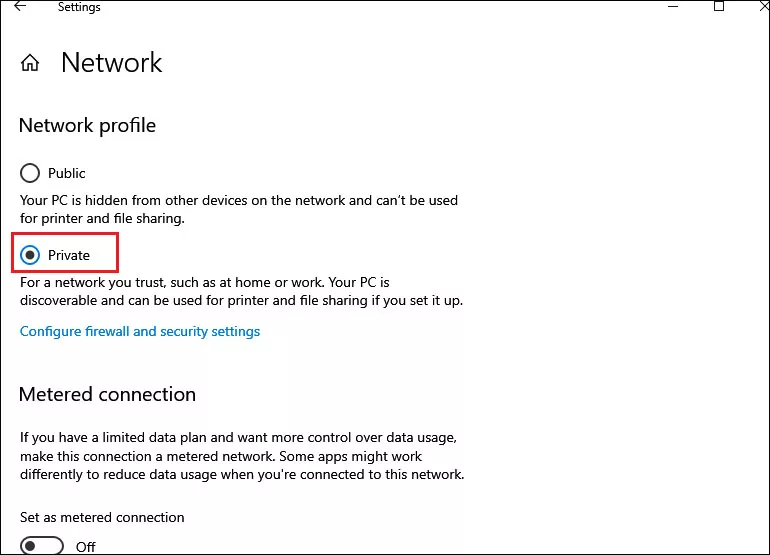
2. Change network profile to private
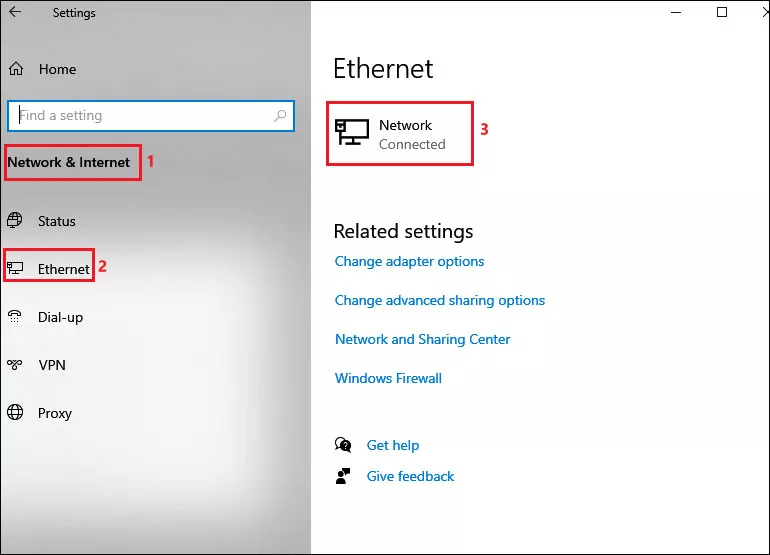
Step 1: Press Windows+I to open Settings and select Network & internet. Then select WIFI or Ethernet and click on the connected network.
Step 2: Under the Network profile section, select Private.
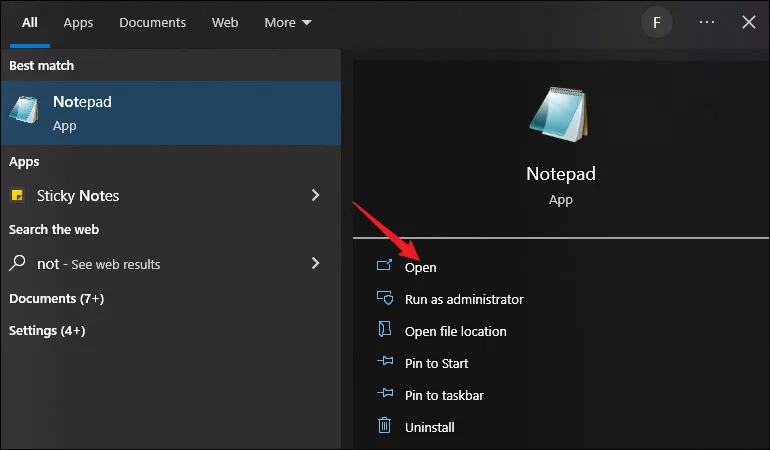
3. Clear all credentials from Credential Manager
Step 1: Search notepad in the search bar and open it.
Step 2: In the text input field, copy and paste below scripts:
@echo off
cmdkey.exe /list > "%TEMP%\List.txt"
findstr.exe Target "%TEMP%\List.txt" > "%TEMP% okensonly.txt"
FOR /F "tokens=1,2 delims= " %%G IN (%TEMP% okensonly.txt) DO cmdkey.exe /delete:%%H
del "%TEMP%\List.txt" /s /f /q
del "%TEMP% okensonly.txt" /s /f /q
echo All done
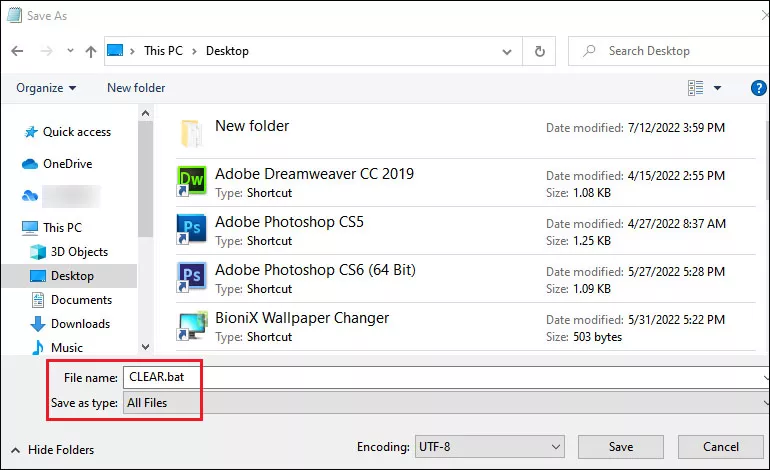
pauseStep 3: Press Ctrl + S to save it with the .bat file extension. For example, CLEAR.bat. Select All files behind Save as type.
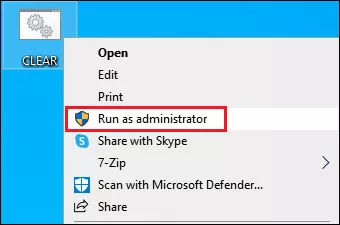
Step 4: Right-click on the saved file and select Run as Administrator. After the command have been executed, all credentials should be cleared from Credential Manager.
4. Disable Credential Manager service automatic startup
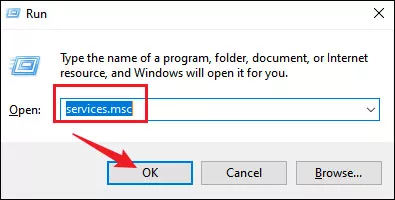
Step 1: Press Windows+R to open run command and type services.msc in the open box. Click OK to open Services.
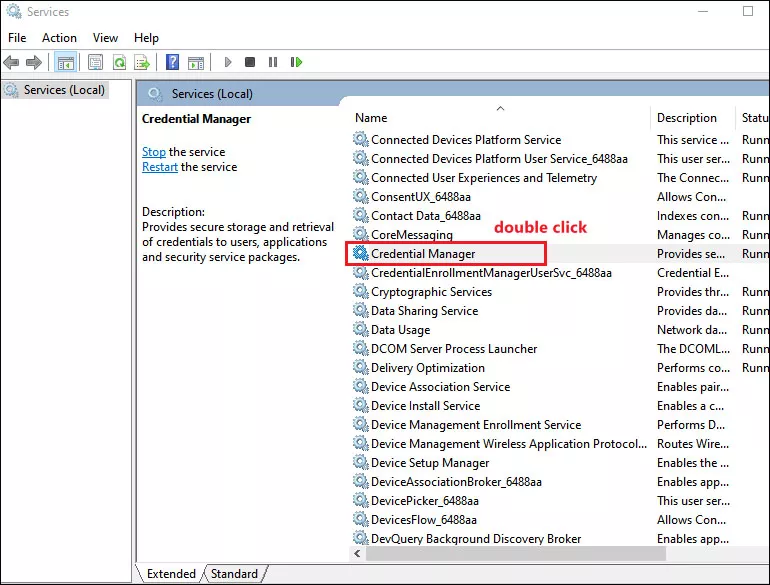
Step 2: Locate Credential Manager and double-click on it.
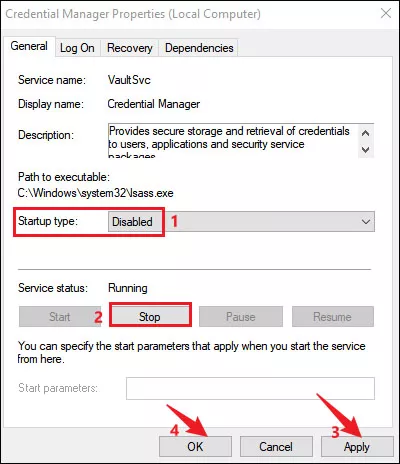
Step 3: In the Properties window, change the startup type to Disabled and click the Stop button. Finally, Click Apply and OK.
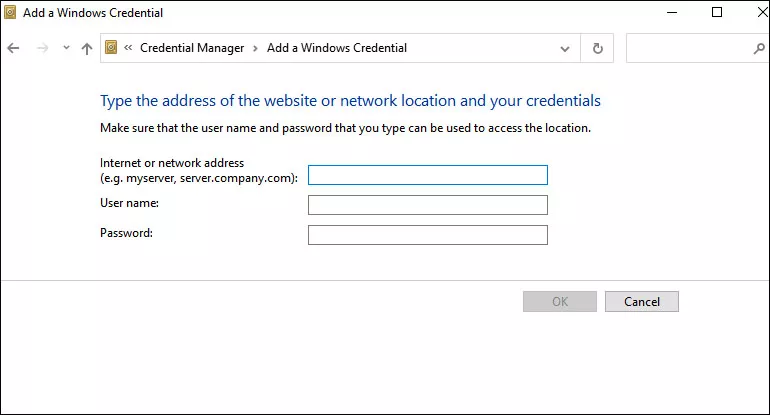
5. Add credentials in Credential Manager
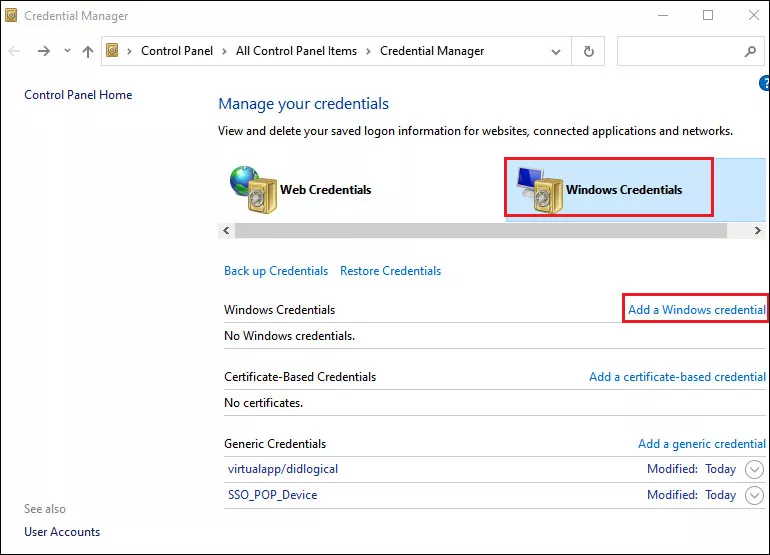
Step 1: Search credential in the search bar and open Credential Manager.

Step 2: Click Windows Credentials and then click on Add a Windows credential.
Step 3: Fill in the information and click OK. After all is done, restart your PC.
6. Change the Username
Step 1: Find out the computer name of the device you want to access. Open Settings and select System>About. Under Device specifications, the Device name is your computer name.
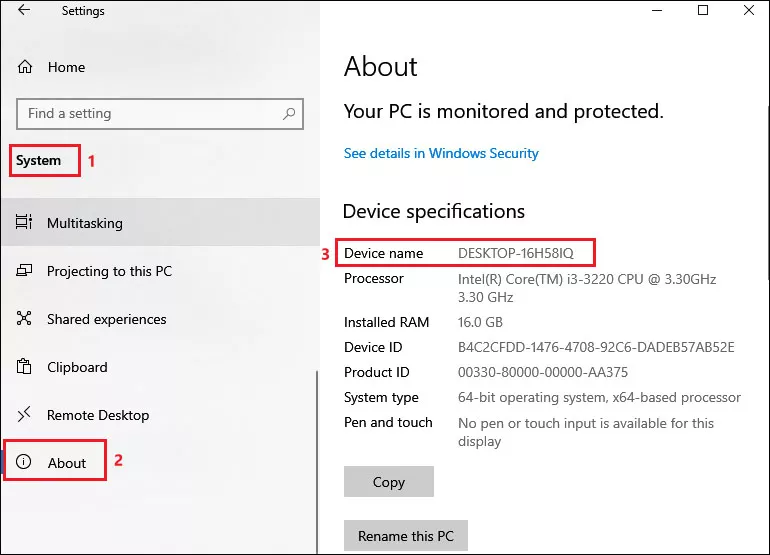
Step 2: Use the Computer name plus account name as Username. For instance, if the account name on the other computer is "Lany454" and the computer name is "Computer16H", in the user name field, you should enter Computer16HLany454.
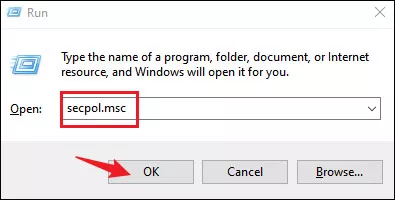
7. Change Security Policies
Step 1: Press Windows+R to open run command and type secpol.msc in the open box and press OK to open Local Security Policy.
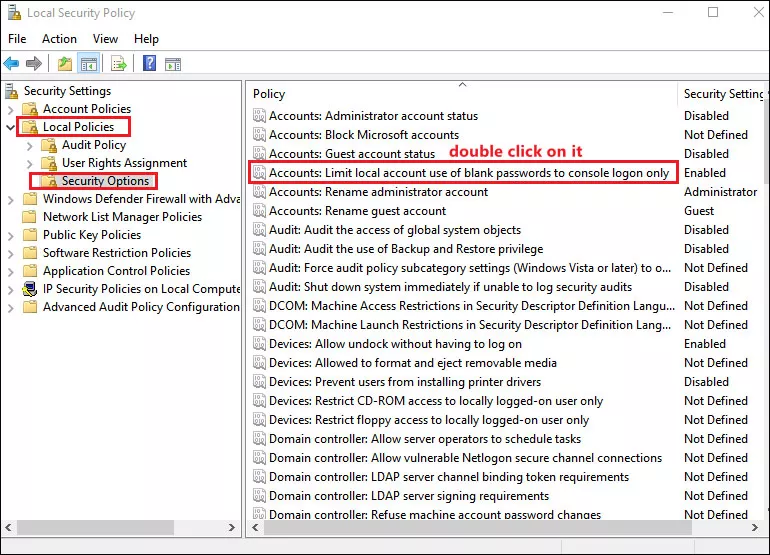
Step 2: Expand Local Policies and select Security Options. In the right pane, double-click on Accounts: Limit local account use of blank passwords to console logon only.
Step 3: Select Disabled option and click Apply and then OK.
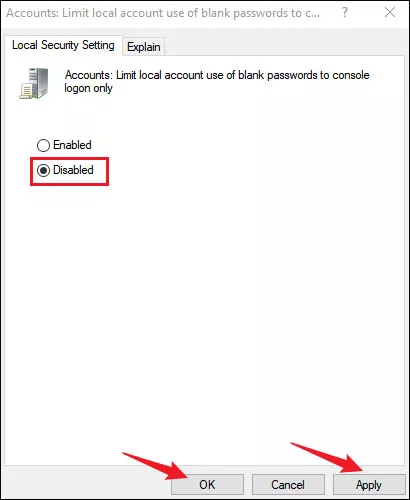
Step 4: Restart your system and connect with the network.
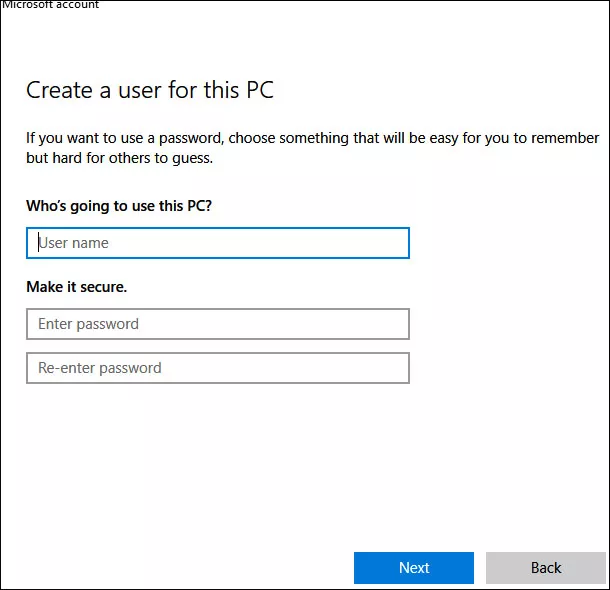
8. Create a new user account
Step 1: Press Windows + I to open Settings and select Accounts > Family & other users.
Step 2: Click on Add someone else to this PC.
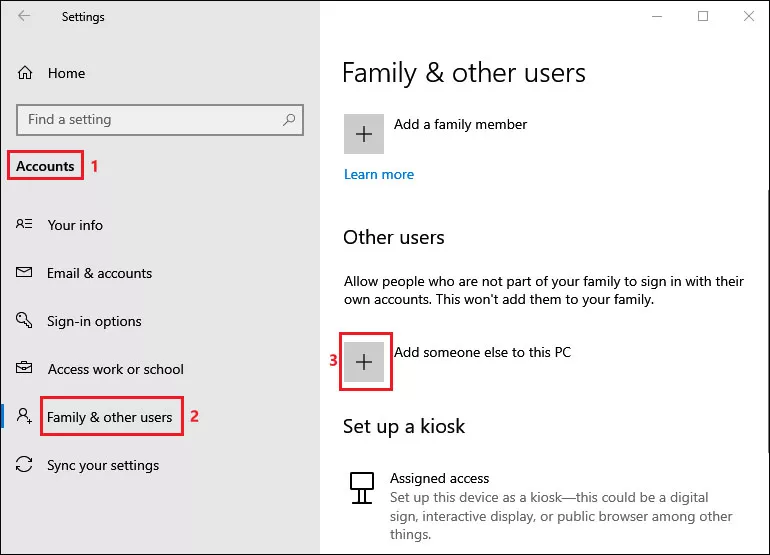
Step 3: Fill in the new account information and switch to the new account to check if the new one would encounter the error.