How to Bypass Windows 11 TPM/CPU Check (Unsupported PCs Are Available)

October 31, 2023
If you want to install or upgrade to Windows 11, there are strict requirements for TPM and CPU that your computer must meet. Not to mention those old computers bought many years ago. Luckily, it is easy to bypass Windows 11 TPM and CPU checks with the methods mentioned in this article.
1. Create “AllowUpgradesWithUnsupportedTPMOrCPU” Value
Even though there are strict requirements for Windows 11 installation, Microsoft has officially provided a method to bypass the check for TPM 2.0 and the CPU family and model. (The TPM requires at least 1.2, and Windows 10 is the 2004 version and above.)
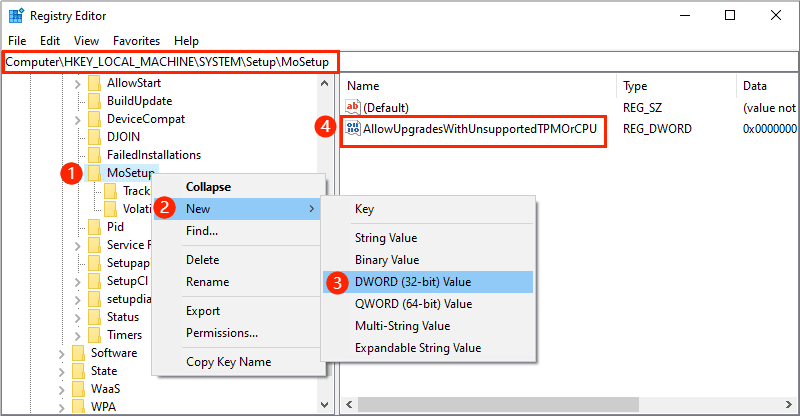
Step 1: Press Win + R and type “regedit”, then click OK.
Step 2: Browse to the following path:
Computer\HKEY_LOCAL_MACHINE\SYSTEM\Setup\MoSetupStep 3: Right-click the MoSetup > New > DWORD (32-bit) Value > Rename it to “AllowUpgradesWithUnsupportedTPMOrCPU”.
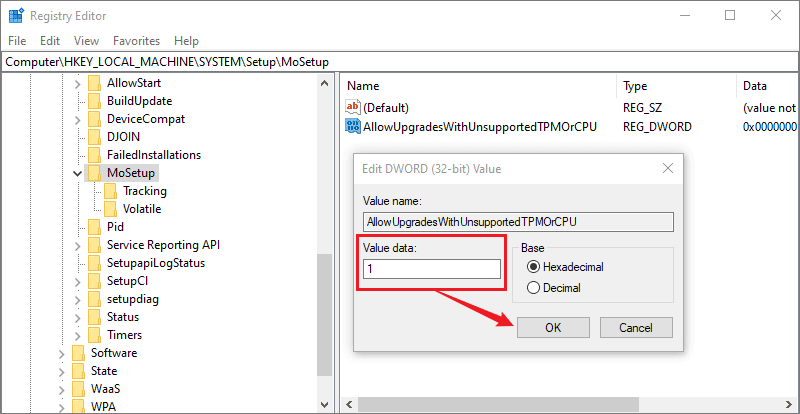
Step 4: Double-click the newly created value > Modify the Value data to “1” > Click OK > Restart your PC.
Step 5: Download the Windows 11 ISO image > Right-click the ISO file > Mount > Double-click setup.

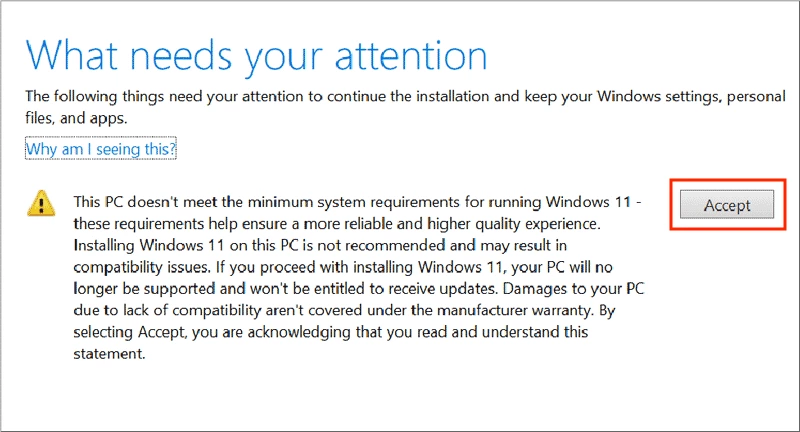
Step 6: In the setup process, click Change how Setup downloads updates > Not right now. In the “What needs your attention” page, click Accept. Then you can continue install windows 11 bypassing TPM and CPU requirements.

2. Replace Win 10 “install.wim” File with the Win 11 “install.wim” File
Step 1: Download Windows 10 ISO and Windows 11 ISO on the Microsoft official website.
Step 2: Open the Windows 10 ISO folder > sources > Delete "install.wim" file.
Step 3: Open the Windows 11 ISO folder > sources > Copy the "install.wim" file to the Windows 10 ISO folder.
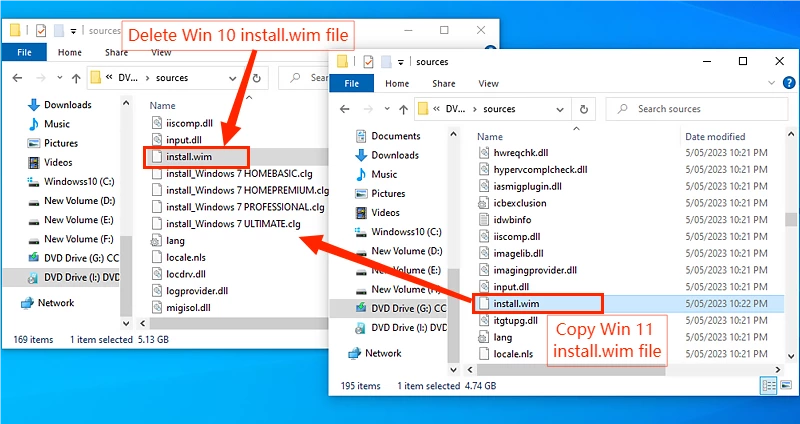
Step 4: Double-click "setup.exe" in the Windows 10 ISO folder. In the “Select the operating system you want to install”, you will find that all were replaced with the Windows 11 ISO.
3. Modify the Specified Parameters to Impersonate the Server
Note: This command only applies to upgrades, such as from Windows 10 to Windows 11 or from an older version of Windows 11 to a new version.
Step 1: Download Windows 11 ISO > Right-click the folder, and select Mount > Confirm the letter of the drive.
Step 2: Press Win + R and type “cmd”, then hit the Ctrl + Shift + Enter buttons to run as an administrator.
Step 3: Type the following command and hit the Enter button after each command:
G: (The letter refers to the drive where the ISO file is mounted.)
setup.exe /product server
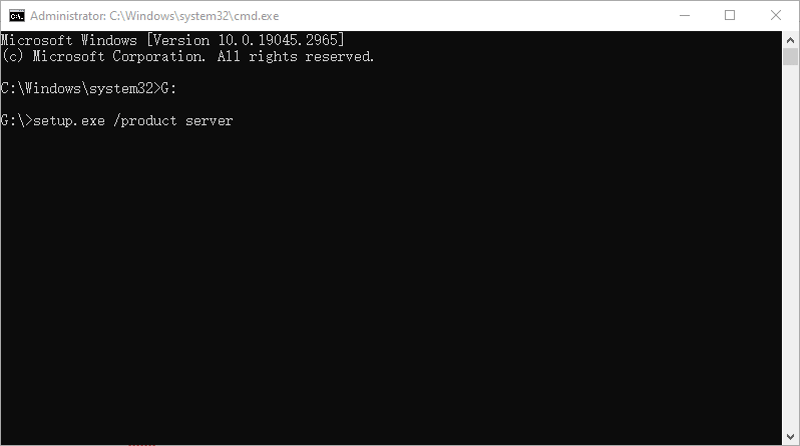
After typing all the commands, it will pop up a Windows Server Setup window, then click Change how Setup downloads updates > Not right now > Accept > Choose what to keep to install Windows 11 without TPM and CPU restrictions.
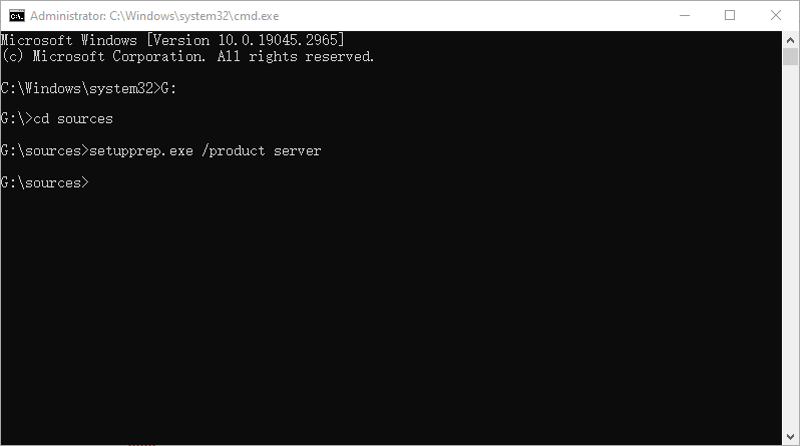
However, the setup.exe /product server command may fail in Windows 11 Canary Build 25977; you can use the setupprep.exe /product server command instead. Here are the steps (steps 1 and 2 mentioned above):
Step 3: Type the next commands and press the Enter button after each command:
G: (The letter refers to the drive where the ISO file is mounted.)
cd sources
setupprep.exe /product server
4. Set the “Appraiser-Data.ini” File as Read-only
Step 1: Download the Windows 11 ISO image > Right-click the ISO file > Mount > Double-click setup.
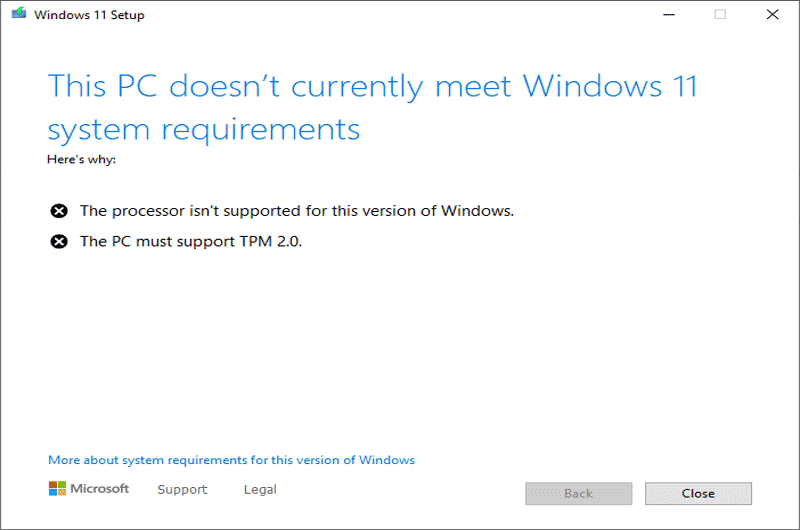
Step 2: Click Change how Setup downloads updates > Not right now. Stay in the This PC doesn’t meet Windows 11 system requirements page.
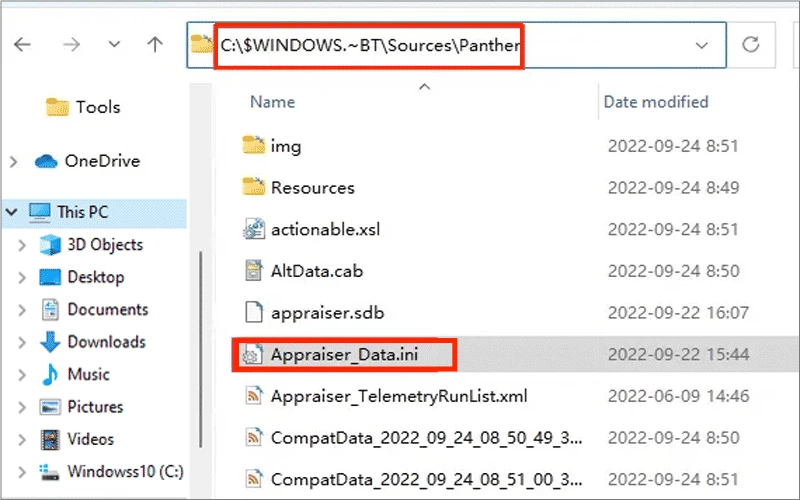
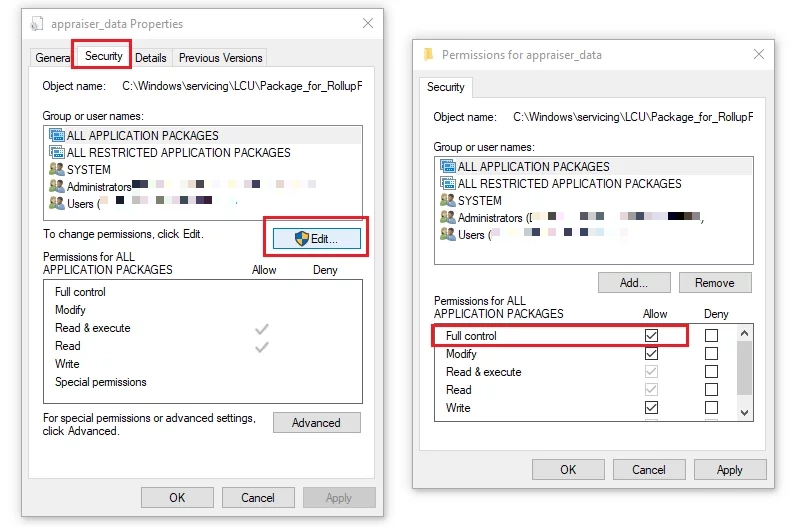
Step 3: Open File Explorer > Visit the path: C:\$WINDOWS.~BT\Sources\Panther > Find out and right-click Appraiser_Data.ini file > Properties > Security > Edit > Tick Full Control > Click Apply and OK.
Step 4: Double-click the file > Delete all the content inside > Save.
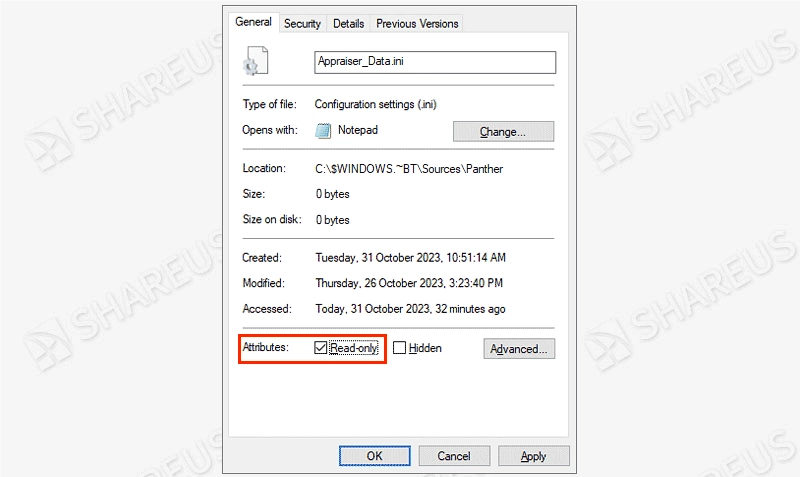
Step 5: Right-click Appraiser_Data.ini file > Properties > General > Tick Read-only in the Attributes option > Click Apply and OK.
Step 6: Back to the This PC doesn’t meet Windows 11 system requirements page > Click Back > Then click Next, you will surprisedly find that you can install Windows 11 without TPM and processor limitations.
5. Using the MediaCreationTool.bat tool
This tool can help you automatically upgrade your Windows to Windows 11 and bypass the TPM check.
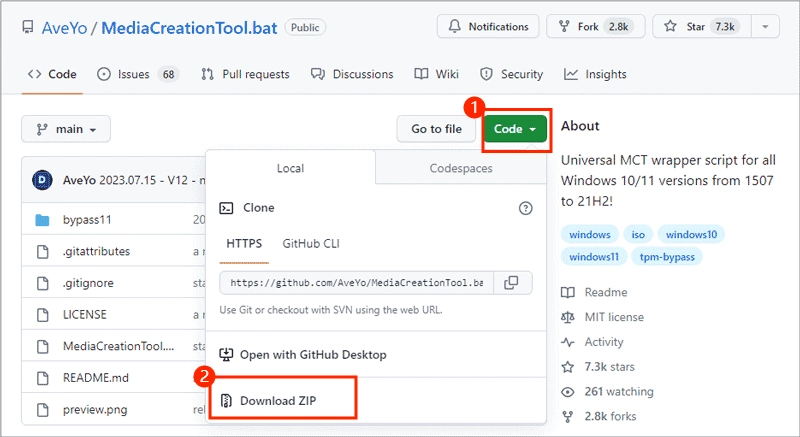
Step 1: Open the MediaCreationTool.bat download page > Click Code > Download ZIP.
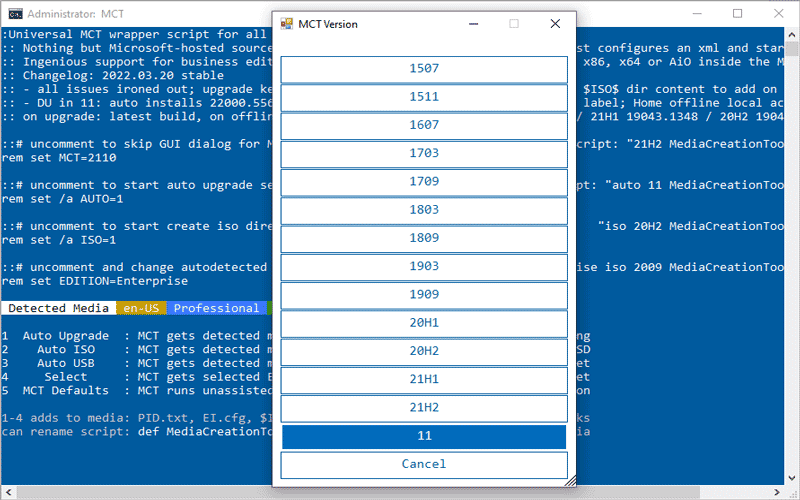
Step 2: Extract the zip > Right-click MediaCreationTool > Run as an administrator.
Step 2: Select “11” in the MCT Version window > Select “Auto Upgrade” in the 11MCT Preset window.
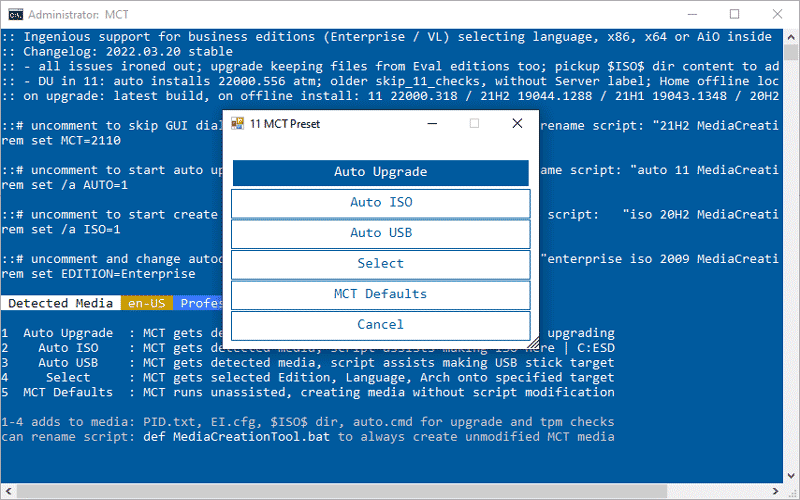
Then wait patiently until the progress is finished, and it will start installing Windows 11 without TPM and CPU checks.