How to Fix High CPU & Memory Usage in Windows 10/11

December 12, 2023
Have you noticed a gradual slowdown in your computer's operation? The CPU and memory usage are also high when you examine the task manager's performance. This is a prevalent problem with Windows 10 and Windows 11.
Wondering why the CPU and memory usage are high? How to fix high CPU and memory usage in Windows 10/11? This article will tell!
- Why Are the CPU and Memory Usage High?
- How to Lower CPU and Memory Usage?
- 1. End Unnecessary Programs
- 2. Disable Unwanted Startup Programs
- 3. Disable the SysMain(Superfetch) Service
- 4. Turn off Fast Start-up
- 5. Run the Windows Diagnostics Tool
- 6. Increase Virtual Memory
- 7. Adjust for Best Performance
- 8. Update Disk Drivers
Why Are the CPU and Memory Usage High?
The reasons causing CPU and memory to be high include, mainly:
- Run too many unnecessary programs.
- Enable too many startup apps.
- Not enough memory capacity.
- An outdated or incompatible disk drive.
How to Lower CPU and Memory Usage?
1. End Unnecessary Programs
Steps: Right-click the taskbar > Click Task Manager > Right-click the unnecessary programs > End task.
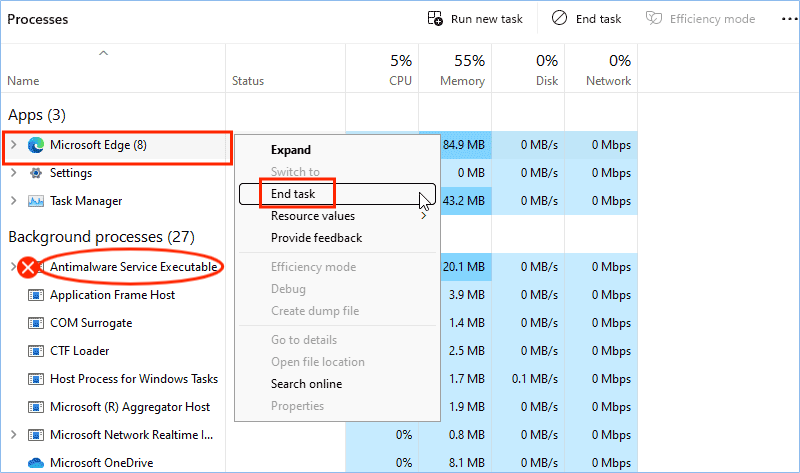
Pay attention to the “Antimalware Service Executable” process; it often causes high usage, but we can’t end it directly. So, you need to disable Windows Defender to delete it.
2. Disable Unwanted Startup Programs
Steps: Open Task Manager > Choose Startup tab > Click the unwanted startup programs > Disable.
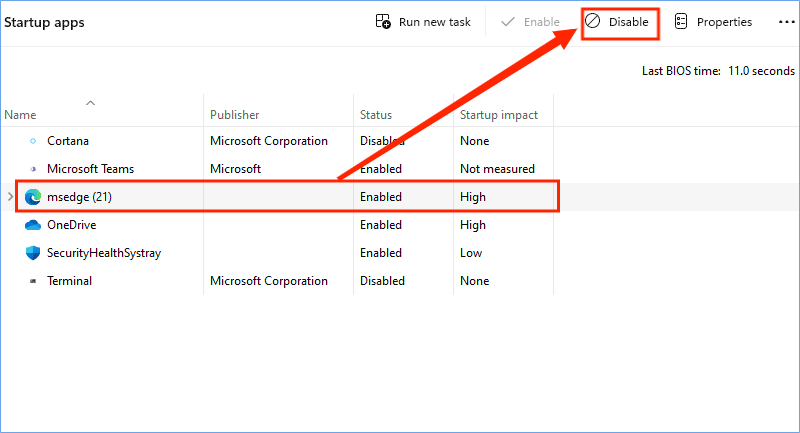
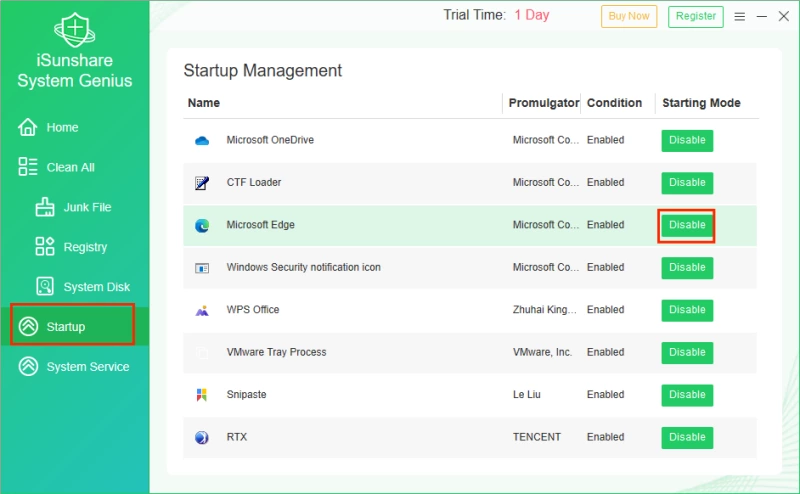
However, sometimes, even if you disable the startup programs with the above steps, the app still starts up itself. It is recommended to use System Genius to completely disable the unwanted startup programs.
Steps: Download and run the System Genius > Select Startup tab > Directly disable the programs.
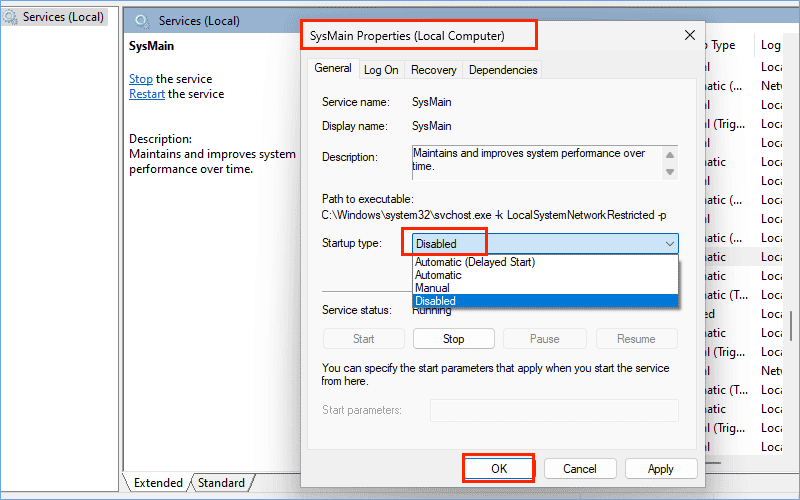
3. Disable the SysMain(Superfetch) Service
Step 1: Press Win + R > Type “services.msc” and click OK.
Step 2: Find and double-click the “SysMain” service > Select Disabled in the Startup type, then click OK.
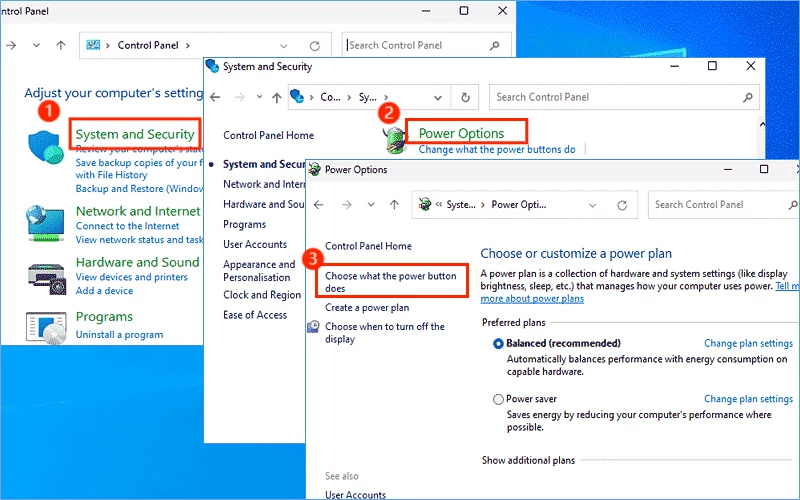
4. Turn off Fast Start-up
Step 1: Type “control panel” in the search bar and hit the Enter button.
Step 2: Click System and Security > Power Options > Click “Choose what the power buttons do” in the left panel.
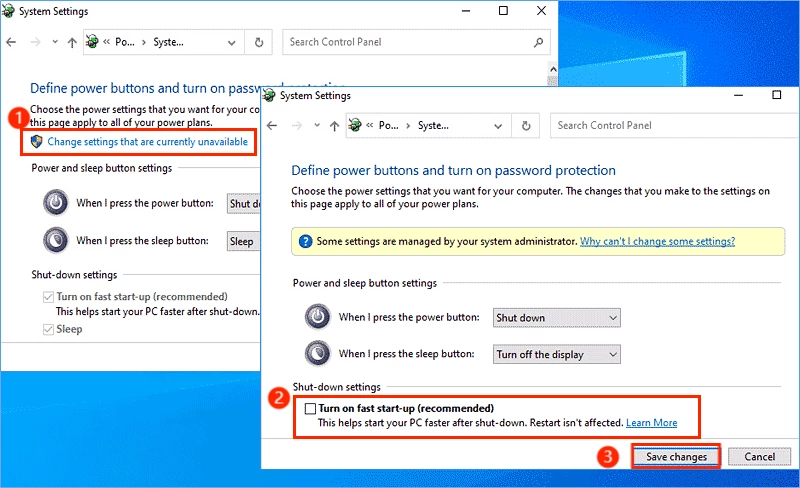
Step 3: Click “Change settings that are currently unavailable” > Untick “Turn on fast start-up (recommended)” > Save changes. There is one thing that needs attention: turning off fast start-up may slow down the computer’s booting.
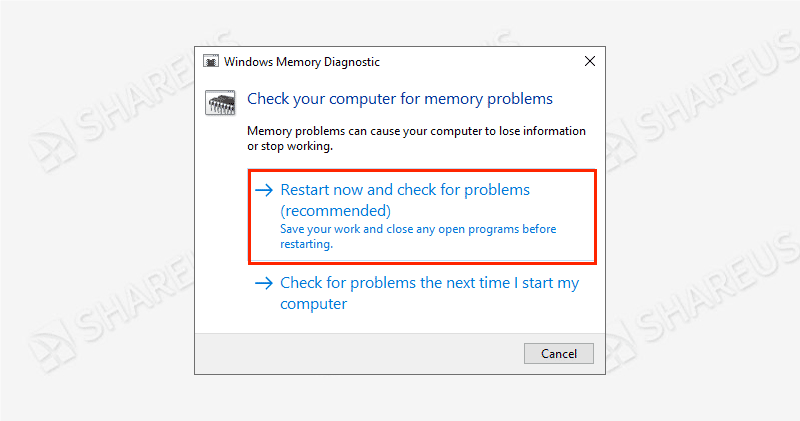
5. Run the Windows Diagnostics Tool
Steps: Press Win + R and type “mdsched.exe” then click OK. There will be a choice; click Restart now and check for problems.
6. Increase Virtual Memory
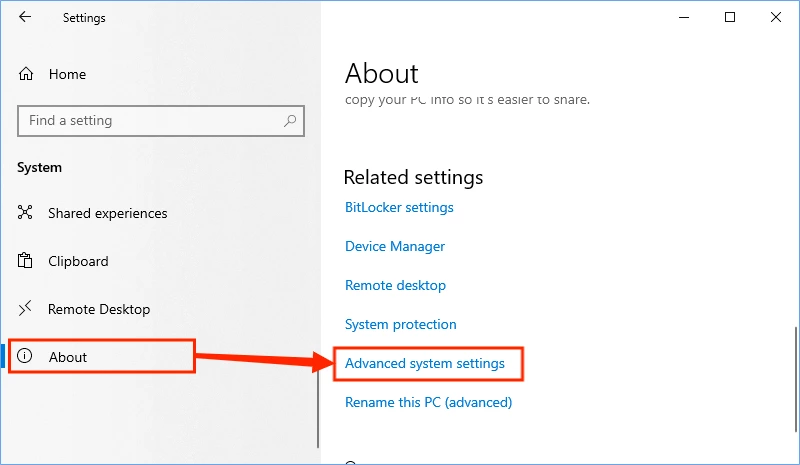
Step 1: Press Win + I > System > About > Scroll down and find “Advanced system settings”.
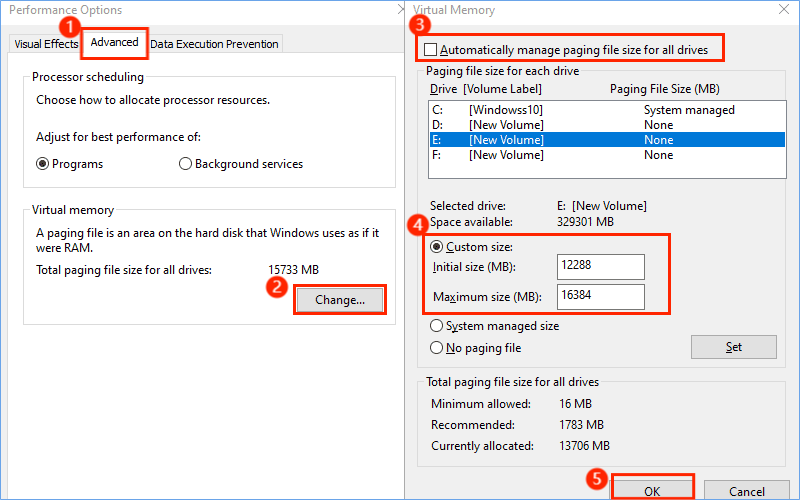
Step 2: Select the Advanced tab > Setting… > Select the Advanced tab in the Performance Options window > Change…
Step 3: Untick “Automatically manage paging file size for all drives” > Select a drive except for C: > Custom size. (The initial size is 1.5 times your physical memory, and the maximum size is 2 times your physical memory.)
7. Adjust for Best Performance
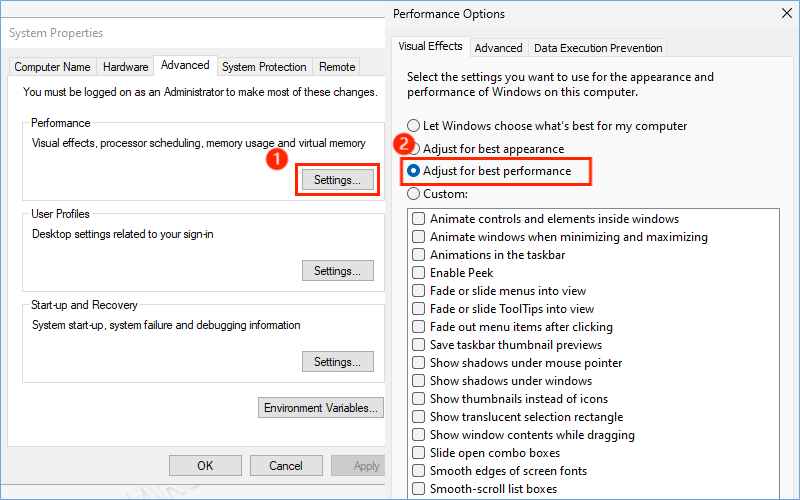
Step 1: Press Win + I > System > About > Scroll down and find “Advanced system settings”.
Step 2: Select the Visual Effects tab > Setting … > Tick “Adjust for best performance” and click OK.
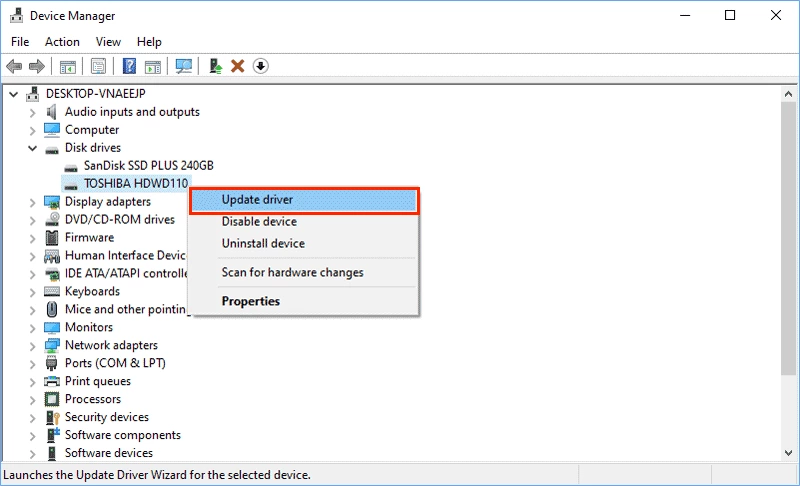
8. Update Disk Drivers
Steps: Right-click the start menu > Click Device Manager > Disk drives > Right-click a disk and click Update driver.